Announcement

Collapse
No announcement yet.

Norm - Perth DC5R

Collapse
X
 
  • Filter
  • Time
  • Show
Clear All
new posts

    #91
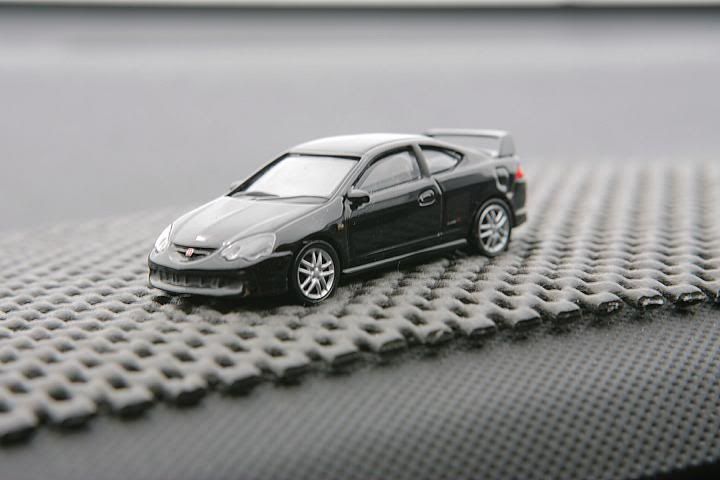
    My partner that i'm working is a professional photographer. Took just a couple of pics at work of my 1:64 Diecast model on my dash. Had to put a white blanket over the windscreen to reduce the reflection off the model as black apparently reflects everything. More to come.

    Comment


      #92
      Originally posted by Norm View Post
      Ultra Racing Rear lower bar arrived. Attempted to put it on but had to probaby leave it to the professionals as the rear lower control arms were just giving me too much grief haha.


      Woukld the utlra racing rear lwoer bar compliment a stiffer rear sway bar any good? and can i be able to jsut roll with a rear lower bar and do nothign to the front?
      Integra Type R
      Integra Type S
      S2000

      Comment


        #93
        Yes the ultra racing rear lower bar compliments the rear sway bar by stiffening body roll. When I installed the following chasis reinforcement items:
        • Mugen Front Strut Bar
        • Tanabe Front Lower Bar
        • Ultra Racing Side Lower Bar


        I was experiencing alot of understeer. which is common for a front heavy vehicles such as DC5's. Front heavy vehicles with low rear roll stiffness we will always have terminal understeer.


        Its just because the front tyres which have more load on them due to the engine etc will reach their limits of gripping to the road before the rear tyres. I believe this is also why the front tyre pressure is slightly higher than the rear. Also the front wheels lose alot of grip during cornering as we require the front to transmit all of our power unlike rear wheel drive cars. But having said and typed all that up, alot of people can deal with understeer a lot much better than oversteer (seen in alot of rear wheel drive cars), and this includes myself.

        After installing the
        • J Racing C-Pillar Bar (Dont think this aided much, was more for bling)
        • Cusco Rear Strut Bar (This helped heaps)


        I felt that I was able to control understeer alot better and was able to pull the car in with more confidence in corners at high speeds alot better. So adding to your initial question, yes you can run with just a rear lower arm bar but it depends on your driving style and also your weight distribution of your vehicle as this aids to keeping as much of your tyres on the road gripping. Camber and coilover setup as also very important in centripetal force in maximising tyre to road contact. Best to talk to ChargeR in regards to coilover and camber setups for track. Also, maybe see a specialist in terms of your car's weight distribution?

        PS. If i've said anything wrong, I dont mind anyone correcting me as I'm still learning lots myself
        Last edited by Norm; 11-10-10, 12:18 AM.

        Comment


          #94
          Can i see a foto of the J'S Racing C-Pillar bar dude??
          Installed and prior to installation??
          Easy to install the C-Pillar bar or no??
          What did you have to do to get it in?? Any trimmings or anything like that needed?

          Cheers

          Comment


            #95
            If you want a photo refer to here. But i'll take some more close up pictures when I get home from work. I didn't take any close up pics of the end connections prior to the installation. It is just a bar with two detachable end connections which come out easily with turning. Installation of C-Pillar bar was easy, probably takes 20-30 minutes. It requires abit of fiddling about to get the correct angle initially but essentially is very easy. There are no trimmings required, it just requires you to take off the rear seat belt bolts at the top and I popped it infront of the larger washer that was provided with the OEM setup. Make sure you remember the order in which the bolts go and dont lose anything. And all you do is just screw back the bolts with the bar end attachments in between.

            PS Update: Ordered brand new Mugen Rear Slotted Rotors from http://www.kingmotorsports.com (USA), for the JDM DC5R not the AUS spec DC5R, unsure what the difference is but i know the JDM DC5R hub + knuckle has a +60 offset if i'm correct?. Had to pay an extra like $30-40. I chose to order from kingmotorsports.com as in future I might order my RBC off them with it ported etc.
            Last edited by Norm; 11-10-10, 12:23 AM.

            Comment


              #96
              Originally posted by Norm View Post
              If you want a photo refer to here. But i'll take some more close up pictures when I get home from work. I didn't take any close up pics of the end connections prior to the installation. It is just a bar with two detachable end connections which come out easily with turning. Installation of C-Pillar bar was easy, probably takes 20-30 minutes. It requires abit of fiddling about to get the correct angle initially but essentially is very easy. There are no trimmings required, it just requires you to take off the rear seat belt bolts at the top and I popped it infront of the larger washer that was provided with the OEM setup. Make sure you remember the order in which the bolts go and dont lose anything. And all you do is just screw back the bolts with the bar end attachments in between.

              PS Update: Ordered brand new Mugen Rear Slotted Rotors from http://www.kingmotorsports.com (USA), for the JDM DC5R not the AUS spec DC5R, unsure what the difference is but i know the JDM DC5R hub + knuckle has a +60 offset if i'm correct?. Had to pay an extra like $30-40. I chose to order from kingmotorsports.com as in future I might order my RBC off them with it ported etc.

              sounds easy dude
              thxx

              Comment


                #97
                PROJECT KICS
                Update: Project Kics have arrived from Autotechnik Tuning Pty Ltd, and thanks Budi. Haven't managed to get a photo of them on my wheels yet due to camera being stolen by girlfriend. Will attempt to snatch it back soon enough


                R40 M12 - P1.5 Classical!, put them on. Looks better than the stock nuts. Looking forward to seeing the extra 15mm on each side when the brembos get chucked on!.

                Comment


                  #98
                  nice work norm your car is really getting somewhere! wish u were in syd dude, i was gonna go for the brake upgrades but it seems i have to replace both front wheel hubs and bearings fml

                  Comment


                    #99
                    Originally posted by stevan View Post
                    nice work norm your car is really getting somewhere! wish u were in syd dude, i was gonna go for the brake upgrades but it seems i have to replace both front wheel hubs and bearings fml
                    what happen? just track wear and tear?

                    Comment


                      Originally posted by Norm View Post
                      what happen? just track wear and tear?
                      id say its a combination of a few track days and the bigger wheels i put on, its quite dissapointing to be honest i could do without the expense but what can you do, the noise is quite worrying, the car will be garaged as of tomorrow until i can afford to fix it hopefully your beast fares better man!

                      Comment


                        Originally posted by stevan View Post
                        id say its a combination of a few track days and the bigger wheels i put on, its quite dissapointing to be honest i could do without the expense but what can you do, the noise is quite worrying, the car will be garaged as of tomorrow until i can afford to fix it hopefully your beast fares better man!
                        Well i'm trying to put all the right things in my car to hopefully prevent any future damages. I'm sure you'll get there.


                        Ok. This has been a long awaited decision but hopefully be the last mod for 2010 (*cough*). This mod will be my I.C.E. The single din I currently have installed in the car was from the previous owner. It only plays MP3 CD's and has no ipod connection. It has come to my attention that even though this is a weekend car and maybe the odd track car next year, the girlfriend still sits in there pretty often and would like to plug in her ipod to enjoy her music (She did give me permissiont to spend my money before the mortgage next year). Dont get my wrong i'm not purely buying this just to suit her but also to enjoy the odd beach drives we have without burning a new mp3 CD just because a new song that we like has just come out. I'm currently in the process of choosing a double din. I dont mind which ever unit but do have certain features which I would prefer. If people on the forums have good double dins I wouldn't mind some suggestiosn? I've seen the PIONEER AVH-P4250DVD, ALPINE IVA-W502E , KENWOOD DDX7036BT and SONY XAV-70BT but am open to more suggestions
                        1. Able to reduce glare by changing background colour
                        2. User friendly
                        3. Doesn't lag
                        4. Plays Ipod videos


                        Also if someone can brief me on the rules and regulations on double dins that would be great .

                        Norm

                        Comment


                          i have a pioneer avh3150dvd. if u get the newer ones u can add the gps module and most of em come with bluetooth as well. it has all the features u want but i cant get ipod videos to work (even though i have the cable for it)..music works fine incl the controls. with screens get a switch installed to turn it off when bypassing the handbrake lever. i got mine coz of the ipod functionality and was the cheapest pioneer unit (im biased towards pioneer :P)
                          Prash Imaging (Facebook) - Please like!
                          Flickr
                          my car blog - Have a read
                          my 2nd car blog - Have a read too

                          Comment


                            Mhmhm. Thanks Phrash, yeh I will definetly look into the gps module, but having said that I'm an ambo, so reading the map should be second nature to me .

                            Update. GOT THE Ultra-Racing Rear lower arm bar on, and MAN was it a mission. I had to remove the rear lower tie bar (OEM), which means no bling such as beaks bar on there. It fitted perfectly. Can't wait to test all this stuff out on the track next year.

                            Now i've got a rant to make, and i'm doing it in my own thread. Has anyone paid for stuff well over $2000 and waited ages for it to arrive? Having the seller give no updates? Having you to call weekly to check up on the item, having to hear the same response "We're still waiting on stuff blah blah blah....".
                            Last edited by Norm; 18-10-10, 12:48 AM.

                            Comment


                              lol i think i know which one who ur talking Bout

                              good luck in waiting.. stuff always take ages

                              Comment


                                Originally posted by Norm View Post
                                Didz - Darn right tein do. And I pretty much wasted +$900 and ended up reverting back to stock. Shoulda just used that money to buy my cai, spewing to be honest.

                                Ok. We changed the break and steering fluids today.

                                Let me first say, the way and method of "us" doing it may not be the most conventional method as the some of the tools we used were improvised in the depot, and to our surprise...everything worked out perfectly. I dont hold responsibility for damages if anyone else tries this. It was done by 2 people and obviously this is just a detail of the events that happened.

                                I must emphasise, that Honda wanted to charged me $220 dollars to get these changed and flushed. I got hold of 2 bottles of Honda Break Fluid and 2 bottles of Honda Steering Fluid for only $55. Labour time performed took only 1 hour between the 2 of us.


                                So lets start! (Please excuse my terminology)
                                1. I opened up the break fluid bottle. I knew it was dirty. It also had a kinda filter thing on the top that I removed so I could suck out all the dirty fluid. I used a syringe to suck out the fluid and did a pretty darn good job. I finished wiping button of the container with some paper towels.


                                2. I topped up the break fluid bottle with new break fluid, and going slightly over the max line, as later I flush remaining dirty fluid with new stuff through the system.

                                3. The sequence of which we started to drain the break fluid began with rear right side, then rear left side, then passanger side and lastely drivers side.
                                We took the wheel off and found the break cap (Circled Blue on top of the jack) at the rear. Removed the cap with our hands and got hold of an empty IV bag or you could use in this instance at home some tubing or even do it with a bucket underneat and degrease the area after. We used the empty IV bag to drain the dirty fluid. I believe you can also purchase kits which have a one way valve over this break cap and perform this flush with 1 person.


                                4. One person had to press on the break pedal 3-4 times to build up the pressure and then hold it firmly down. Once this is done the other person using a 10mm spanner loosens the bolt beneath the break cap and lets the pressure push all the dirty break fluid out. We performed this several times untill we could see clear break fluid exiting. Bear in mind to check after a few drains that you have break fluid in the bottle and that the system isn't sucking in air and forming air bubbles. It is also important to close the break cap before your partner takes his/her foot off the break pedal as failure to do so will result in suck in air and forming air bubbles.


                                5. Number 4 was in the same fashion for all 4 break caps. In the order of rear right, rear left, front left and lastly front right. The reason being is because the rear right is the most furthest away from the break fluid bottle (Correct me if I’m wrong).

                                6. Once the driver’s side was done we topped up the break fluid bottle.

                                If you get break fluid on your panel work/ paint, rinse off with water immediately and don’t use a clothe to wipe or rub.

                                If any of the above i'm doing wrong please dont hesistate to correct me as i'm still learning.
                                Norm,
                                The order for a JDM DC5 is actually front left/rear right/rear left/front right.
                                I don't know if that differs to AUDM DC5 but I thought you'd like to know

                                Rod

                                Comment

                                Working...
                                X