Announcement

Collapse
No announcement yet.

Project: Honderp City Turbo II - Rebuild

Collapse
X
 
  • Filter
  • Time
  • Show
Clear All
new posts

    Project: Honderp City Turbo II - Rebuild

    G'day Honda mates! Felix invited me to start a build thread so thanks for having me at ClubITR. I've been working on this City Turbo with a friend for about six weeks now. We've made a fair bit of progress so I'll post everything we've done so far in a few sections then do my best to keep this thread up to date.

    We originally found it on Gumtree. We weren't (and still aren't) exactly sure what to do with it (rego/track/sell/other) but it was too good to pass up. I finished a motorbike build recently and had a hankering to work on something else. Plus the guy I'm building it with has a Motorcompo on the way from Japan so we had to pair them up. I'll start from the top.


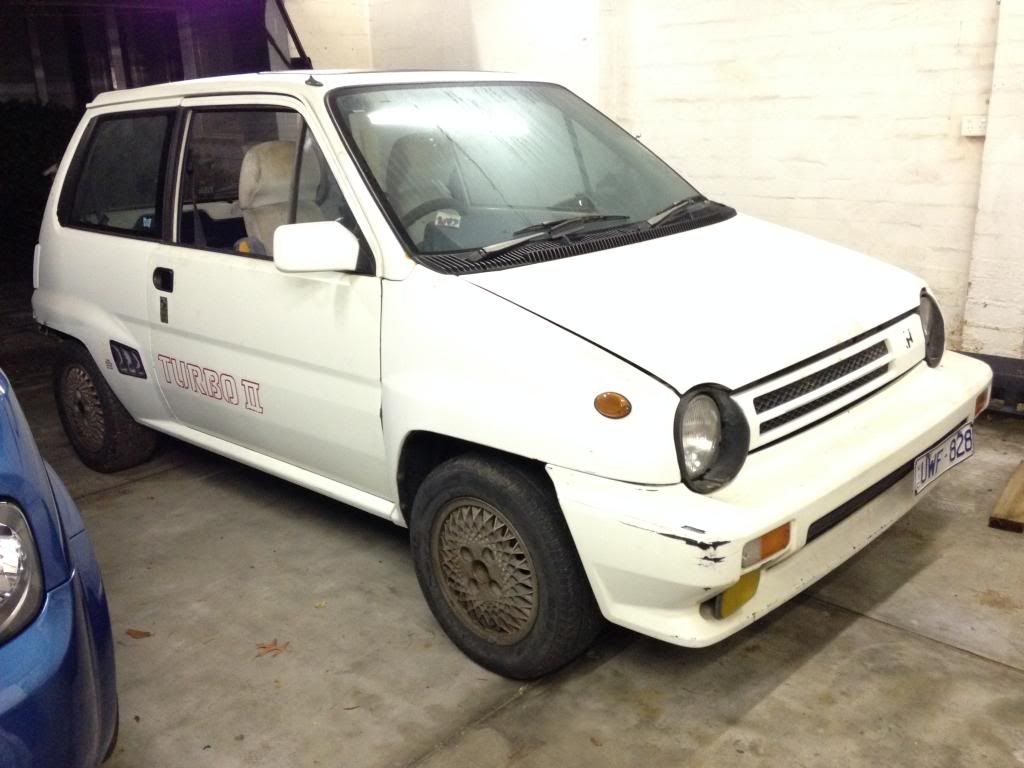
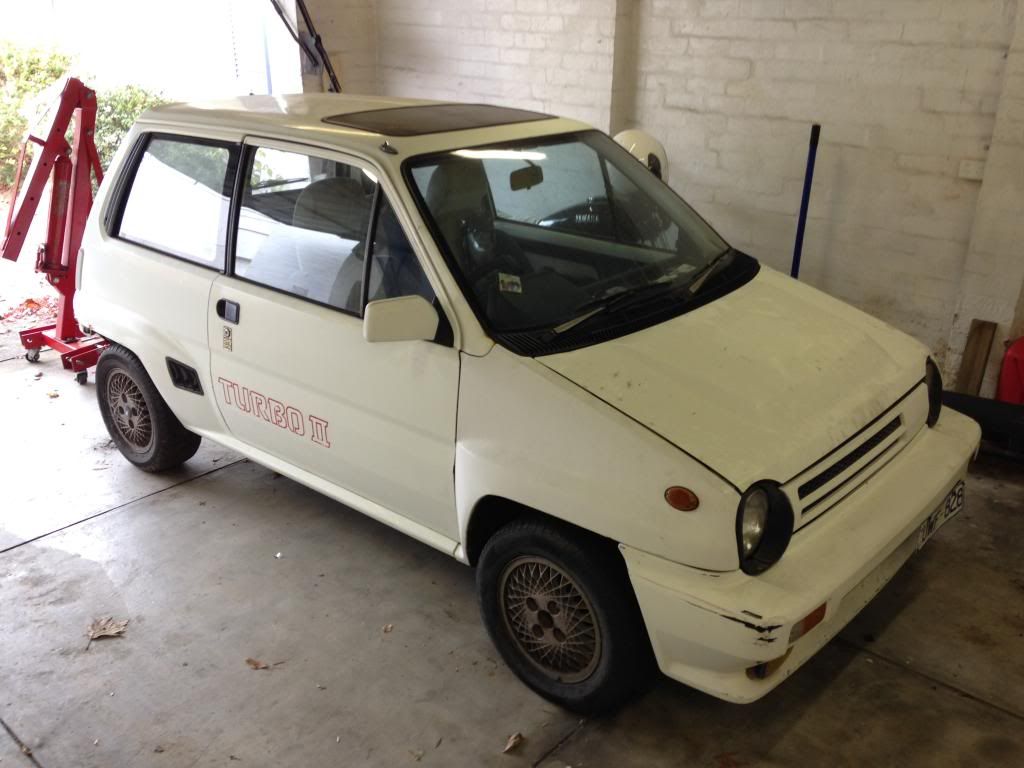
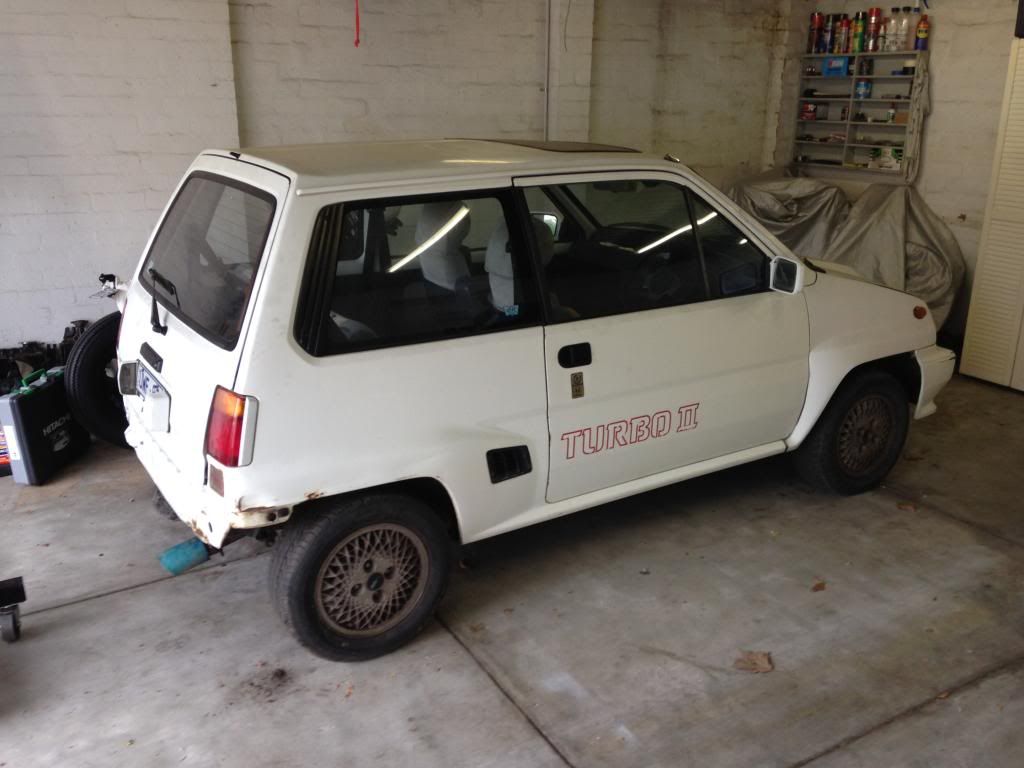
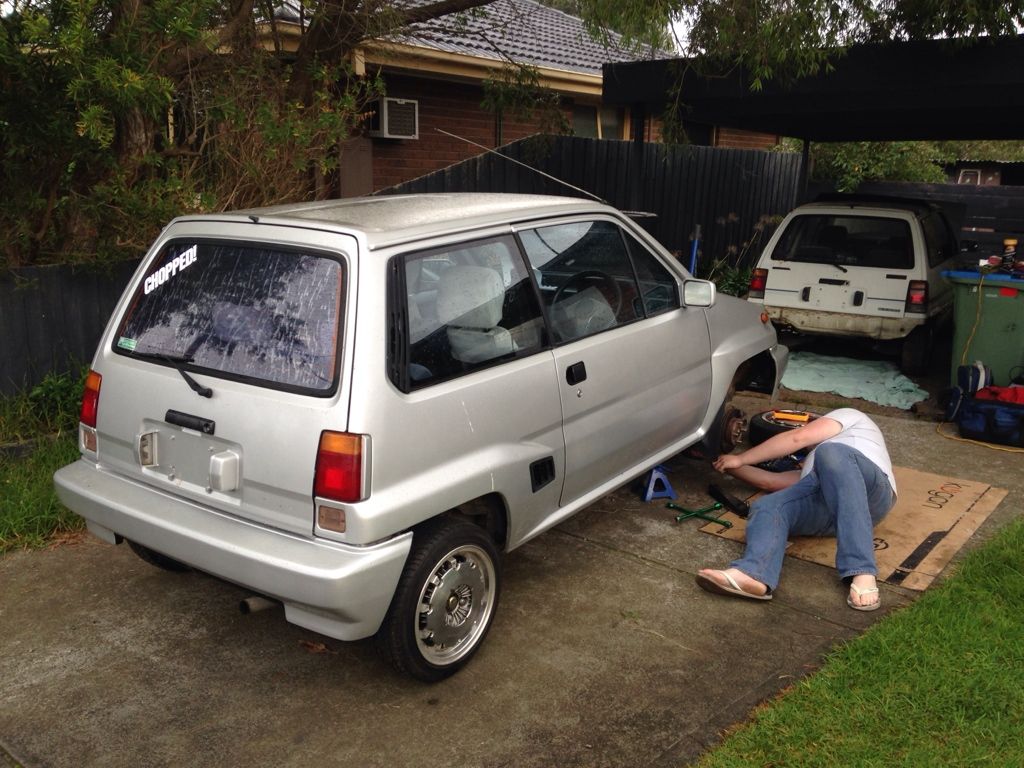
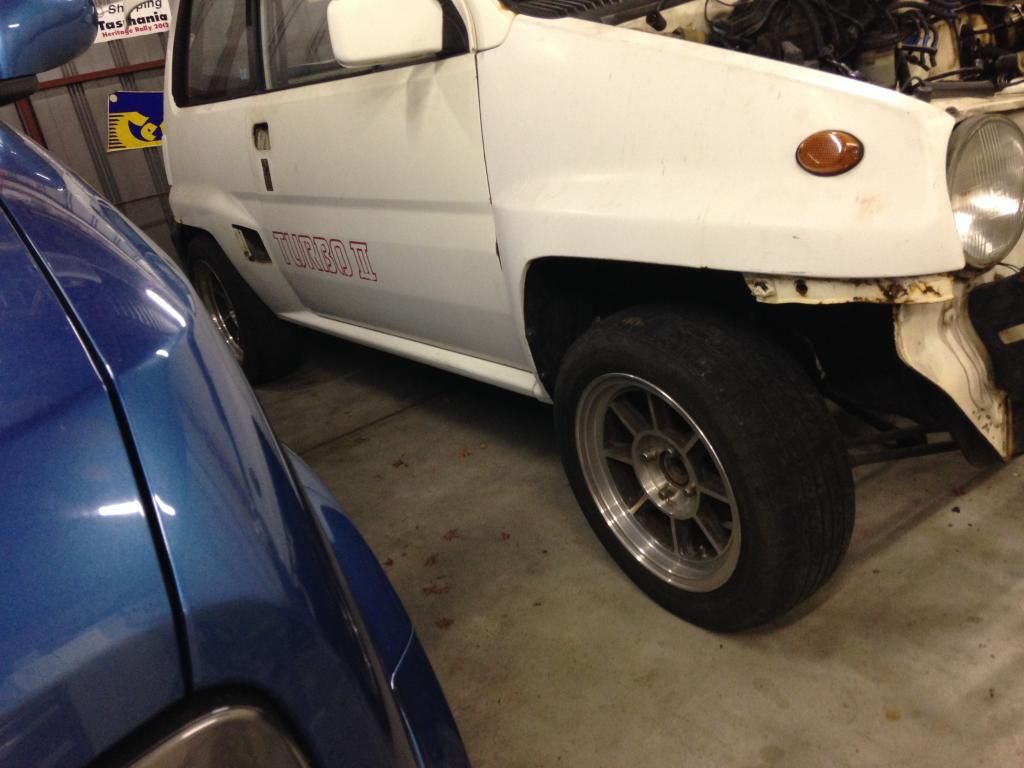
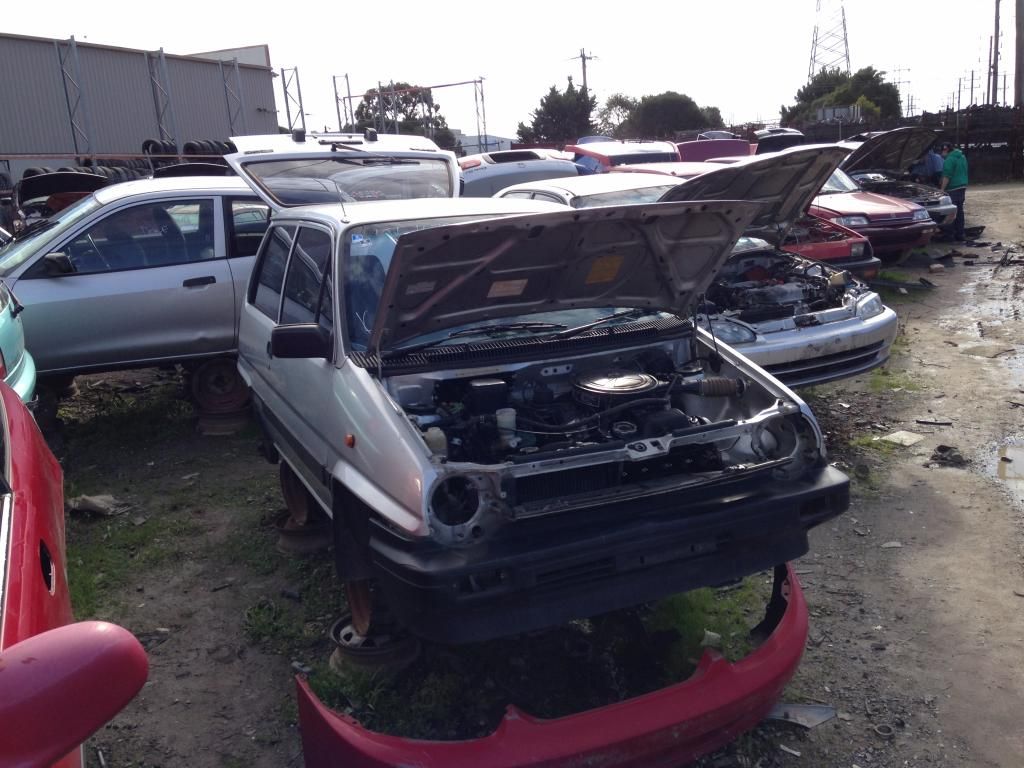
    All moved in to its new home for the next little while.


    It was cheap because:


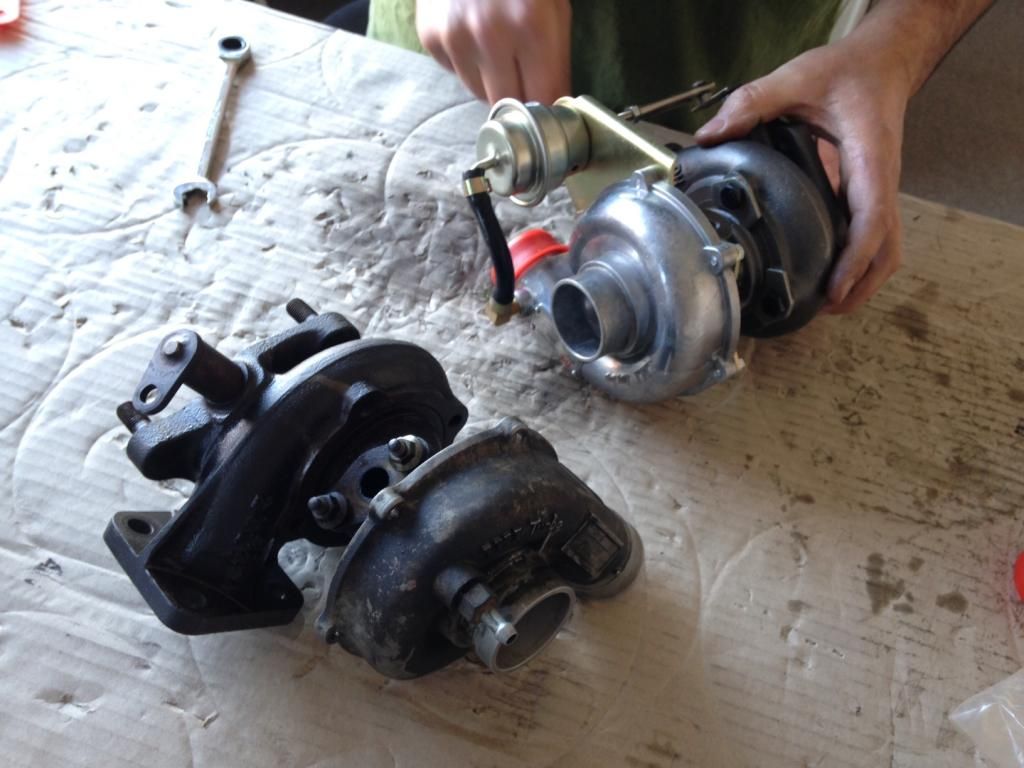
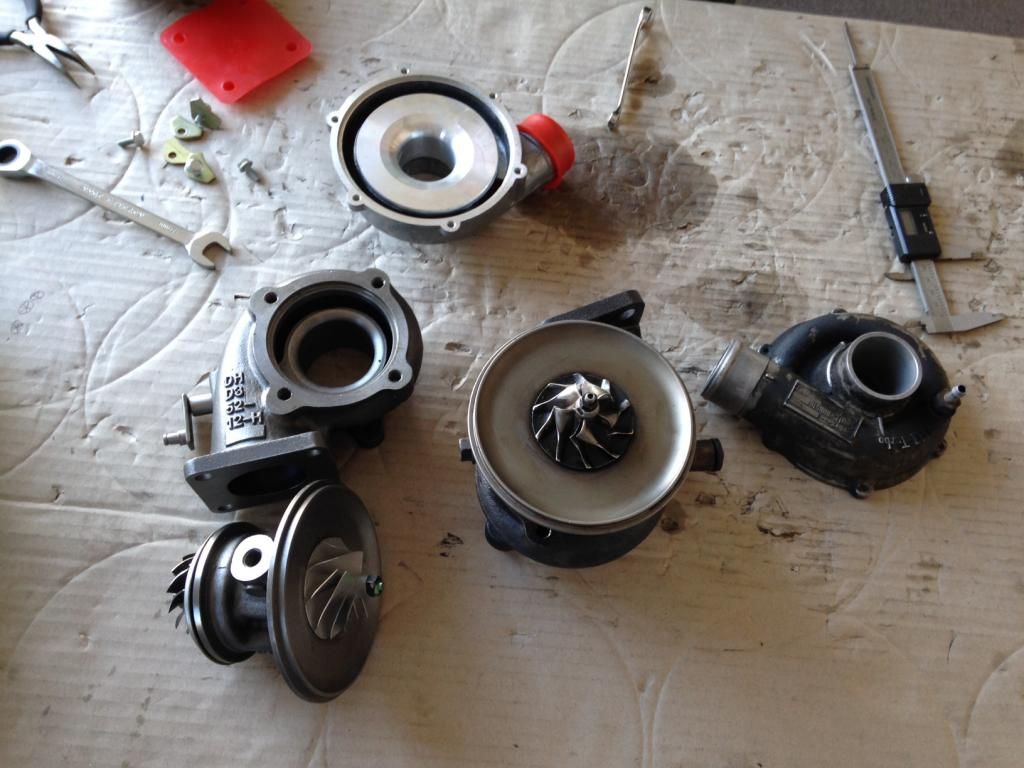
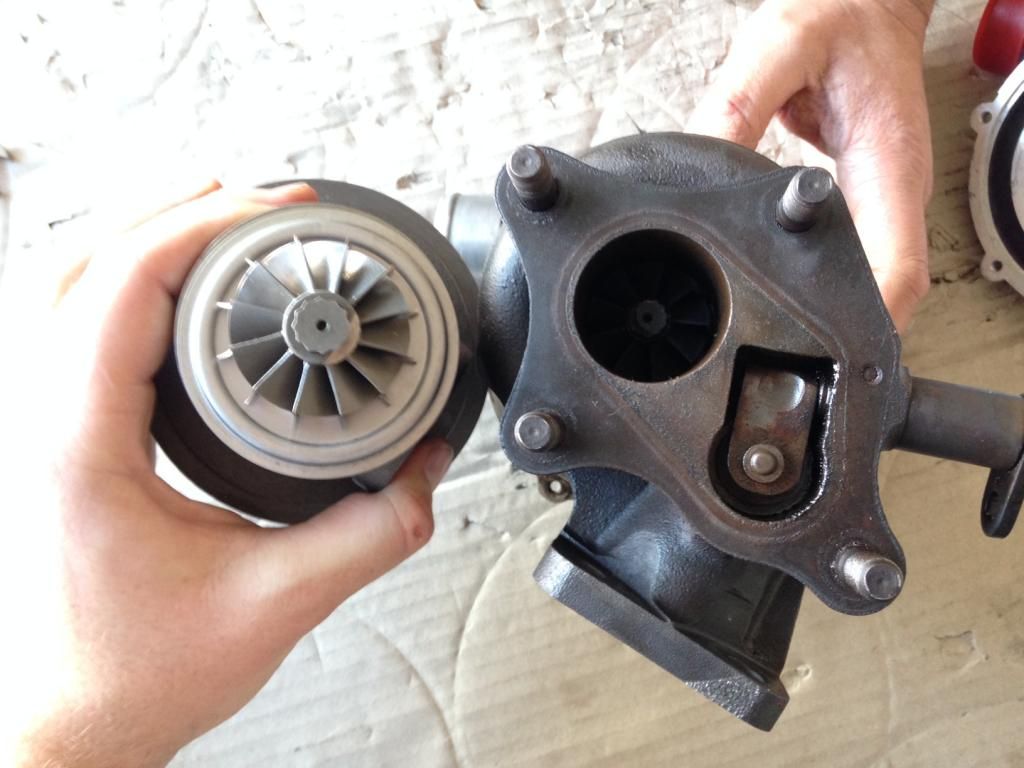
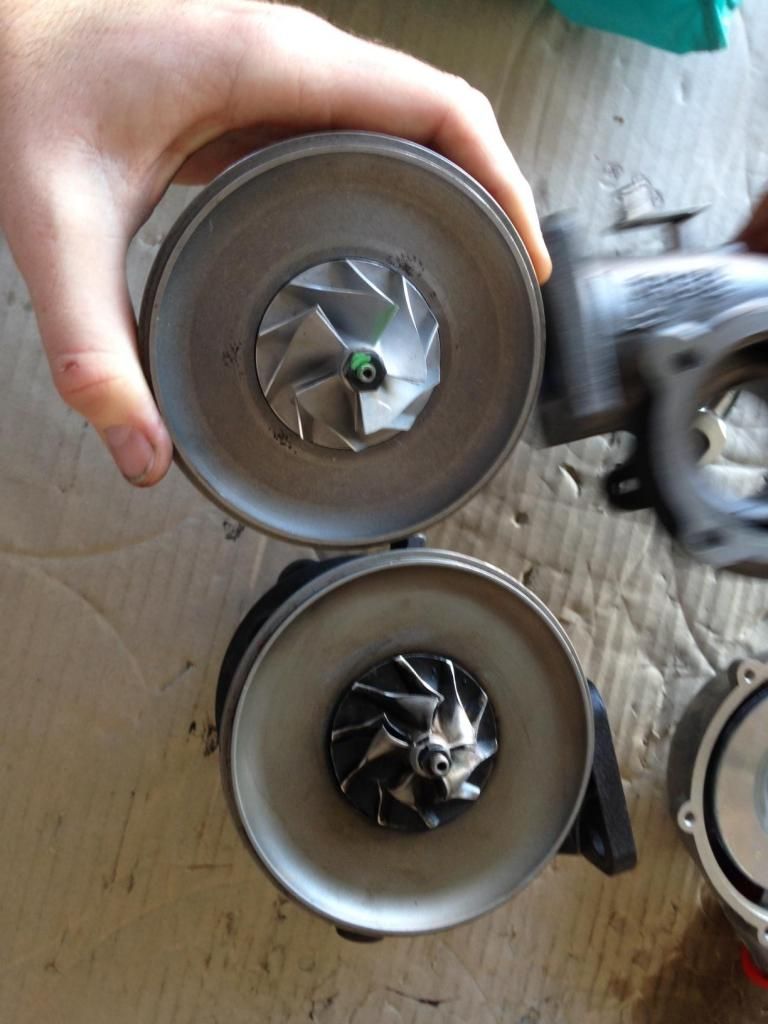
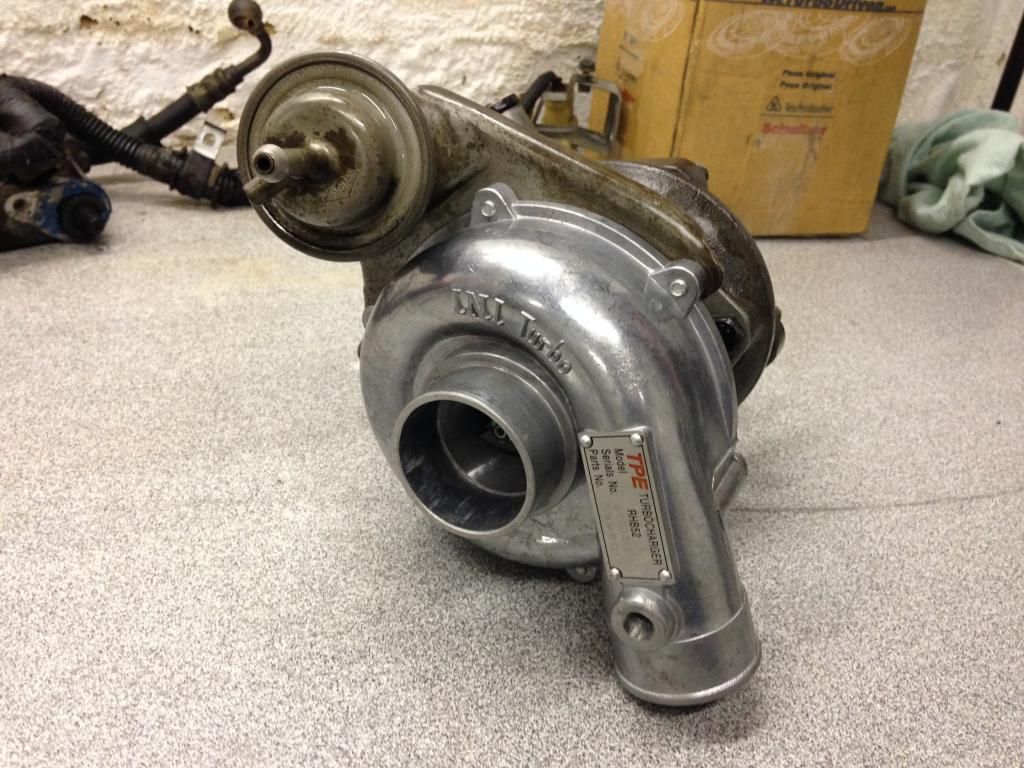
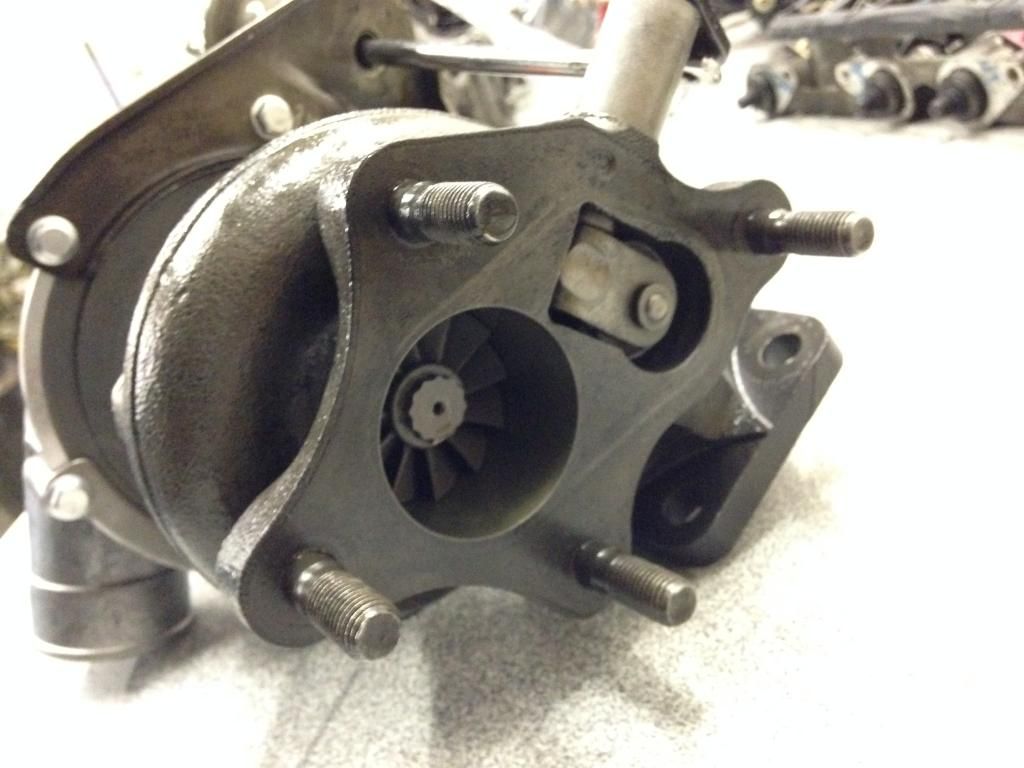
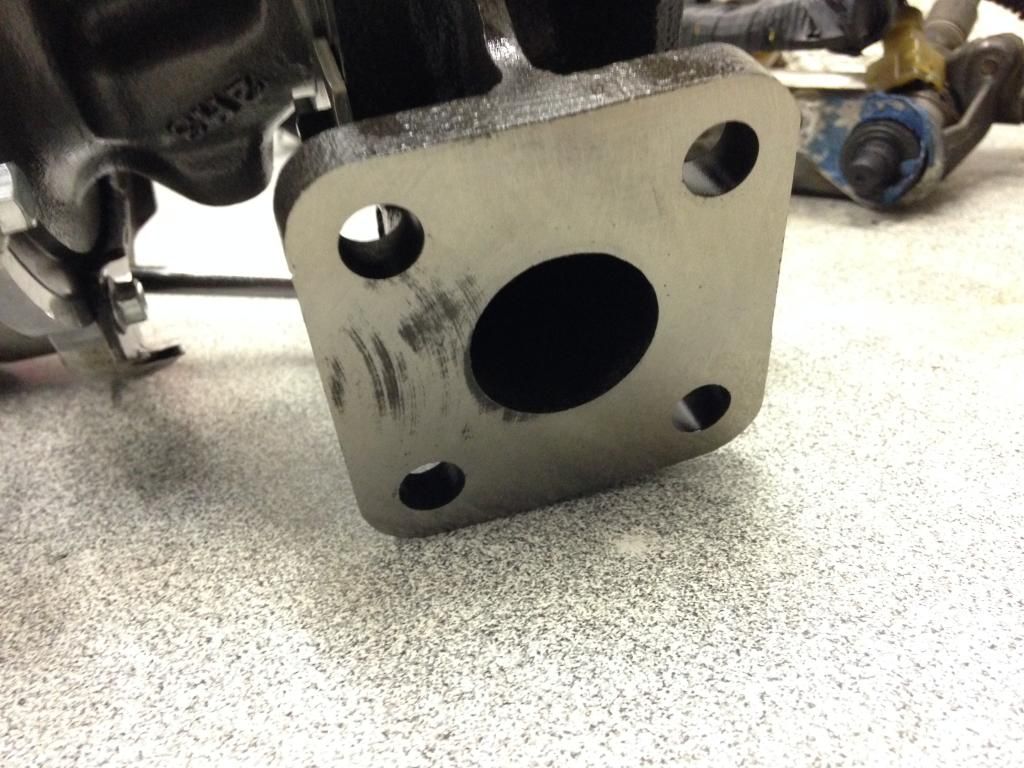
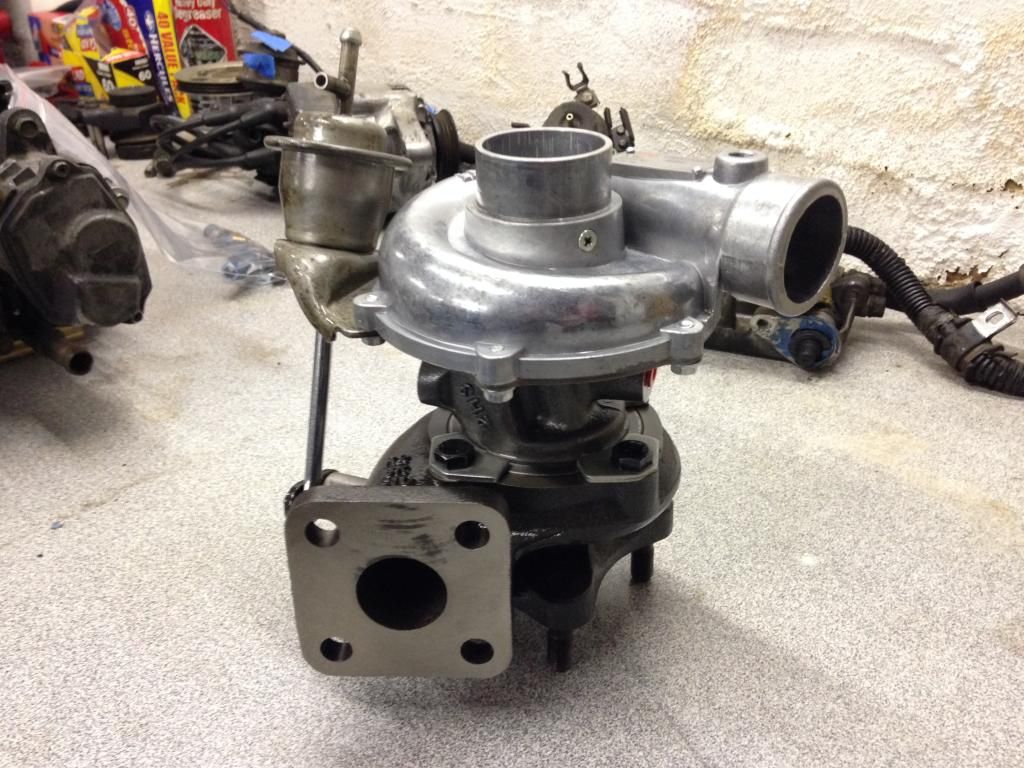
    Not running. Came with a very dead turbo, no fuel pump and lots of holes where parts should be. Thankfully we also got a boot full of bits to be assembled including a head rebuilt kit and a turbo diesel Pajero turbo which was supposed to be an 'easy replacement' according to the last owner. Not likely.


    Like I said, we got straight into it.


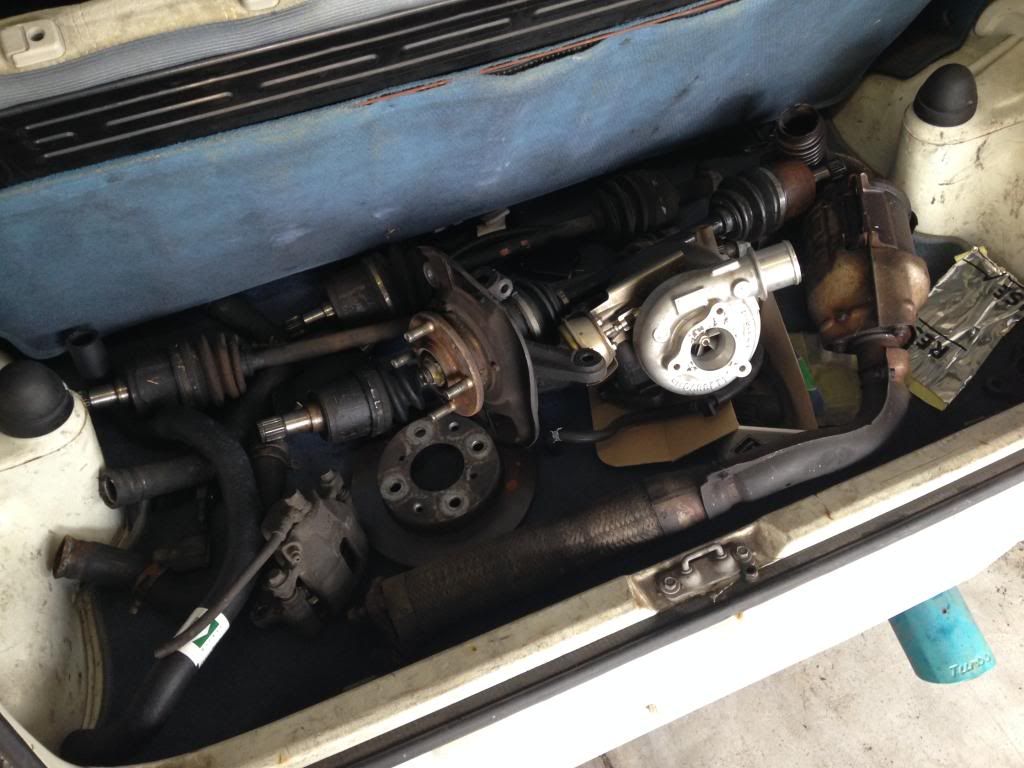
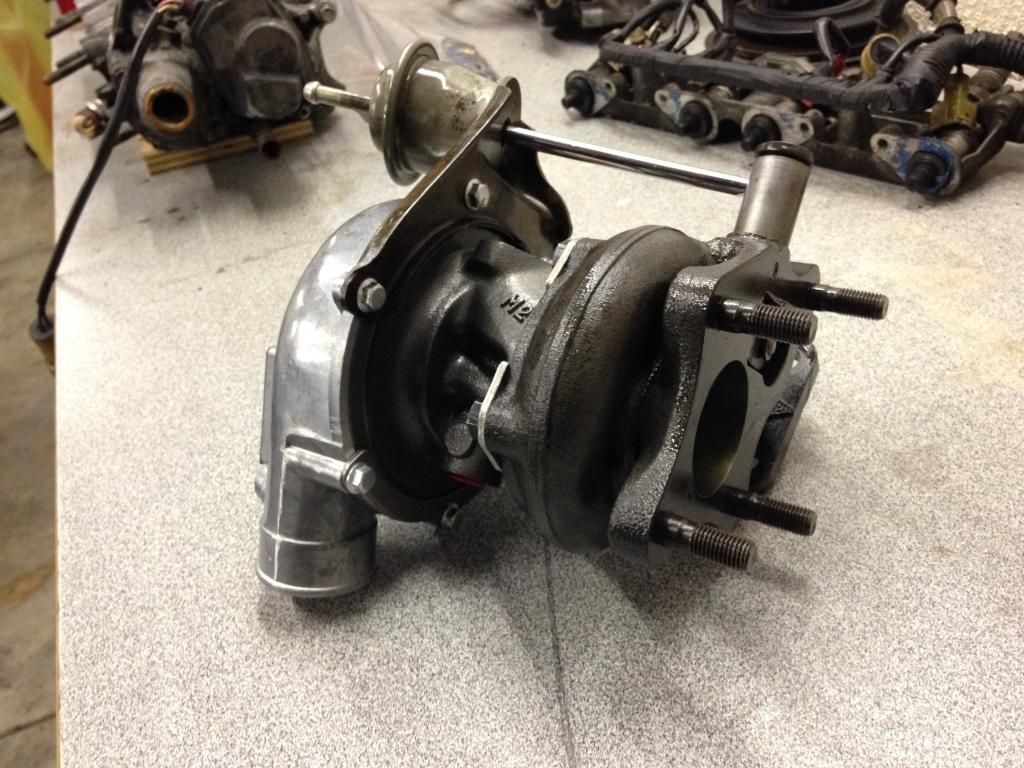
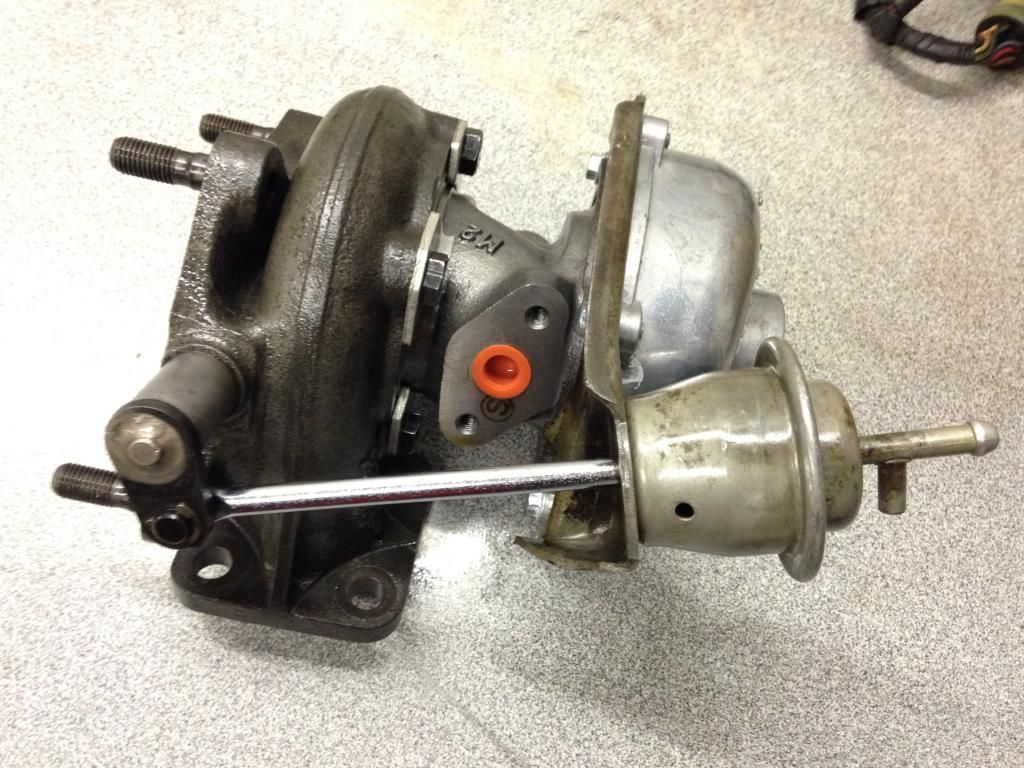
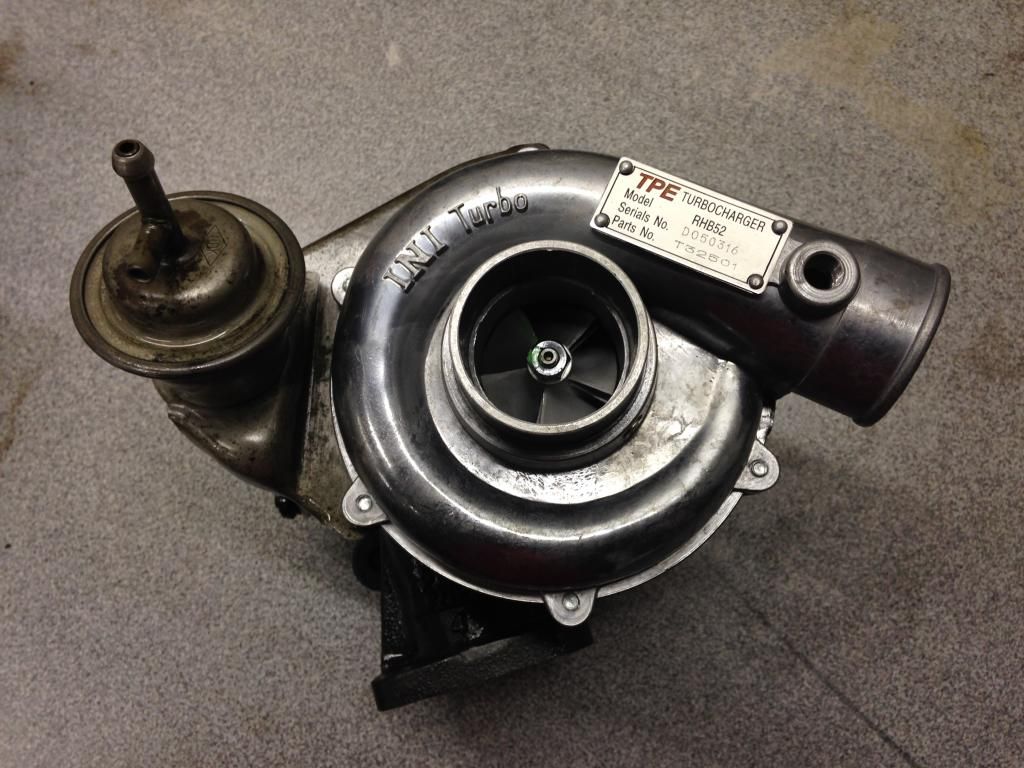
    Boot o' bits. Basically a bunch of driveshafts, turbo diesel Pajero turbo and other odds and ends.


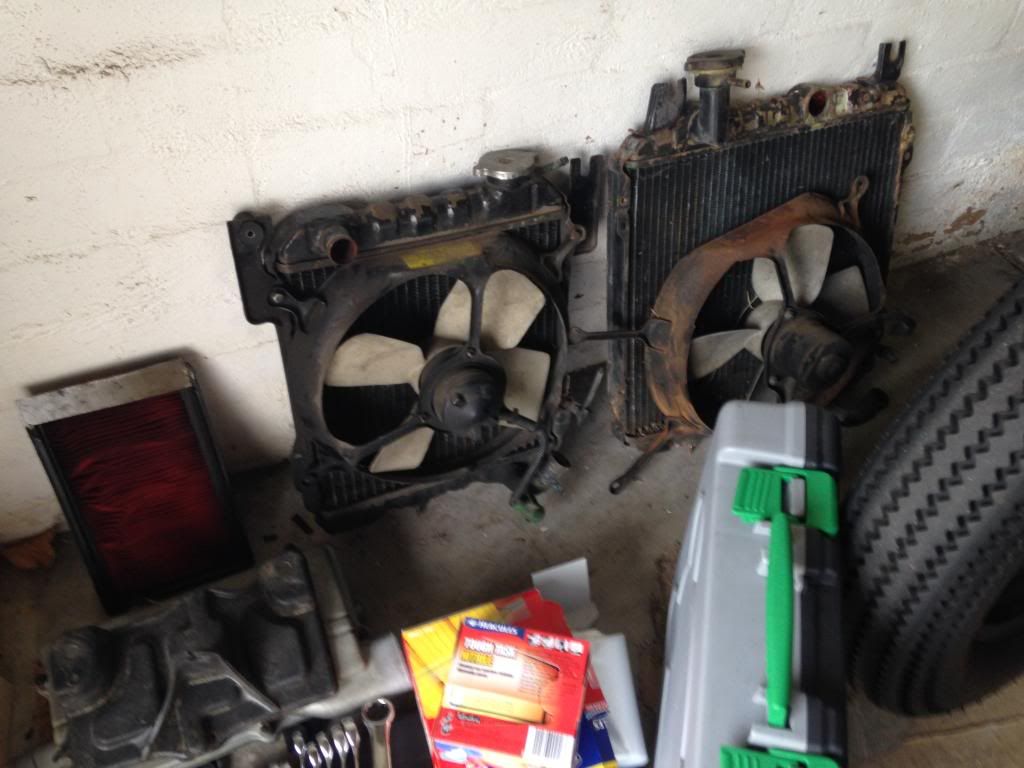
    More spares for the build. Looks like these radiators won't work out so that's on our list of things to source. The top hose fitting has broken off the original and the non-turbo City radiator doesn't look like it'll fit.


    Derp.


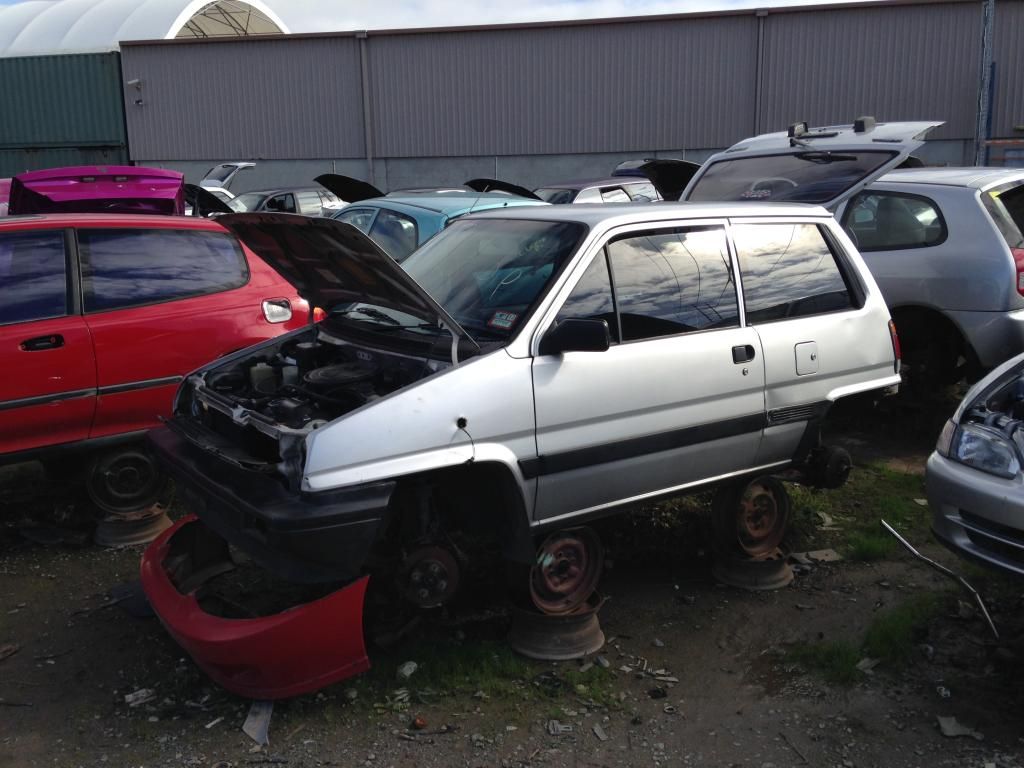
    The whole car is covered in filthy fingerprints and dirt. For the most part the body is in decent condition. A proper wash should bring it up to a reasonable state.


    We have no idea what happened to the original rear bumper but the car came with a replacement from a convertible. City drop tops have the same wide body guards as the Turbo II but the bumpers are black plastic instead of body colour. We'll paint it down the track.


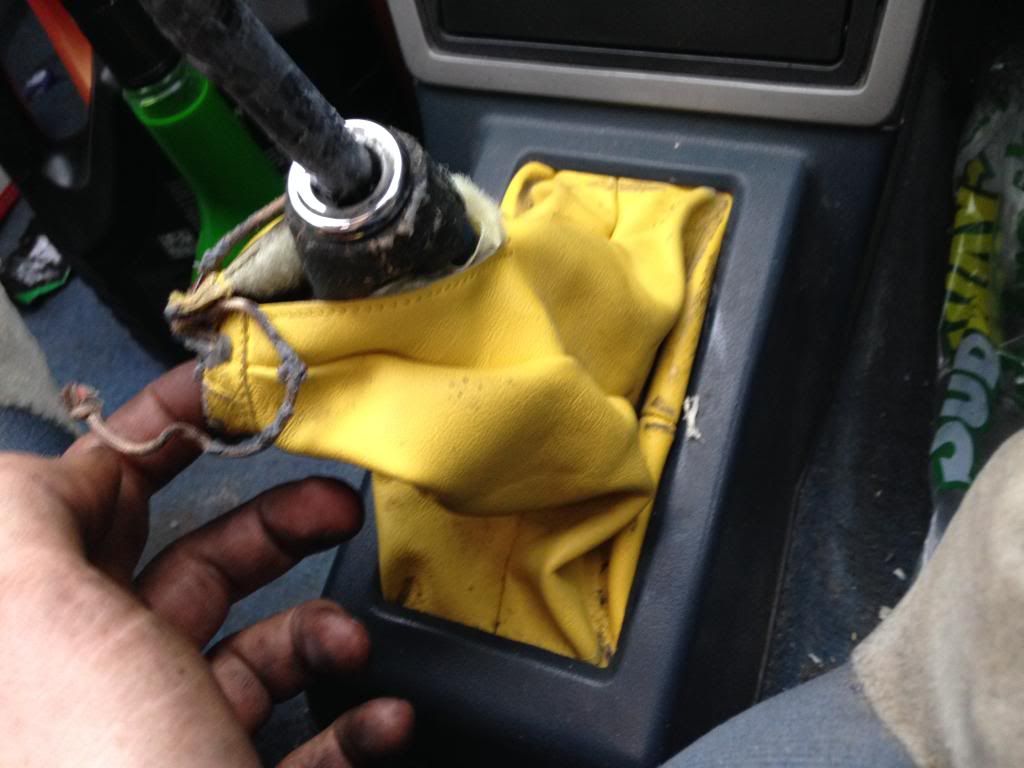
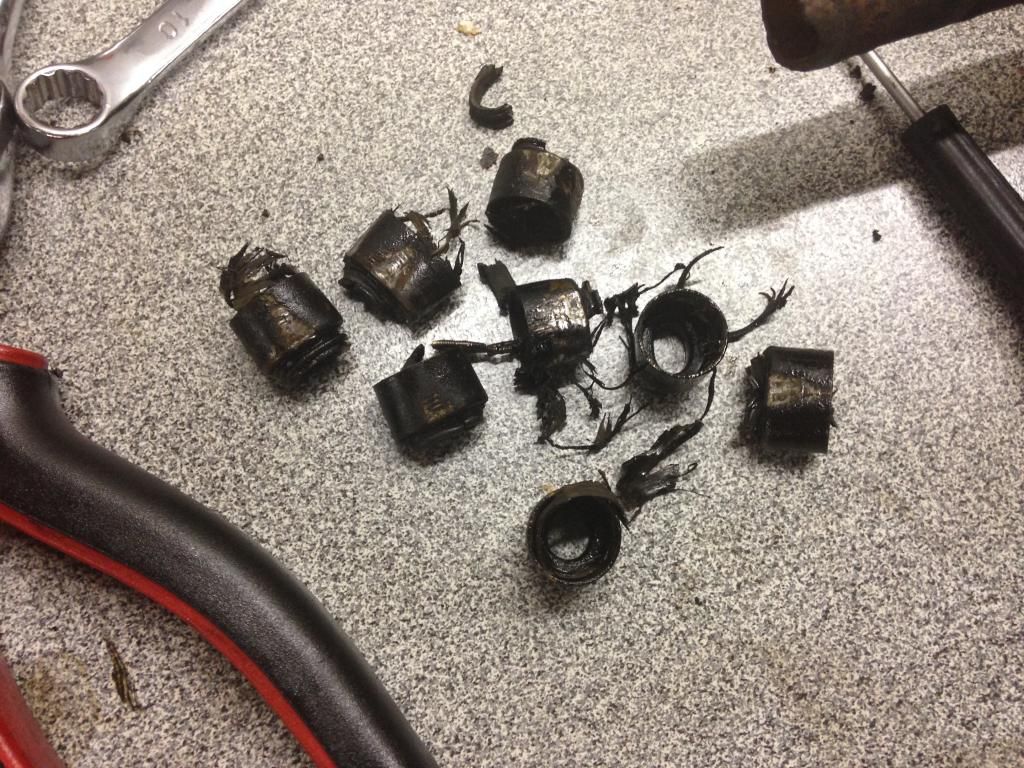
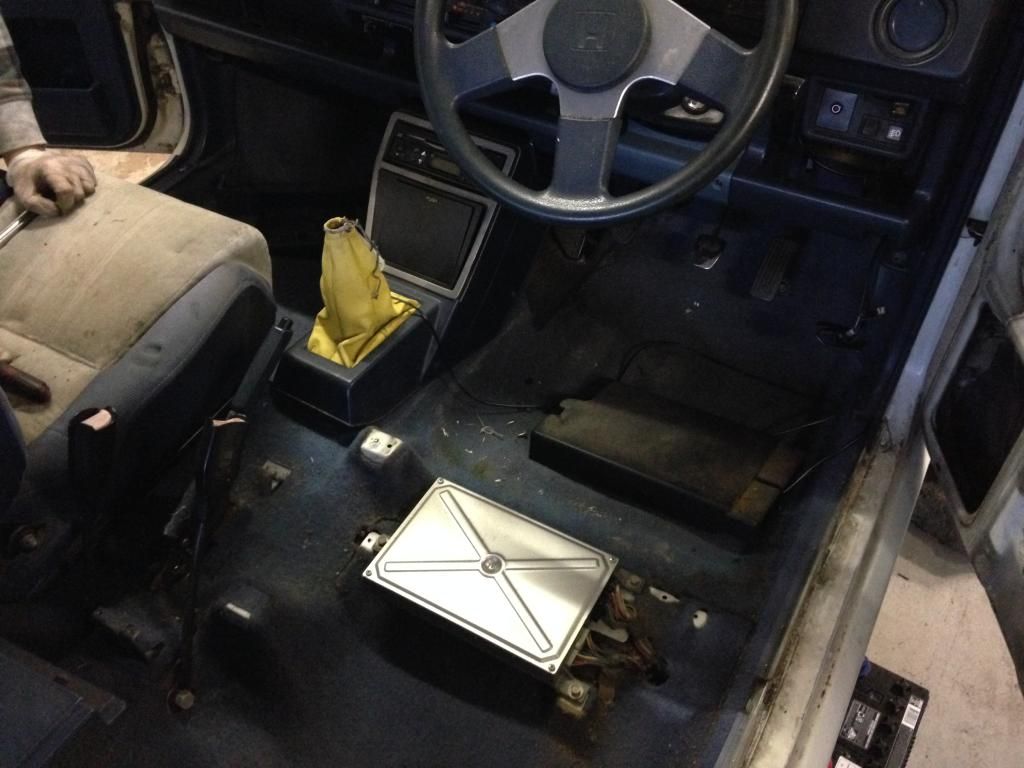
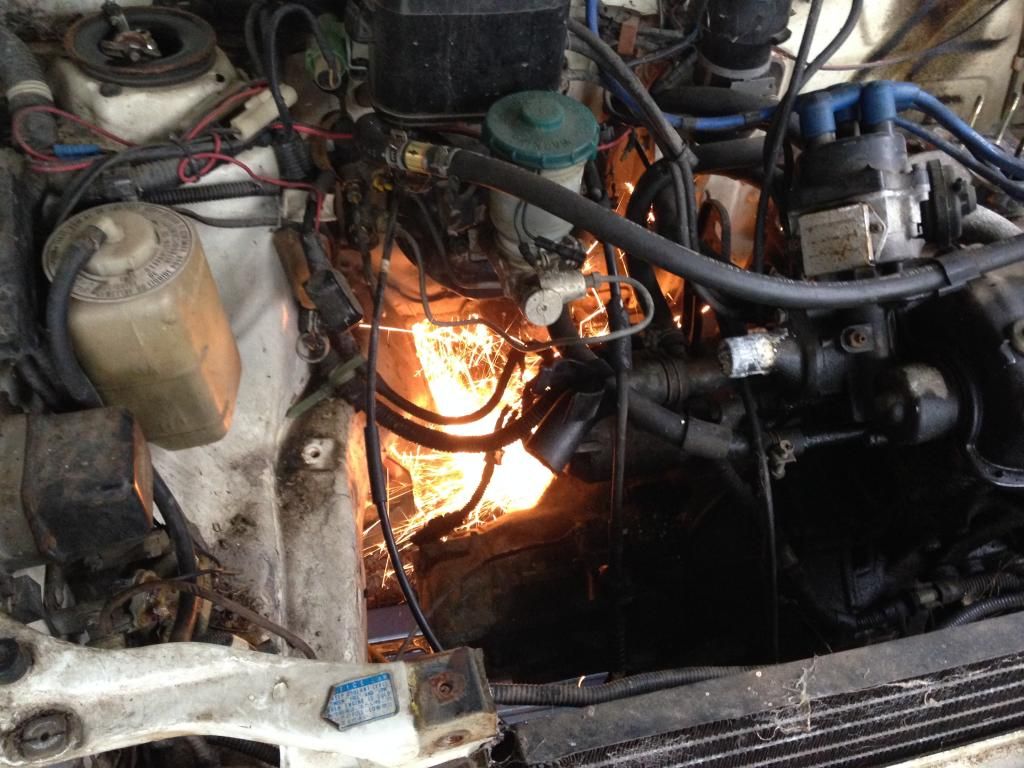
    This is by far the thing I hate the most about this car. It seems no amount of Rost Off will free up the grub screws holding it on. Angle grinder up next.


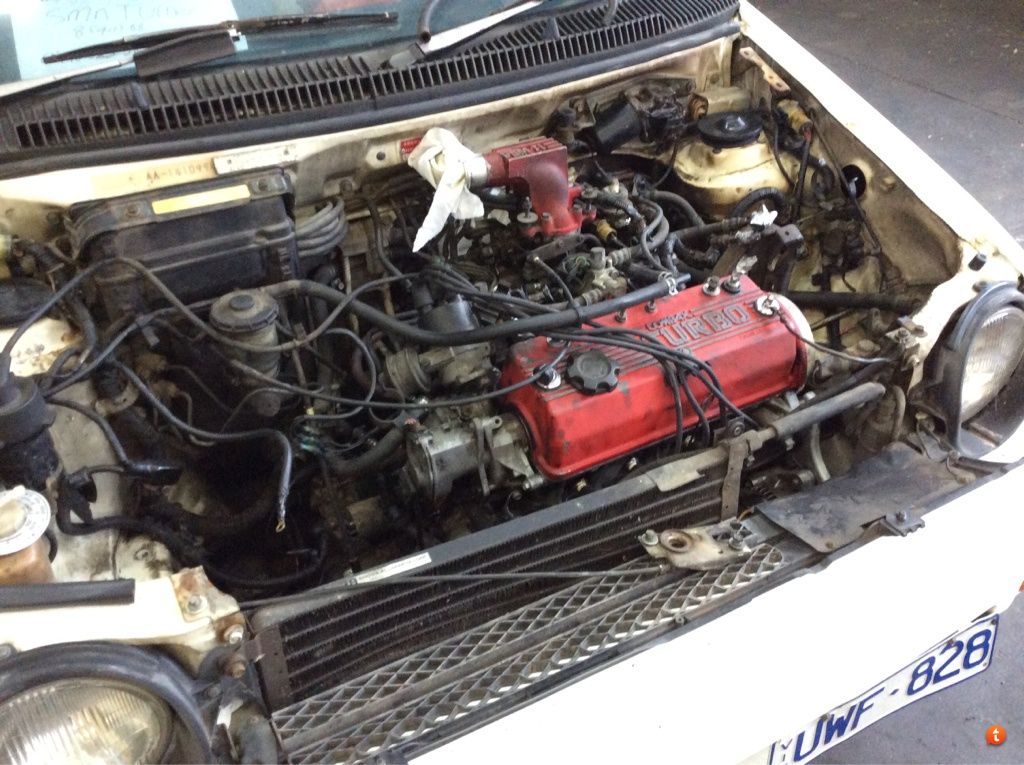
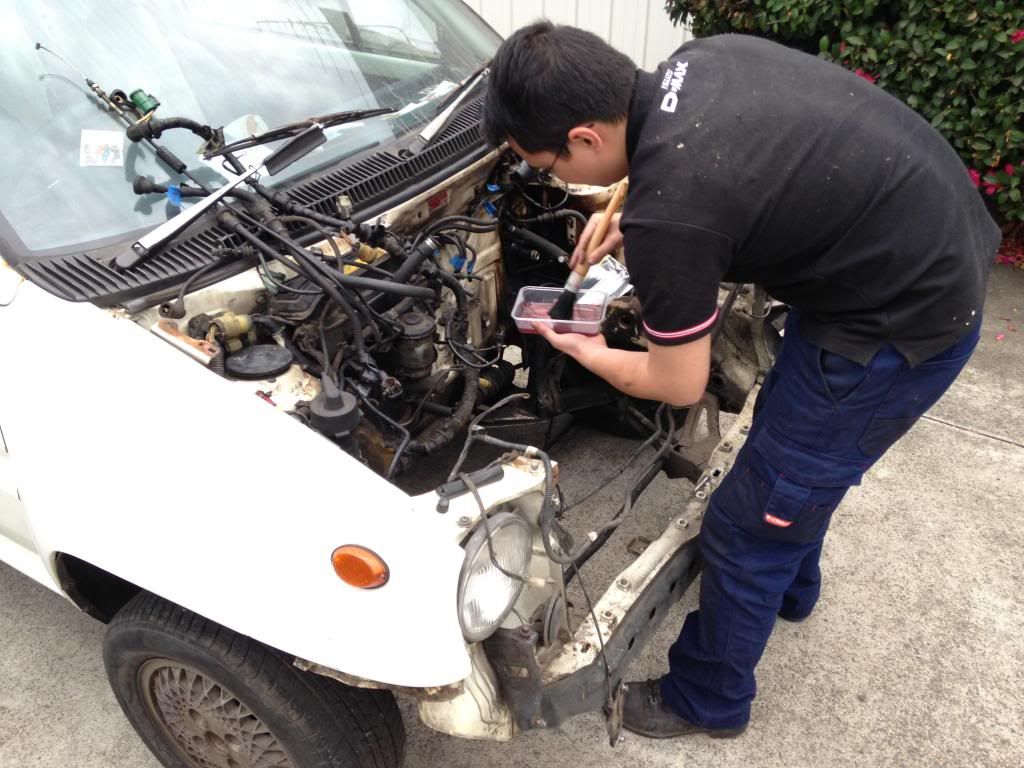
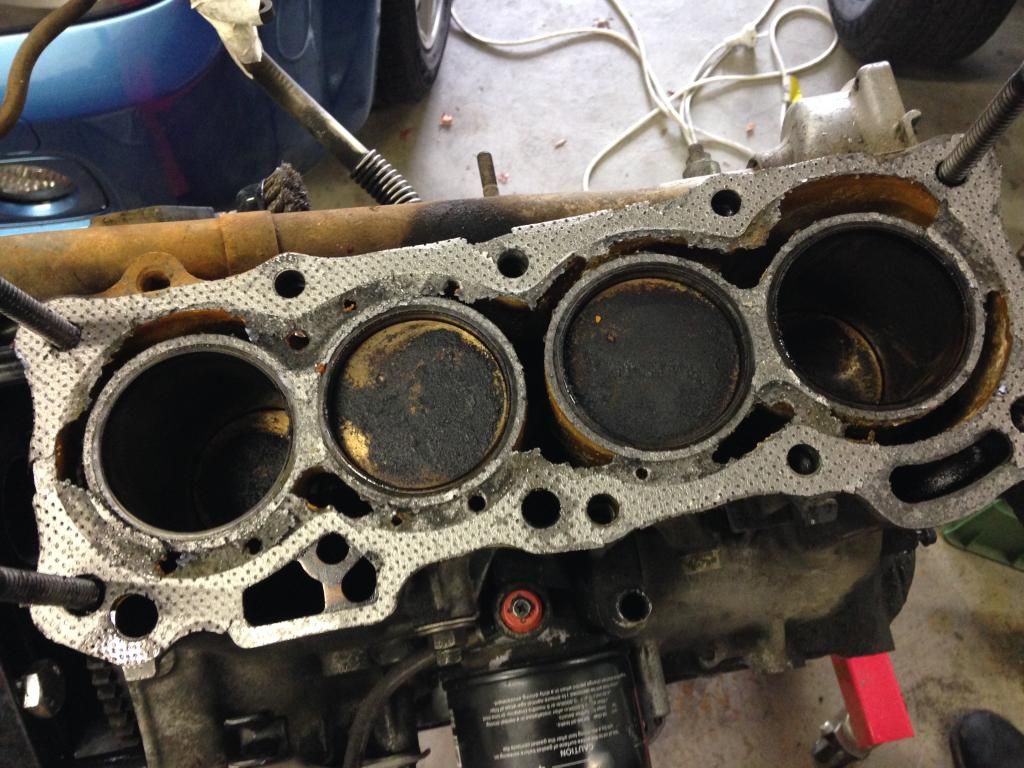
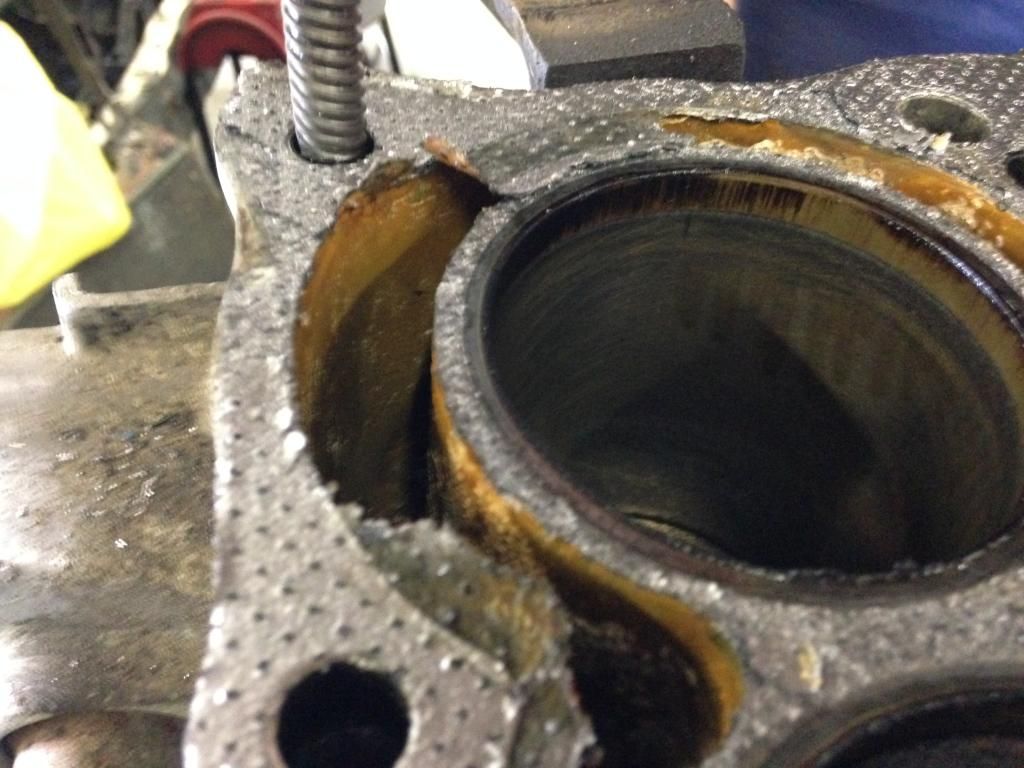
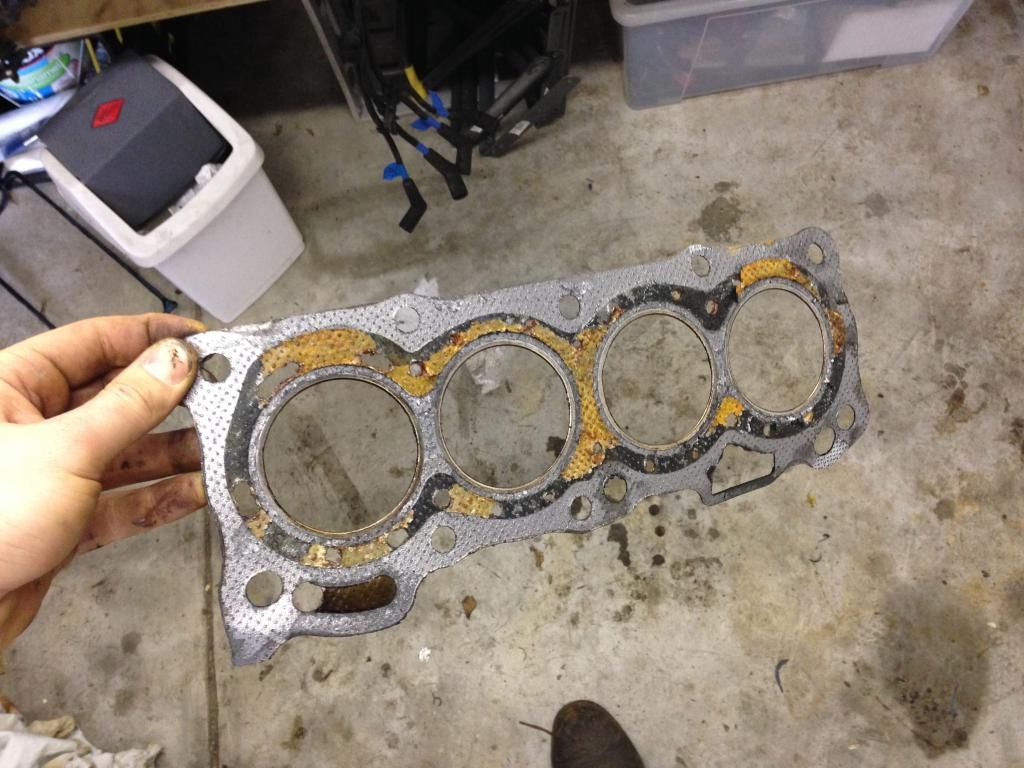
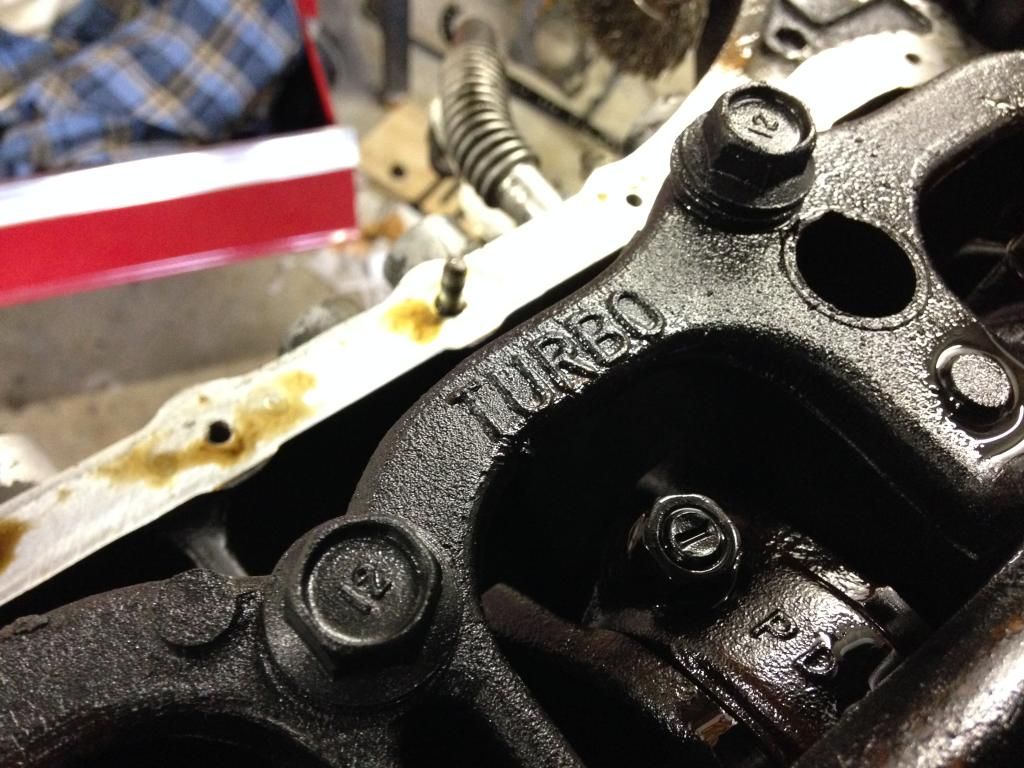
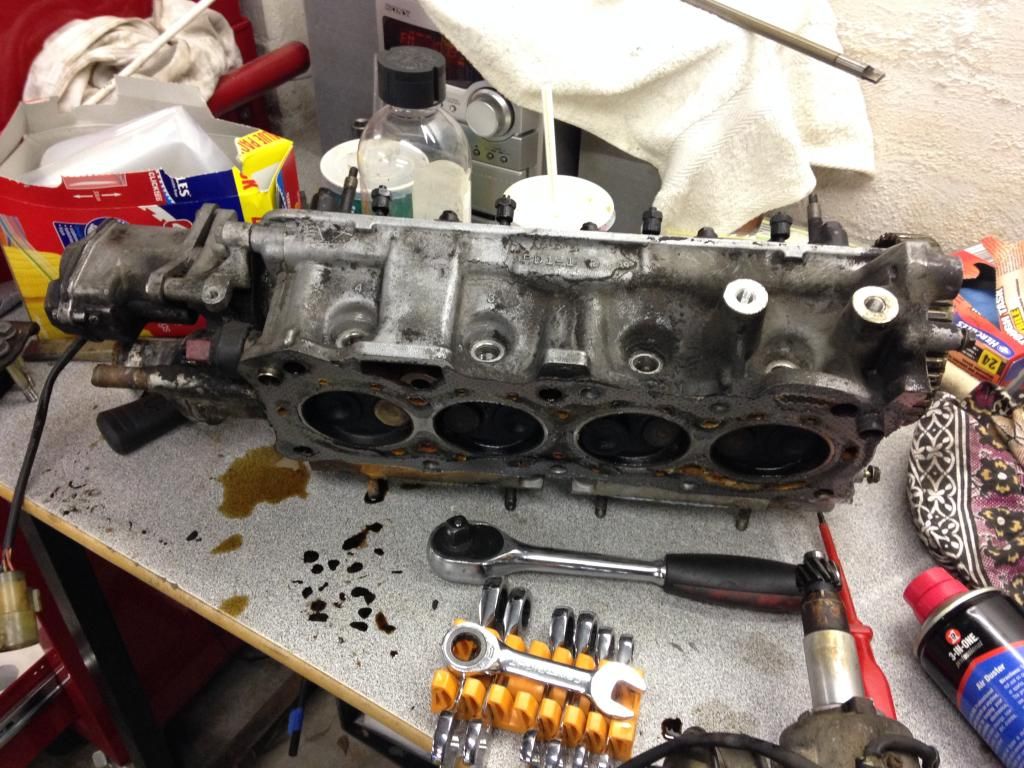
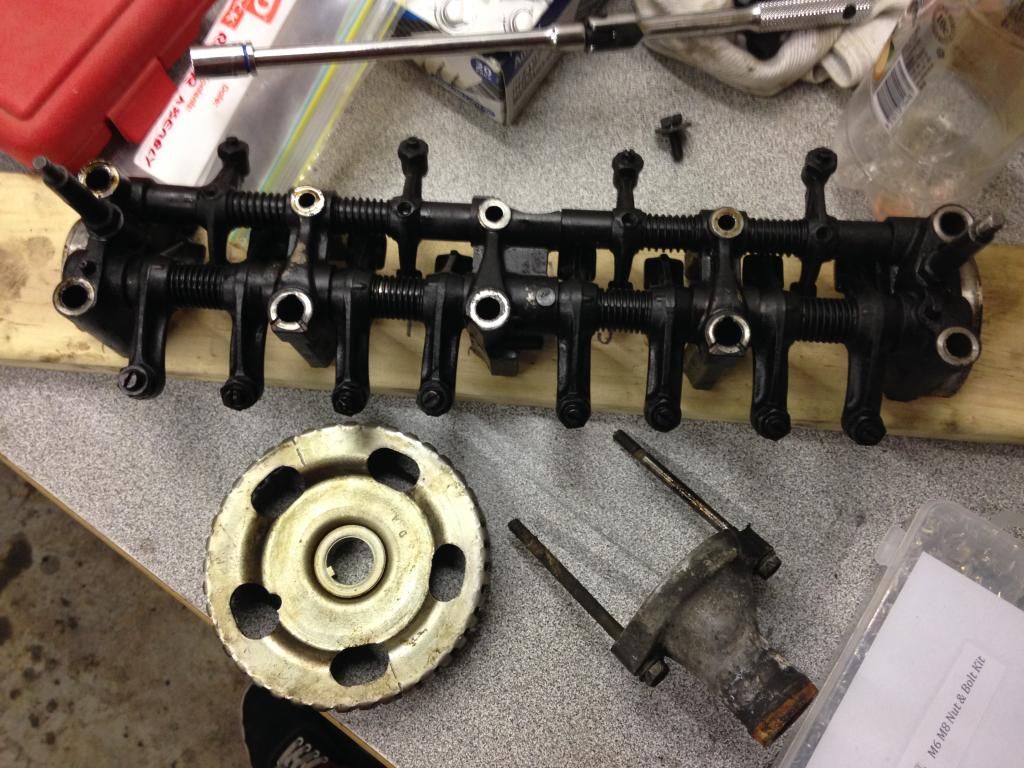
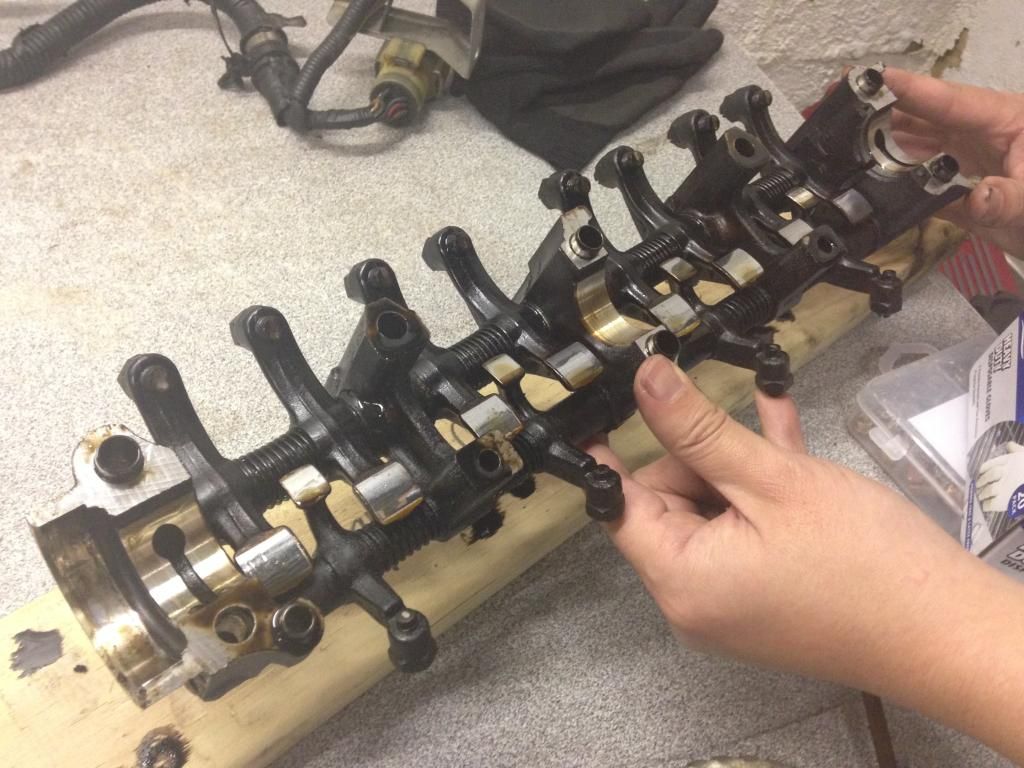
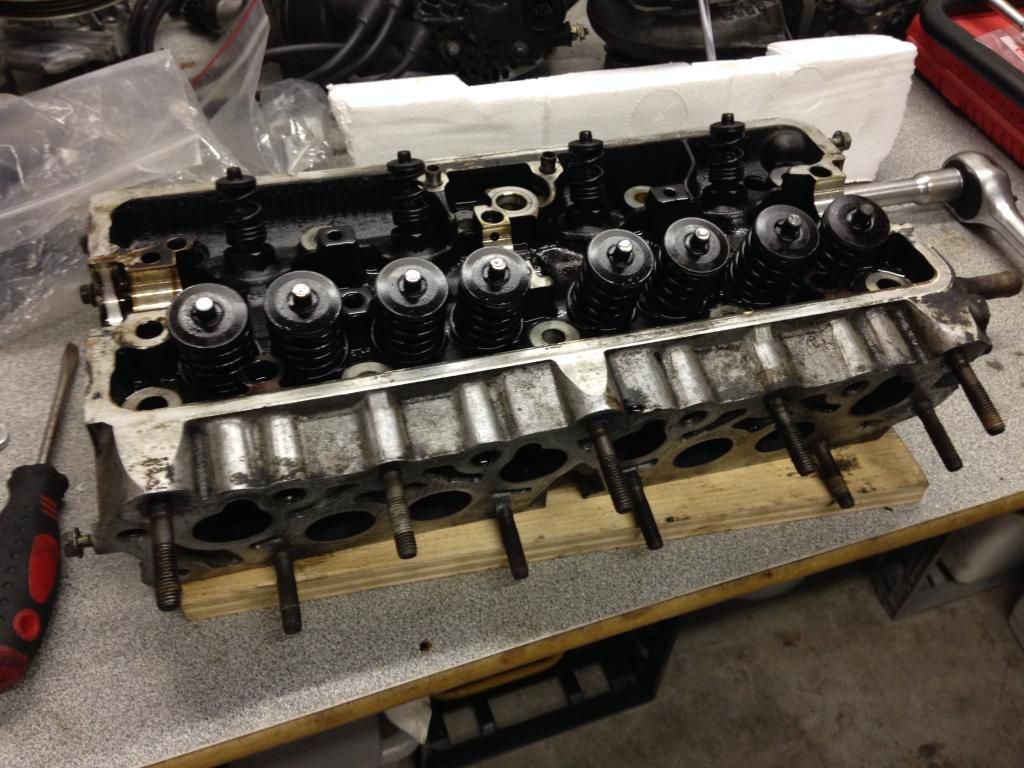
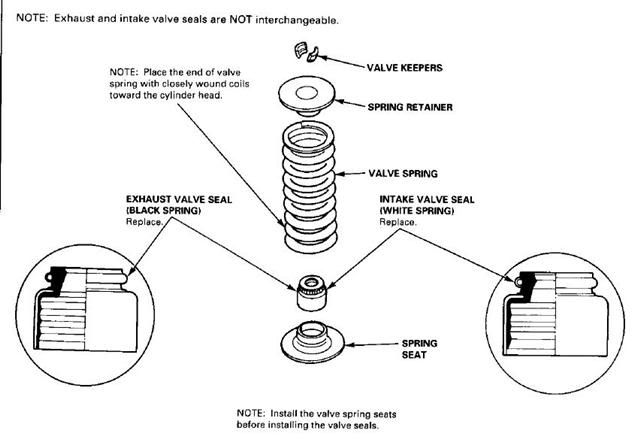
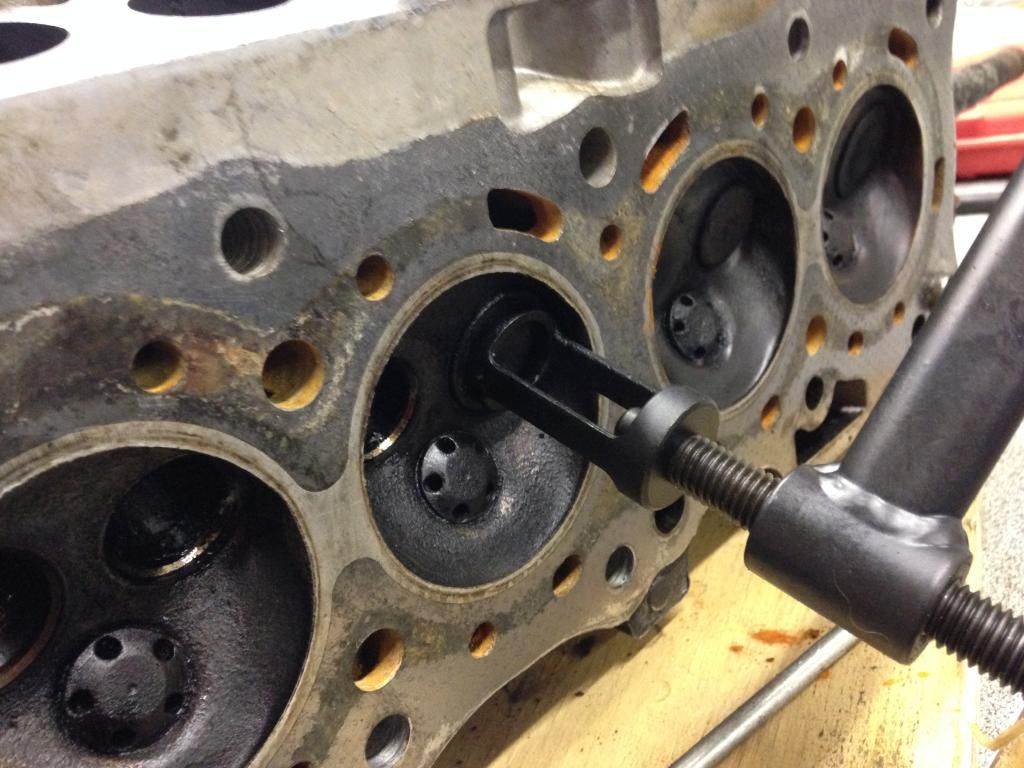
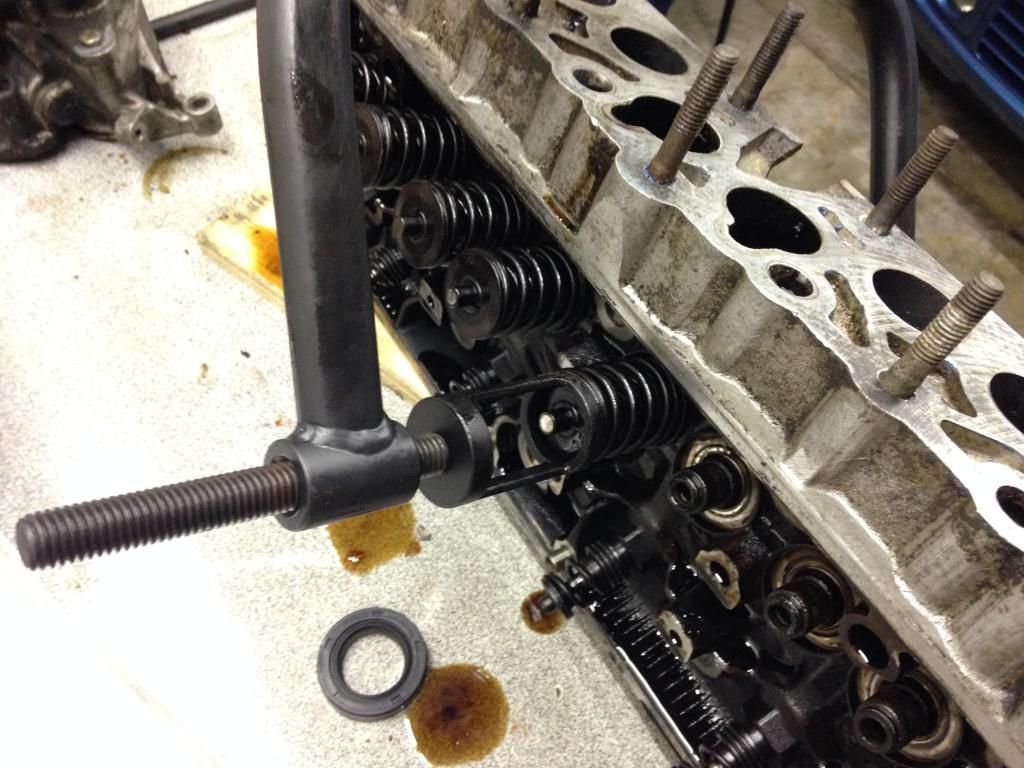
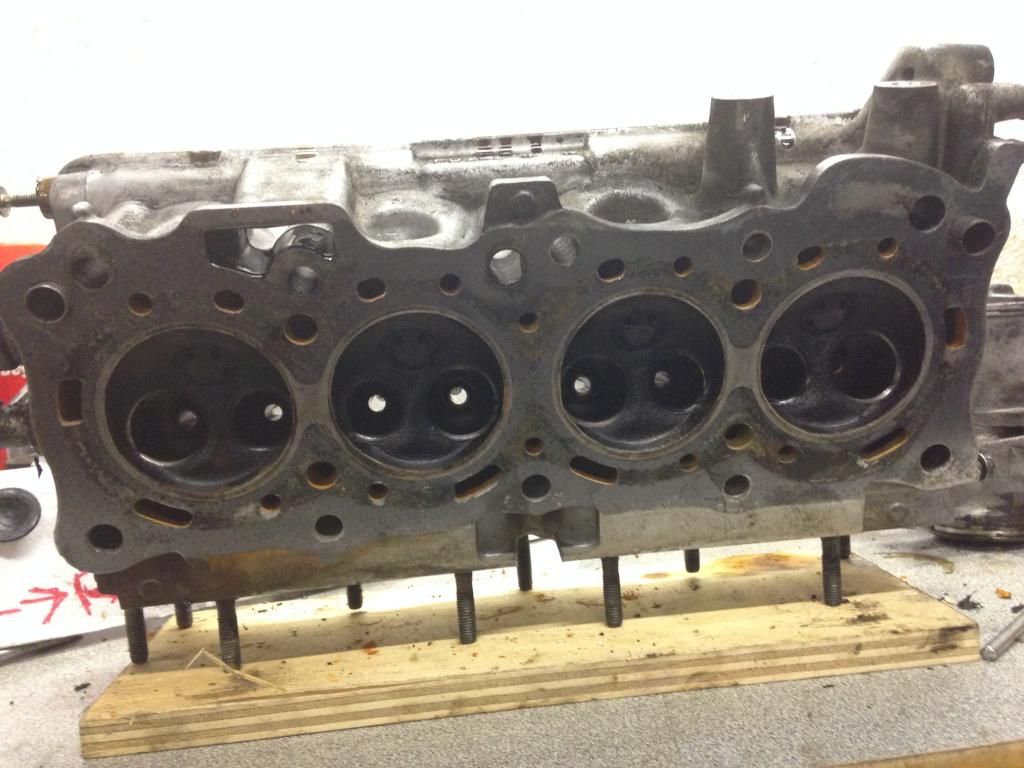
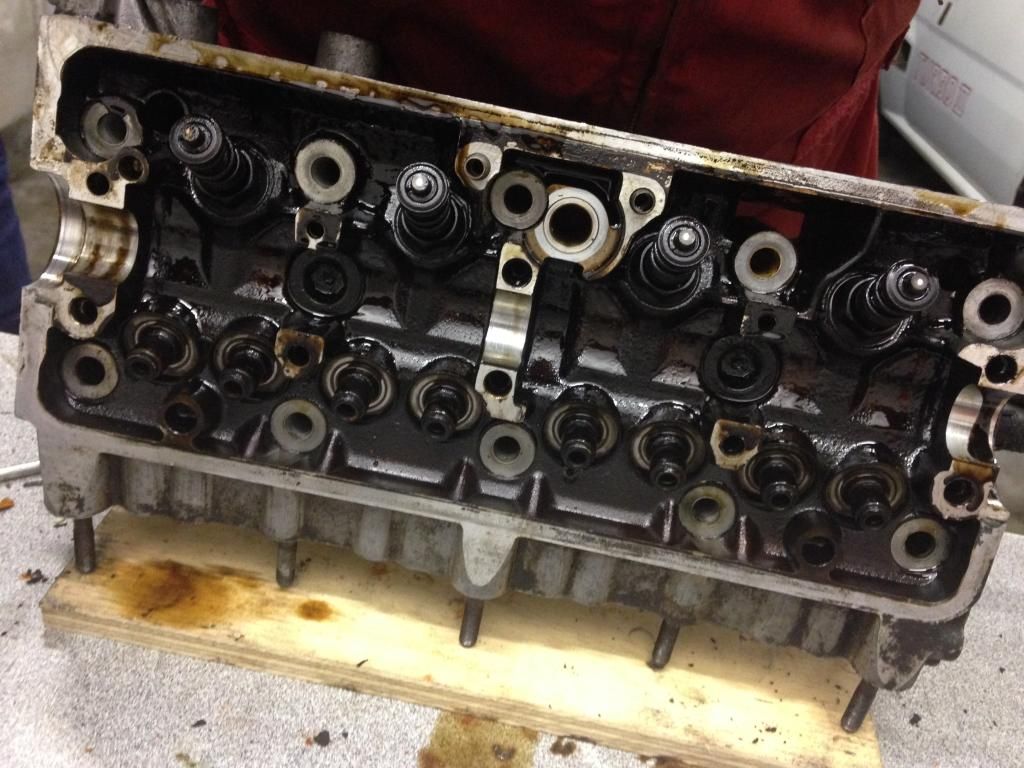
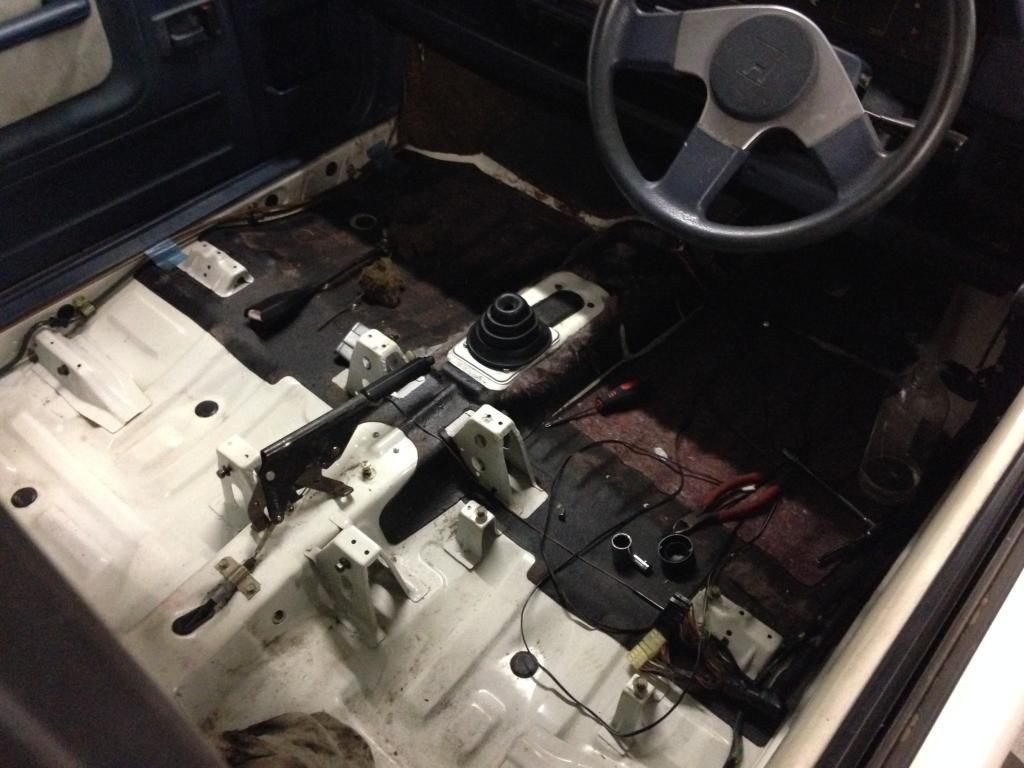
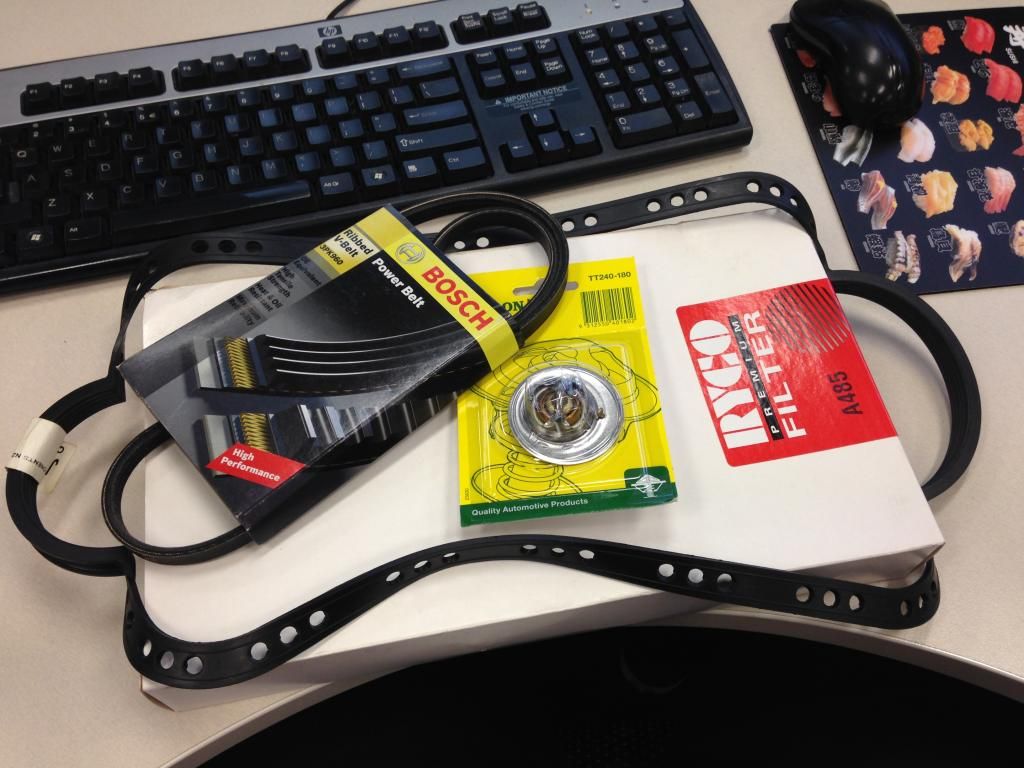
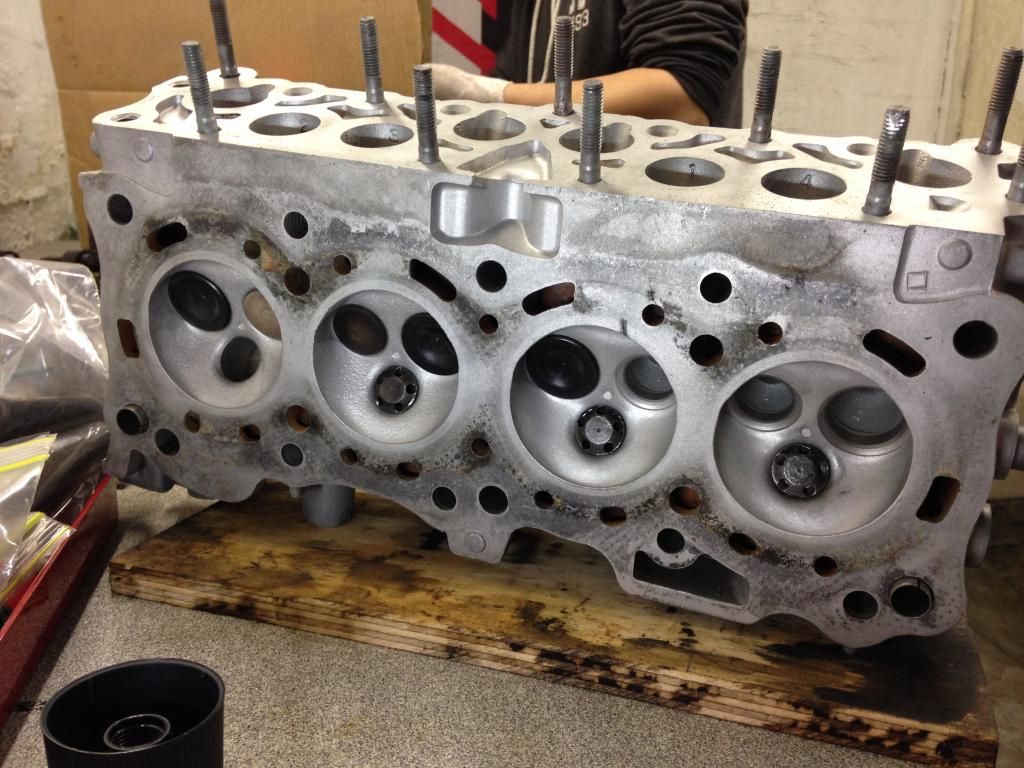
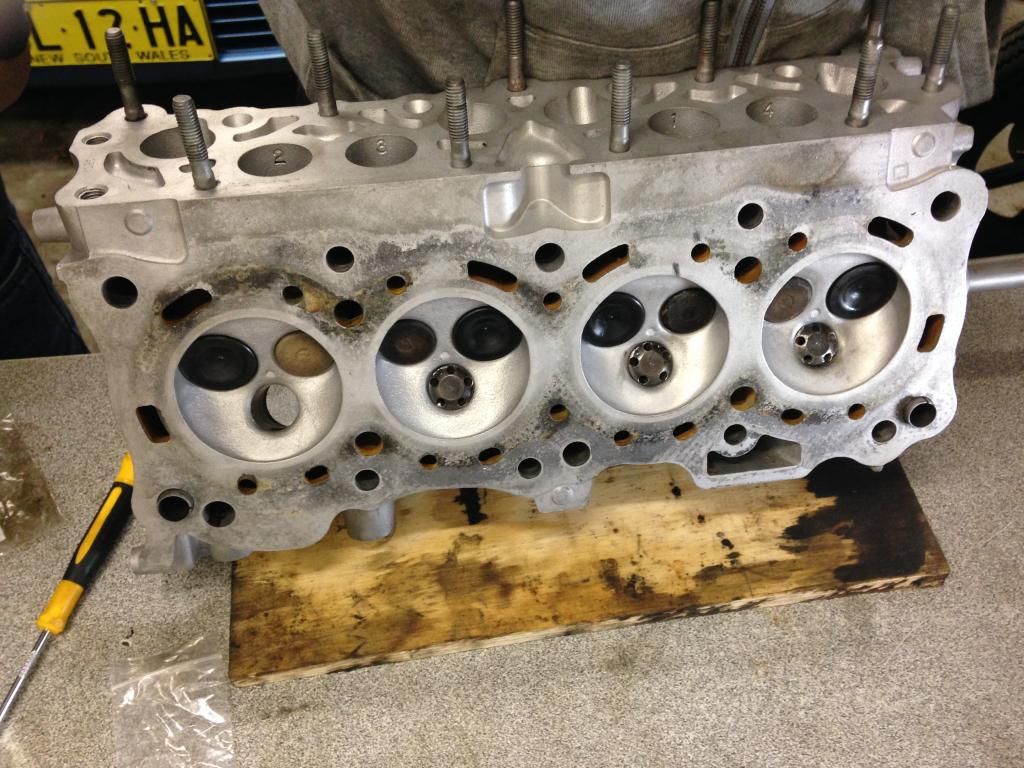
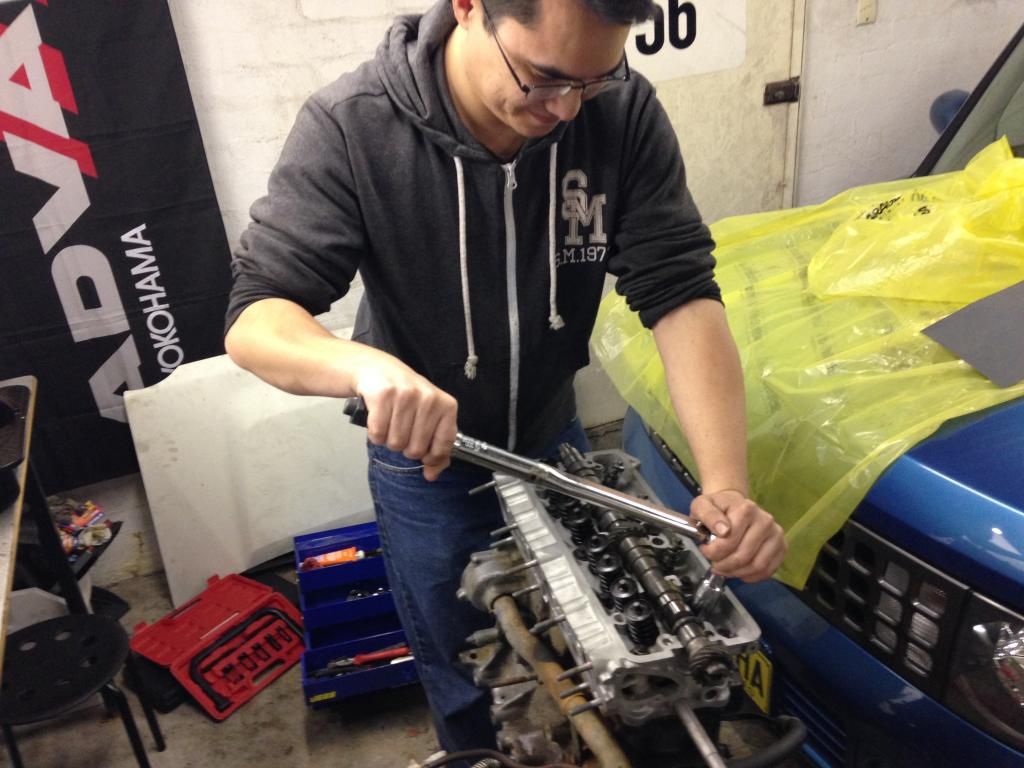
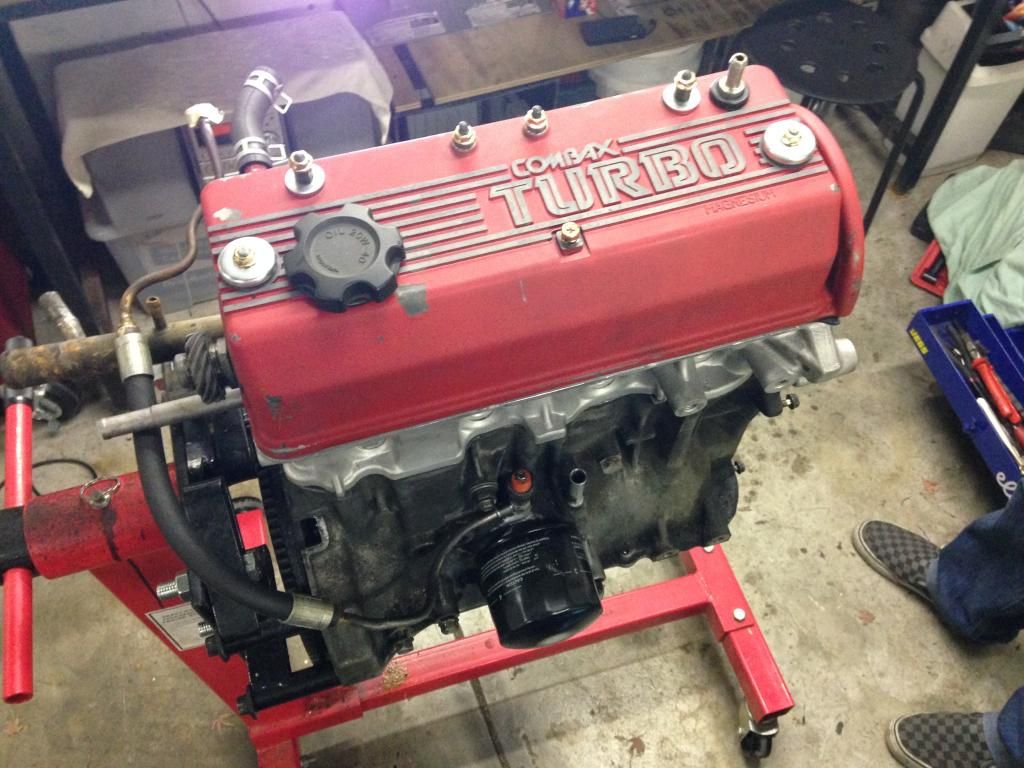
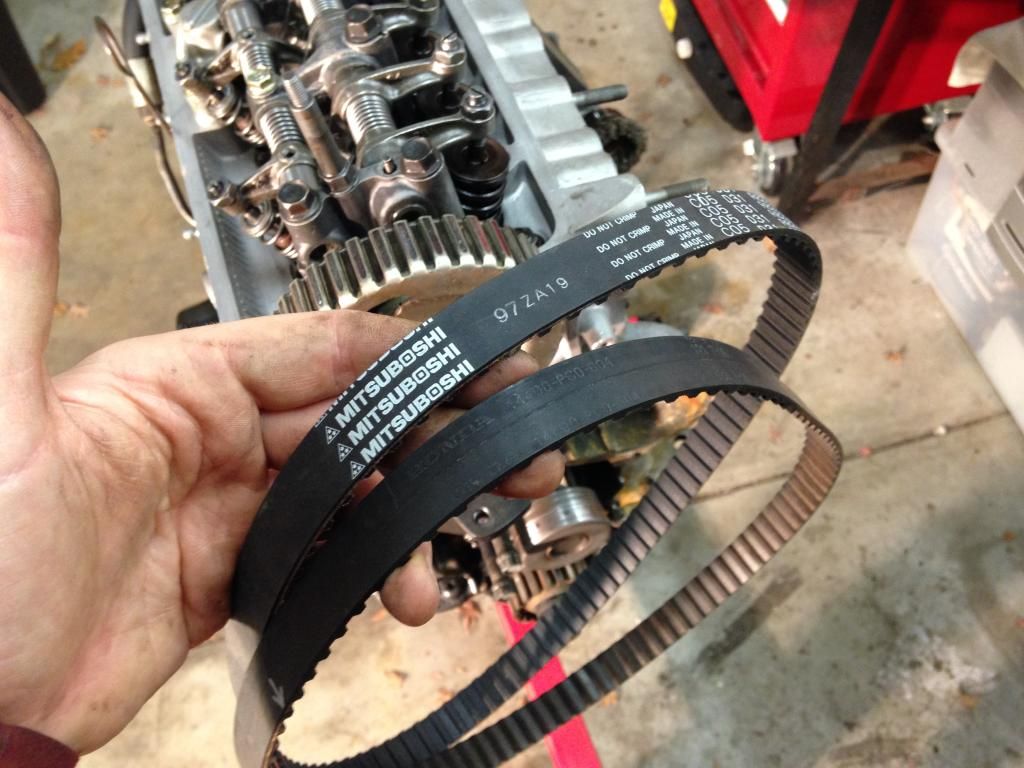
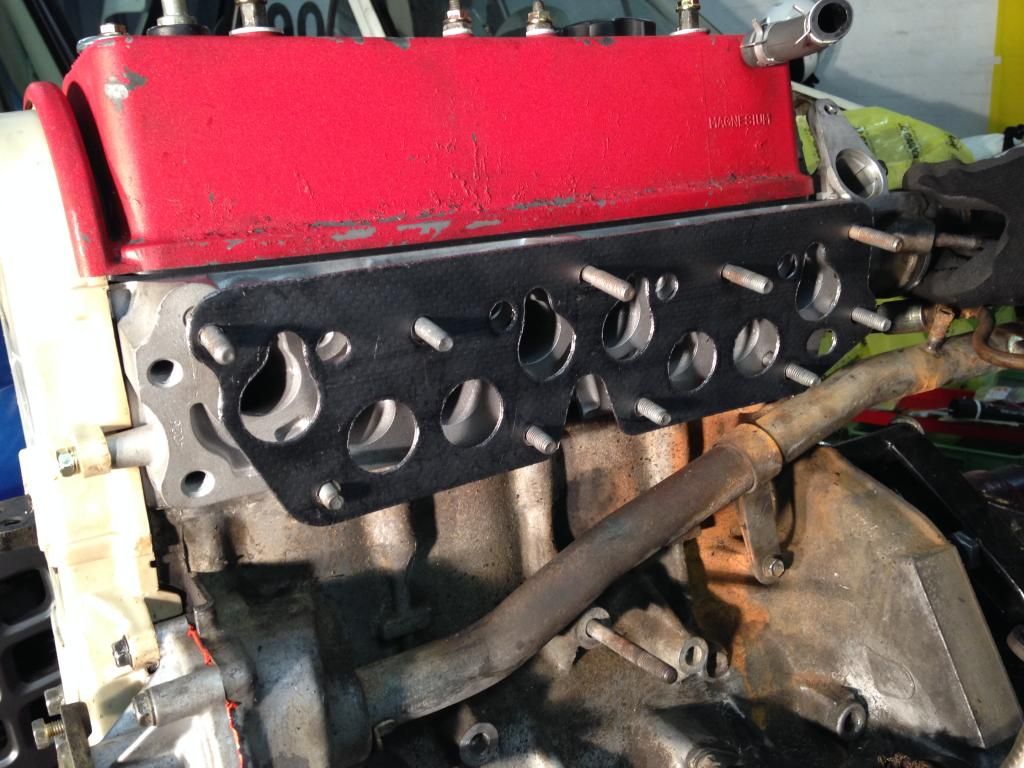
    We wanted to yank the motor out straight away for a proper look at the exhaust manifold and to get started on the freshen up. The car came with a complete gasket and seal kit for the top end so we'll be making the most of that.


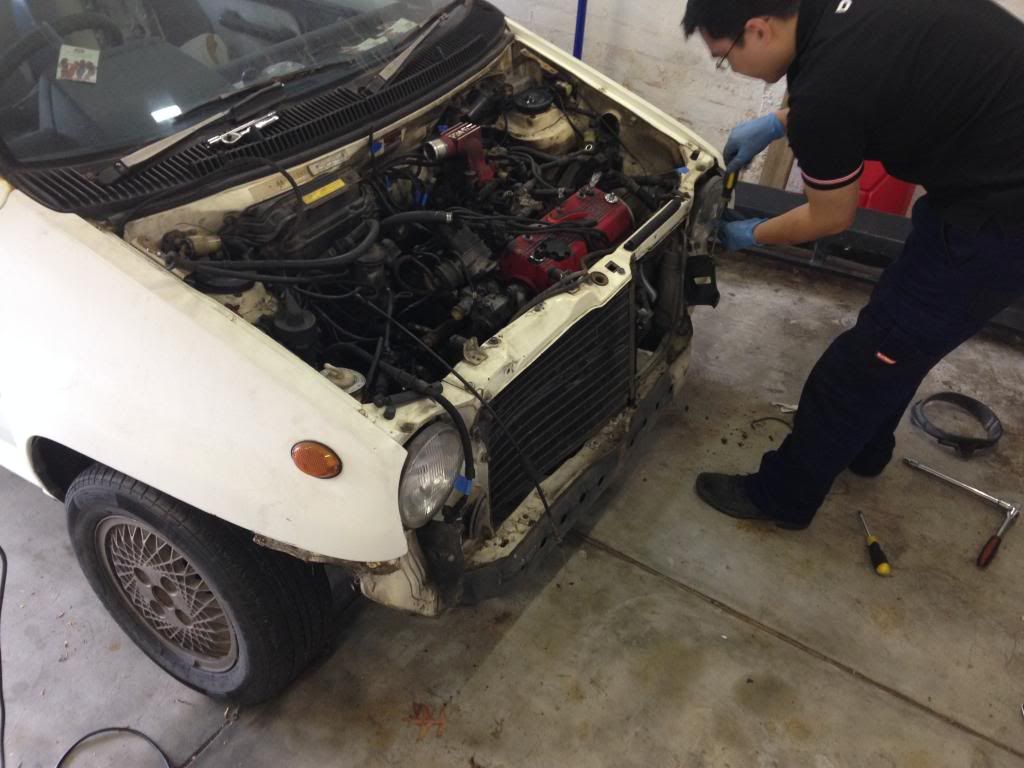
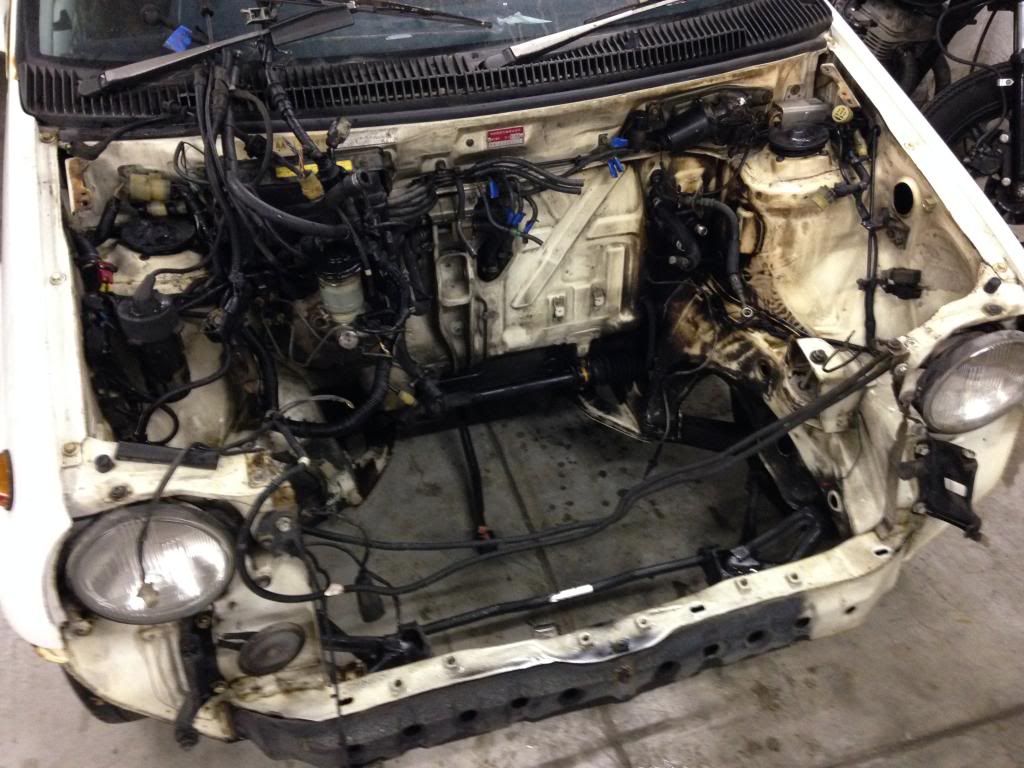
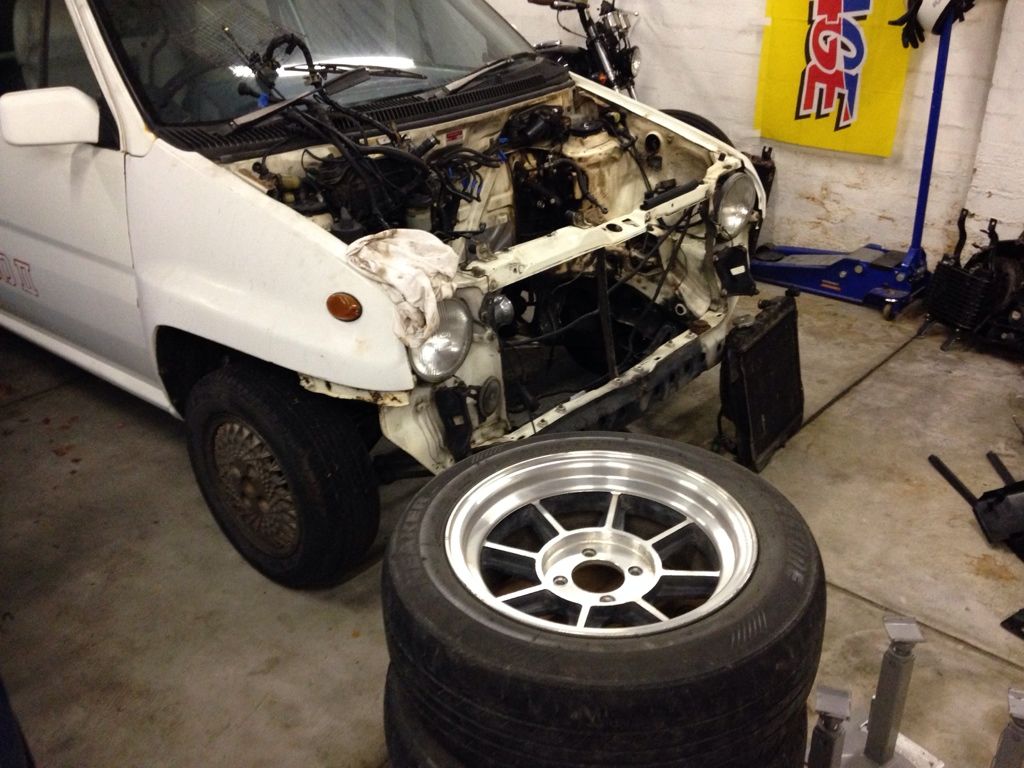
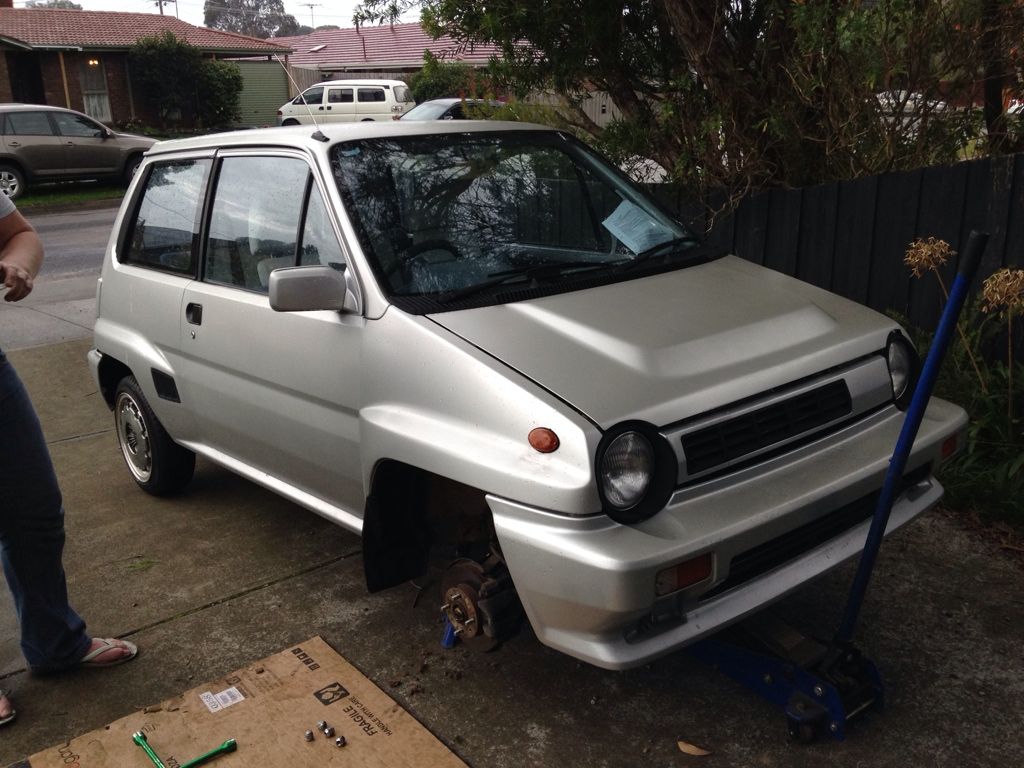
    Front bumper and grill removed for heaps of access. We don't want any air con gear in the car so the condenser came out and went in the bin. Everything disconnected and labelled and rad support removed.
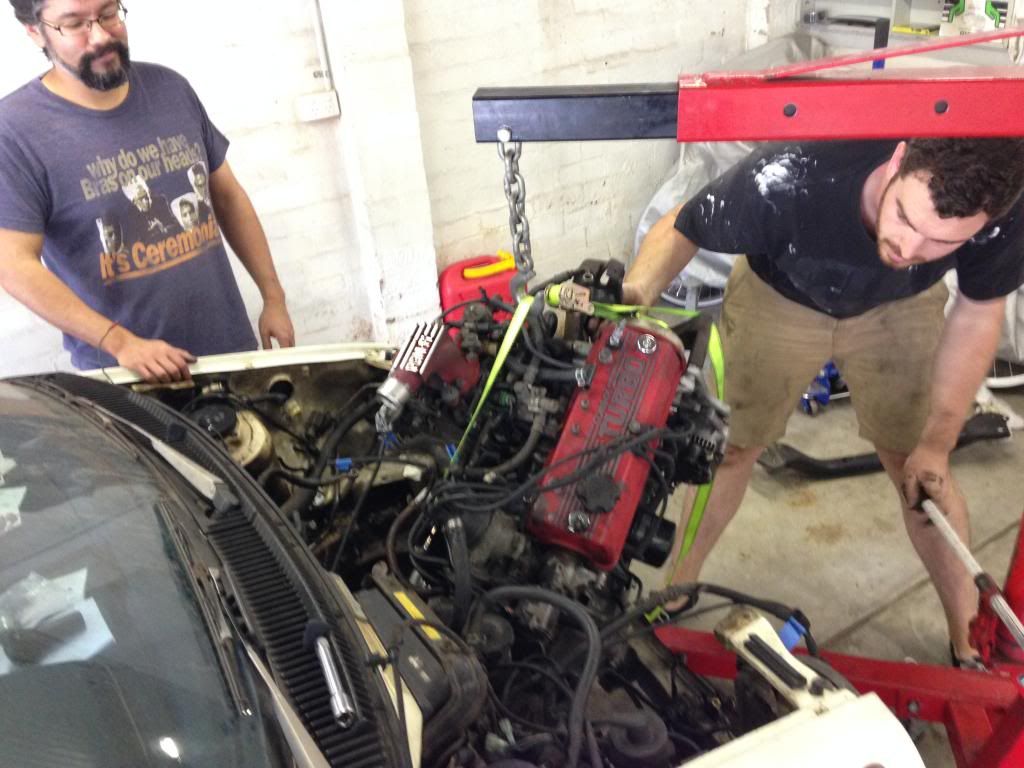
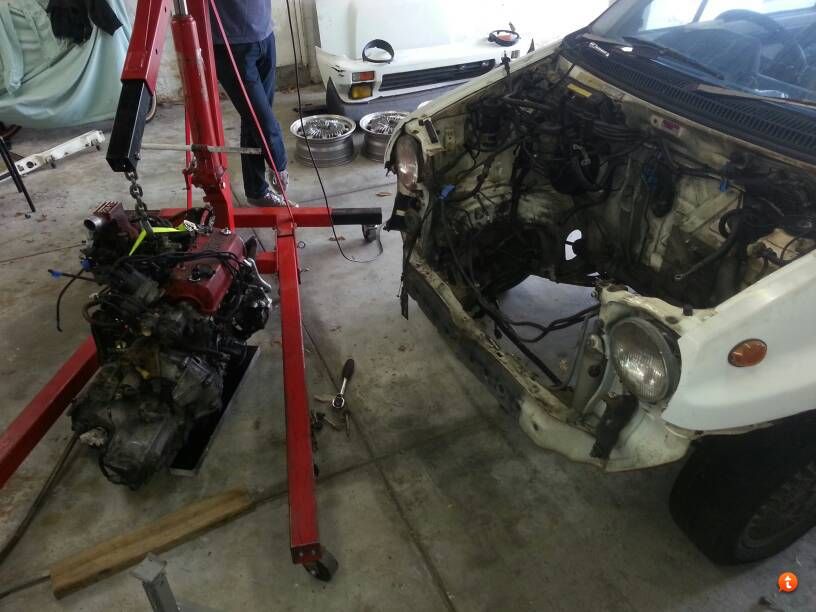
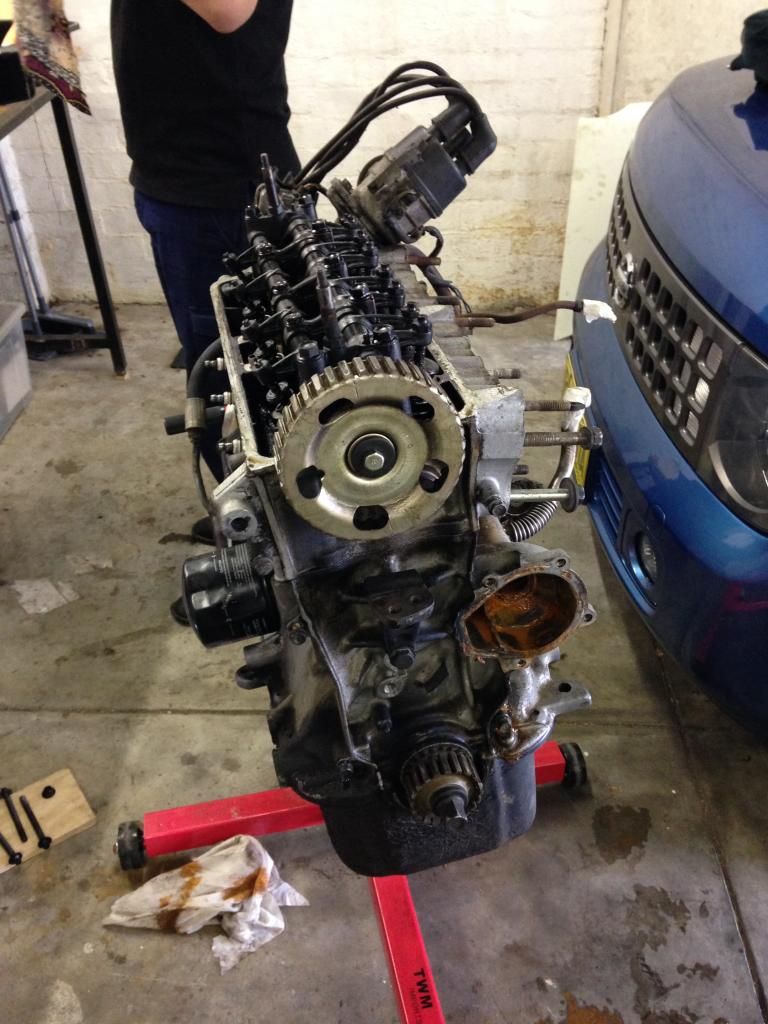
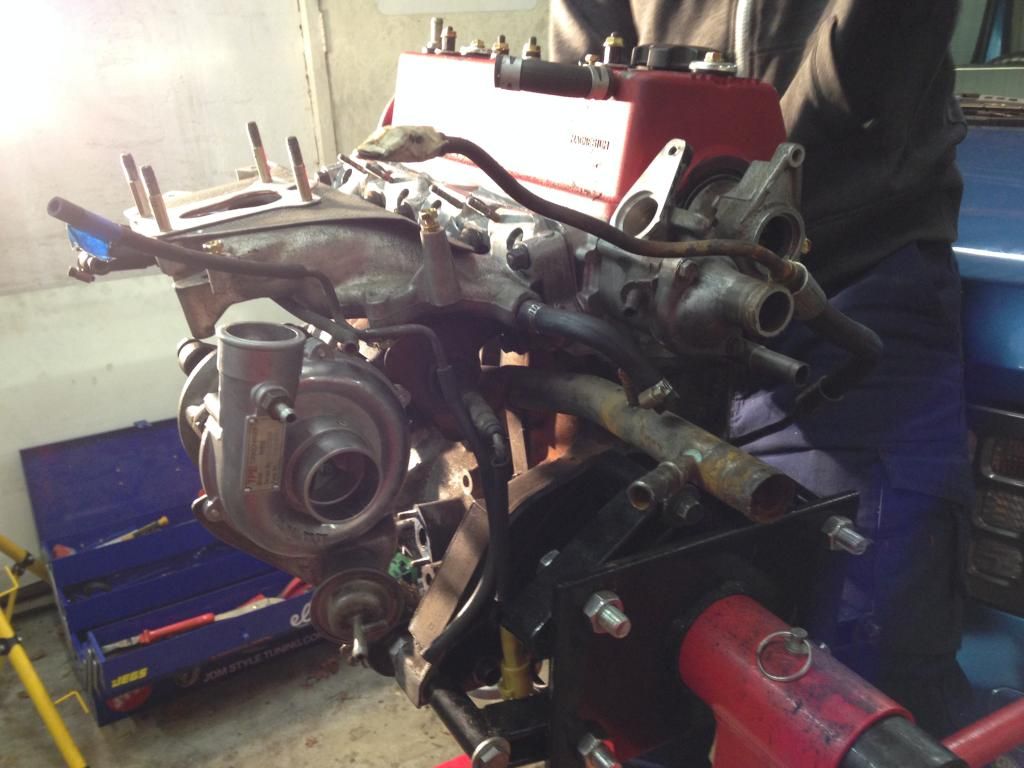


    Engine crane time.


    Winners are grinners. It took us three hours from kick off to engine out. Pretty stoked with that.


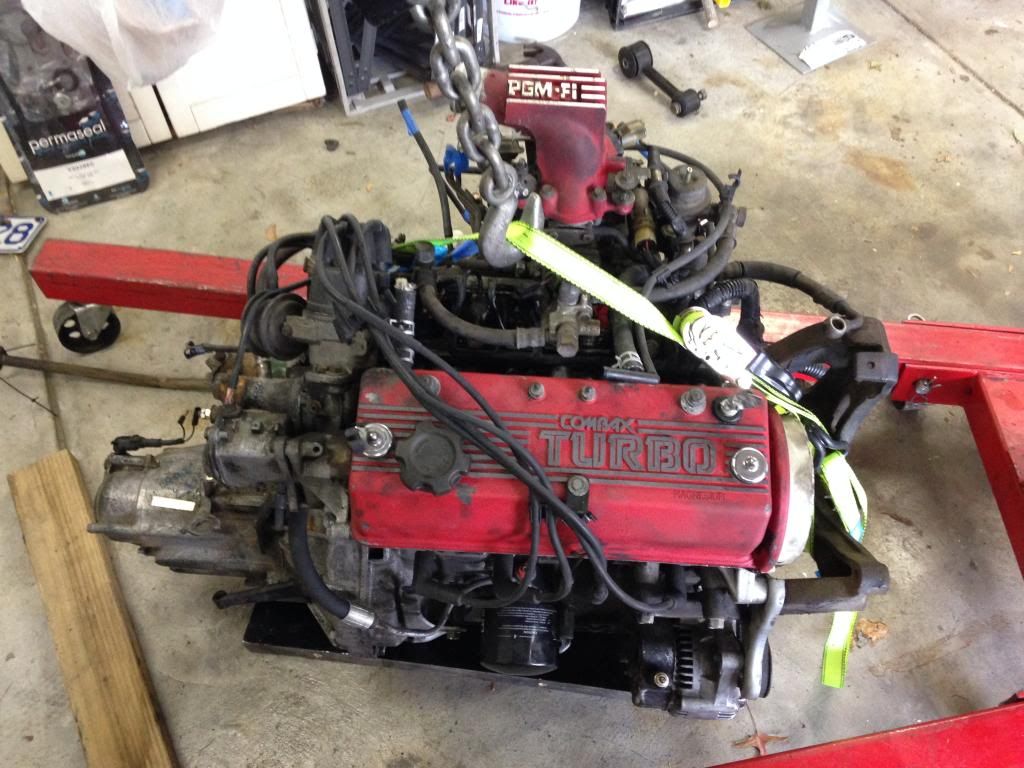
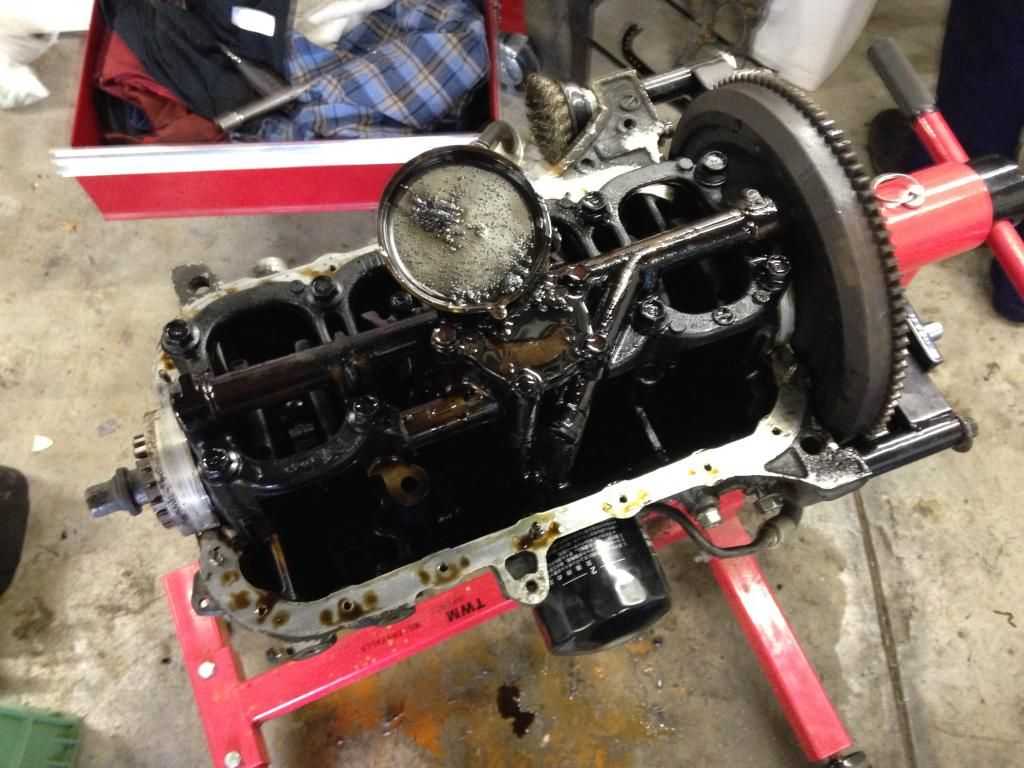
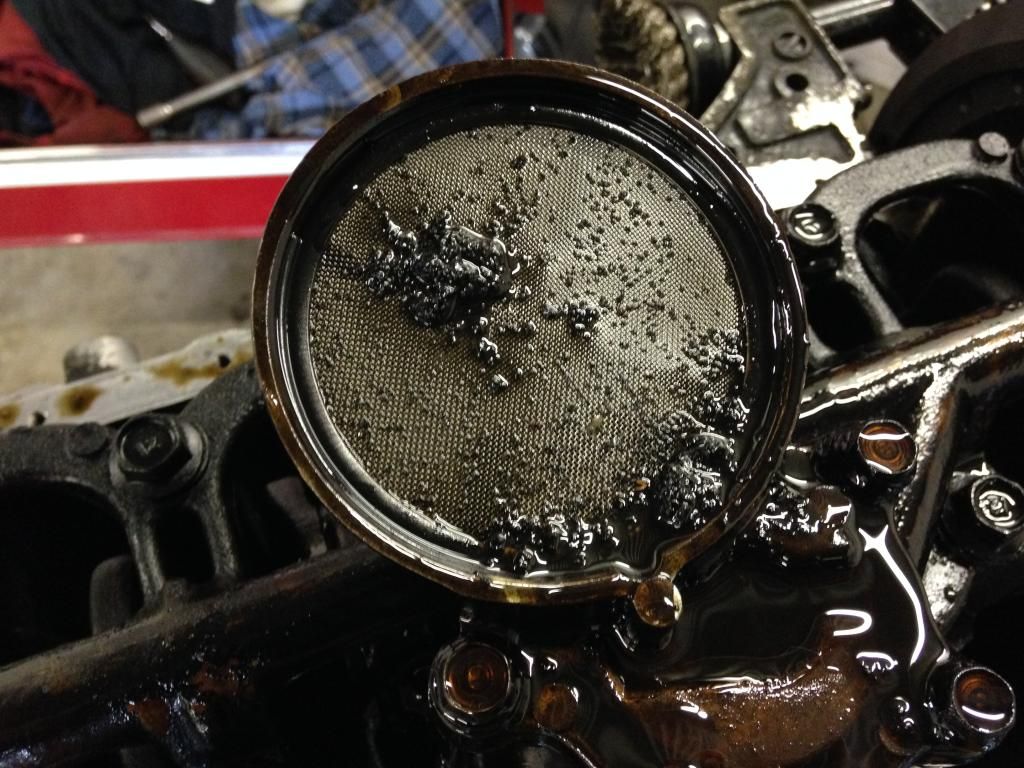
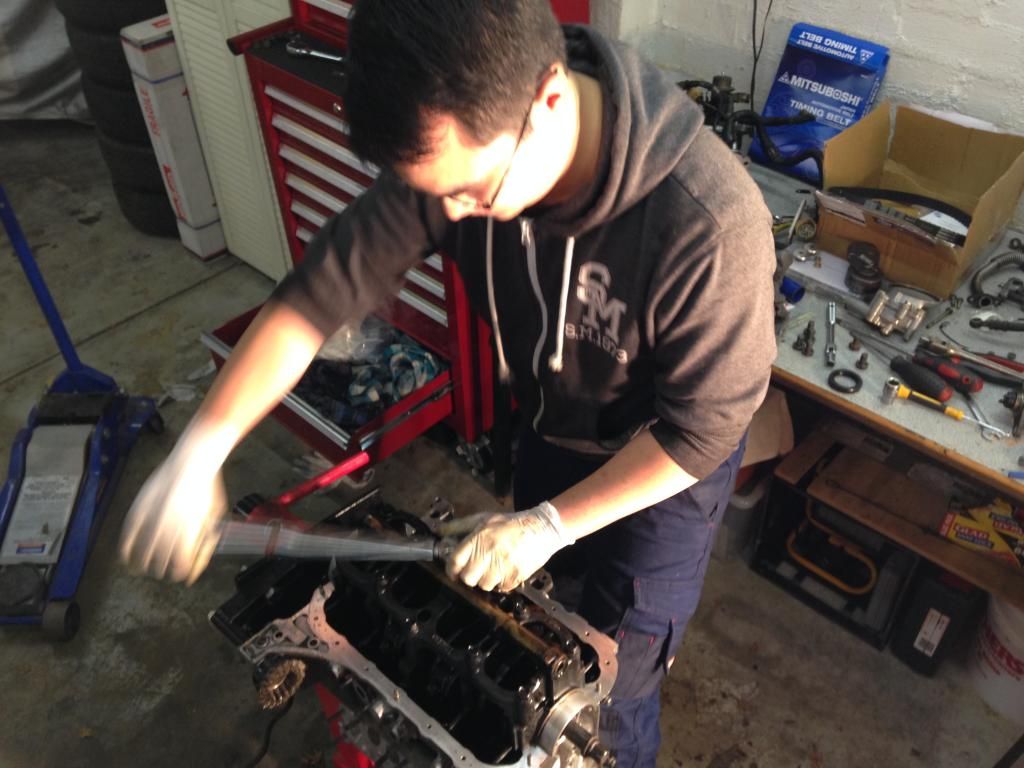
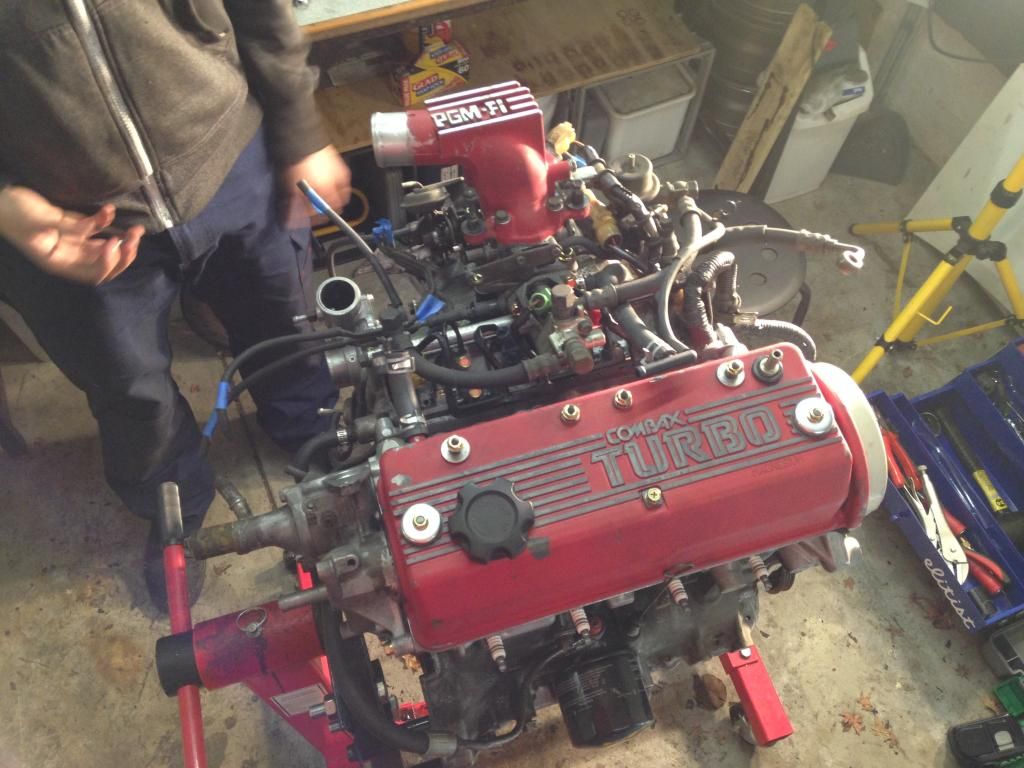
    We dropped the oil out and got the engine onto a stand so we can work on it easily.


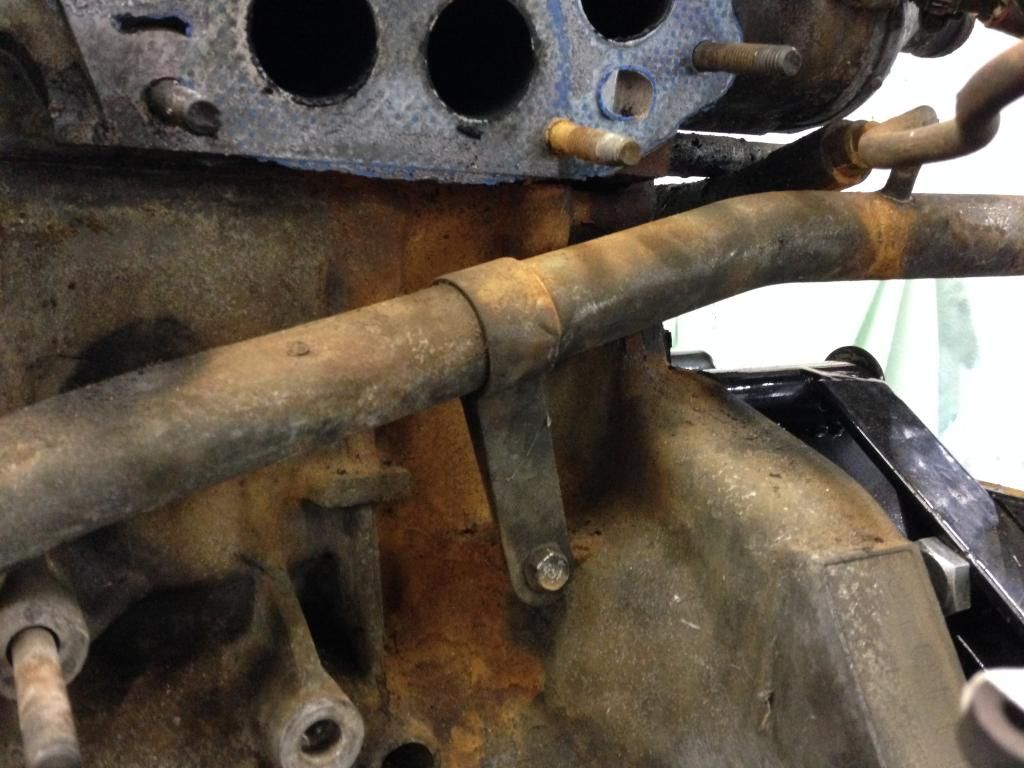
    Dirty engine bay is dirty.


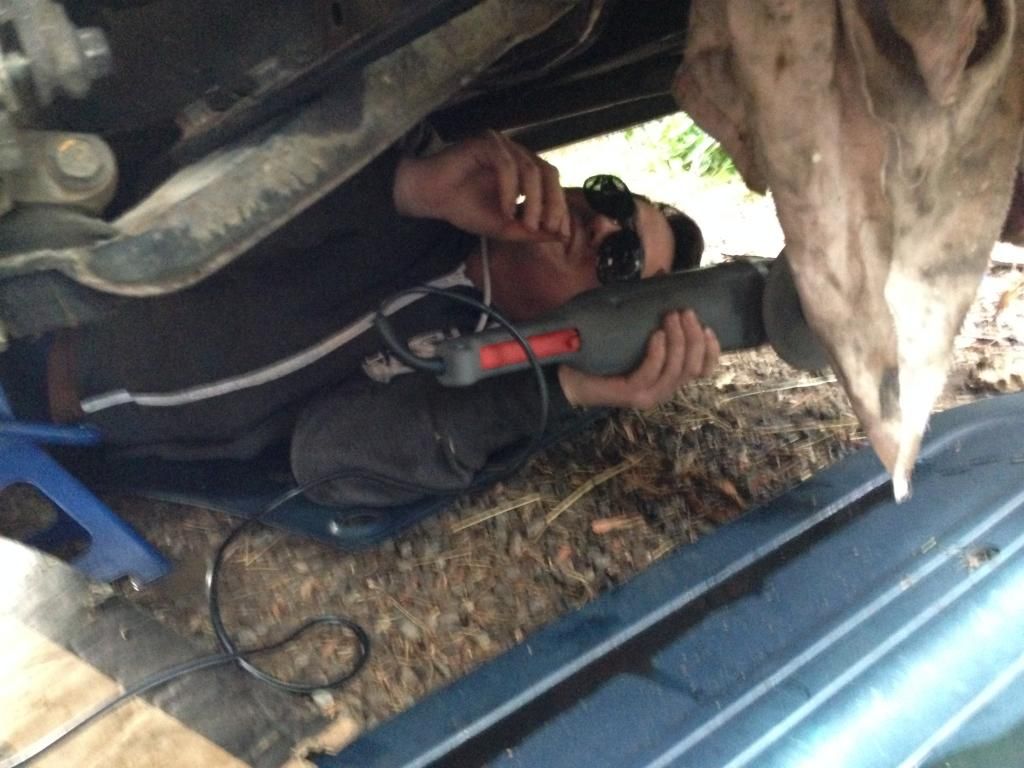
    Degreaser and Karcher tiem.


    Fair bit better. Both of us get pretty OCD at times, but this is definitely not going to be a concours rebuild. The body is a little rough so it doesn't need to be perfect.


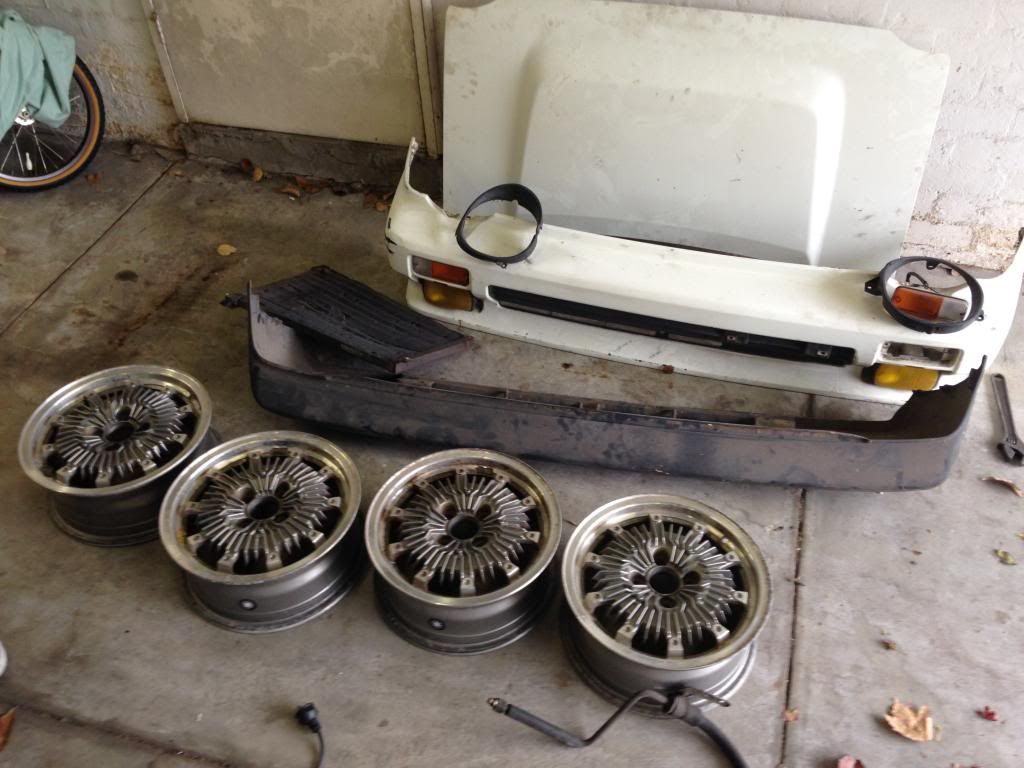
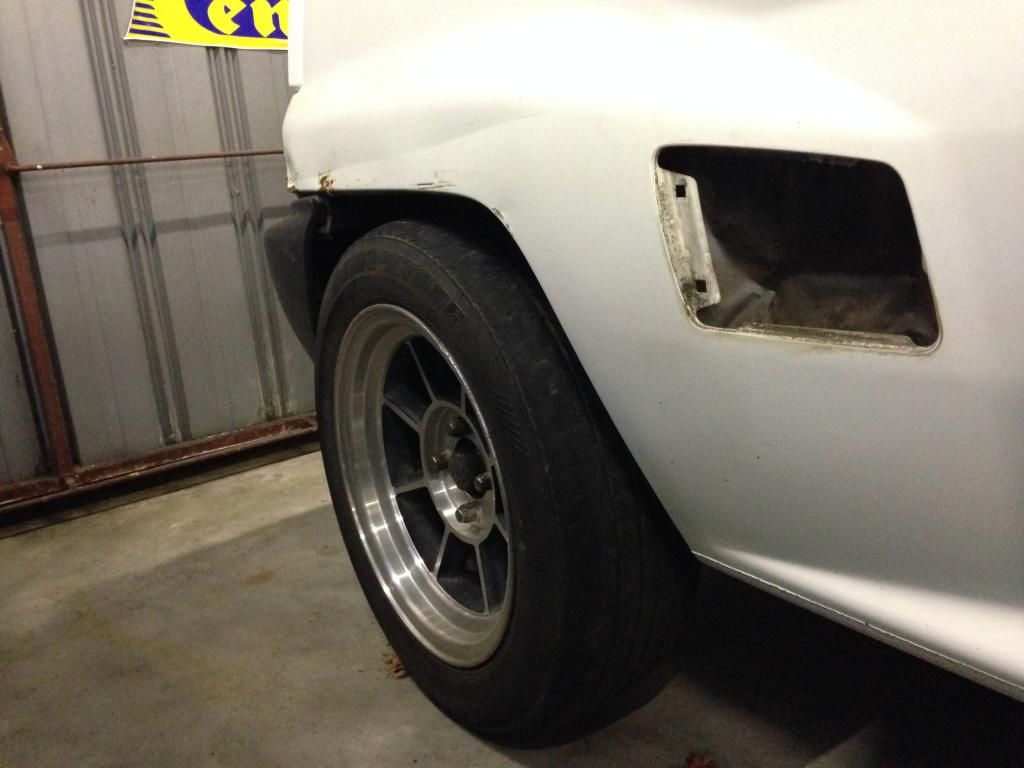
    A friend brought over a set of CF-48s for us to use while we've got the City. May or may not end up on the car.


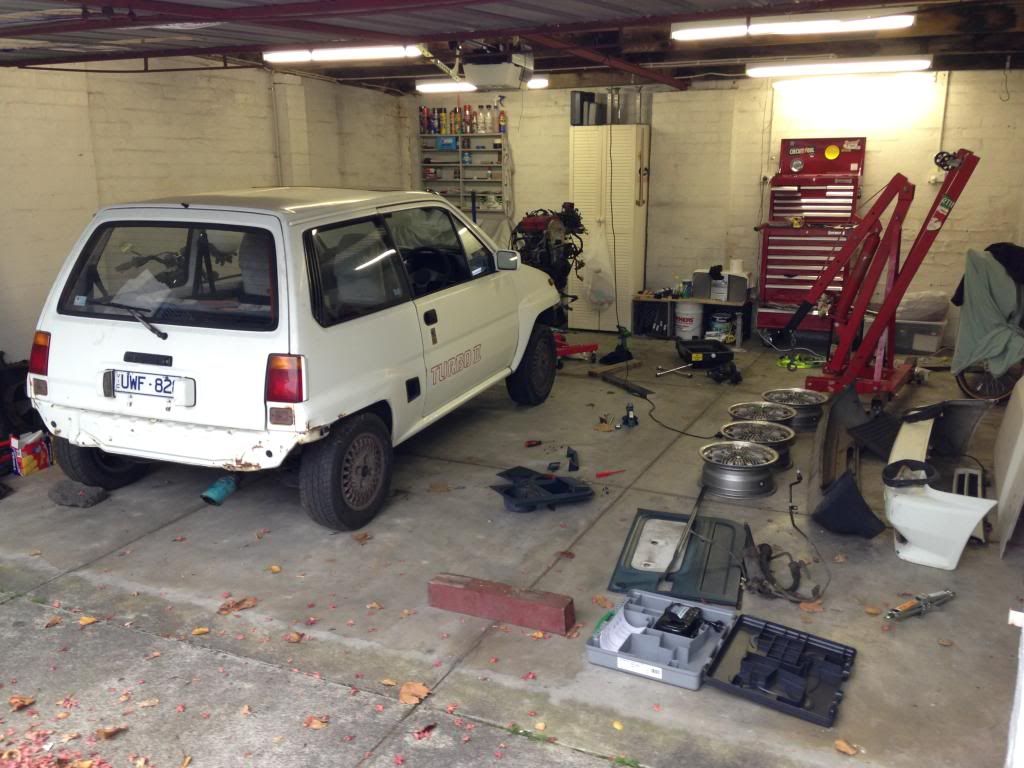
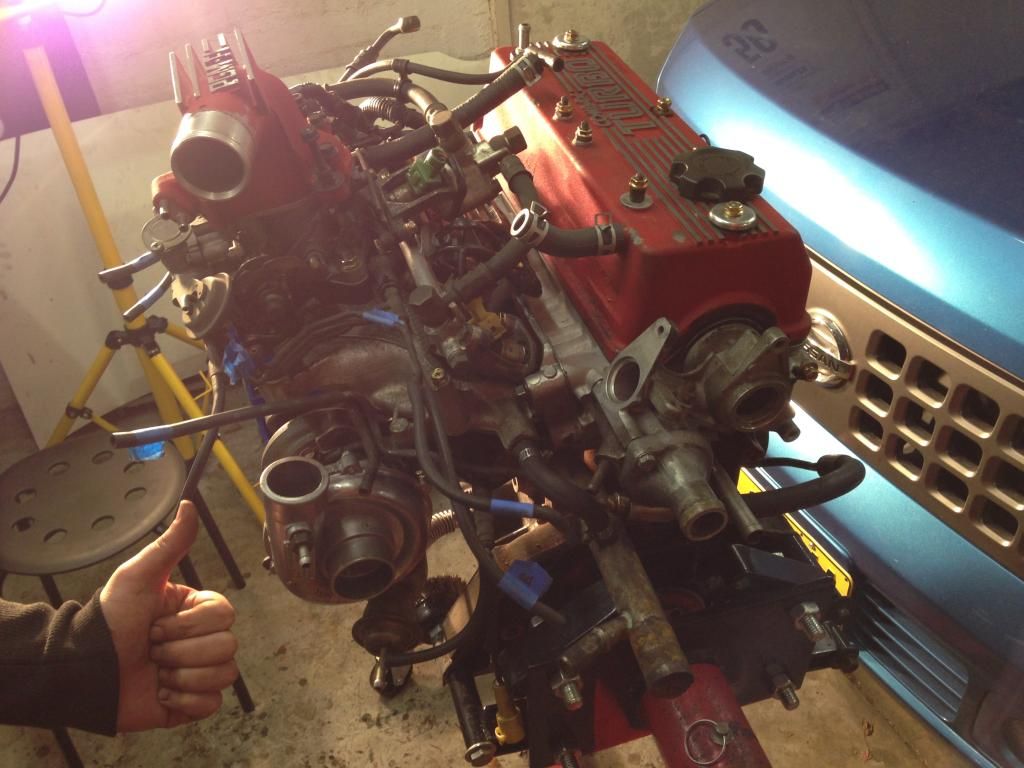
    Loving having this funny car in the garage. So good to be working on a new project.


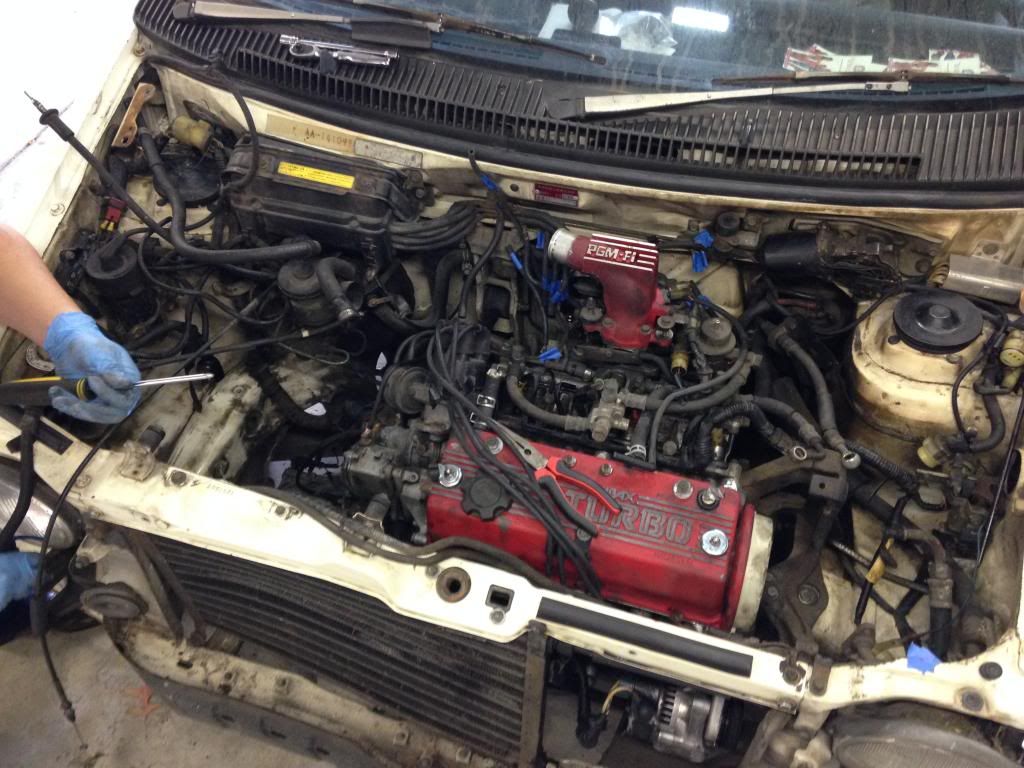
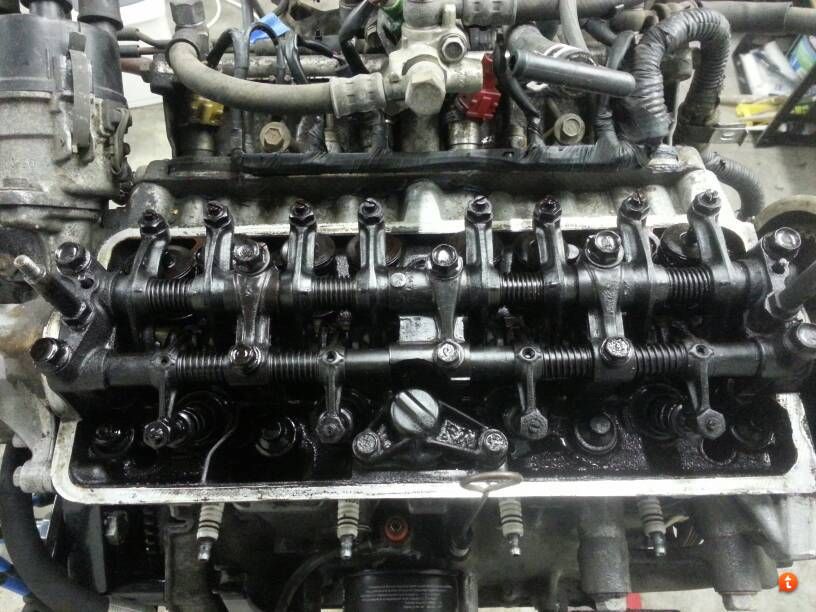
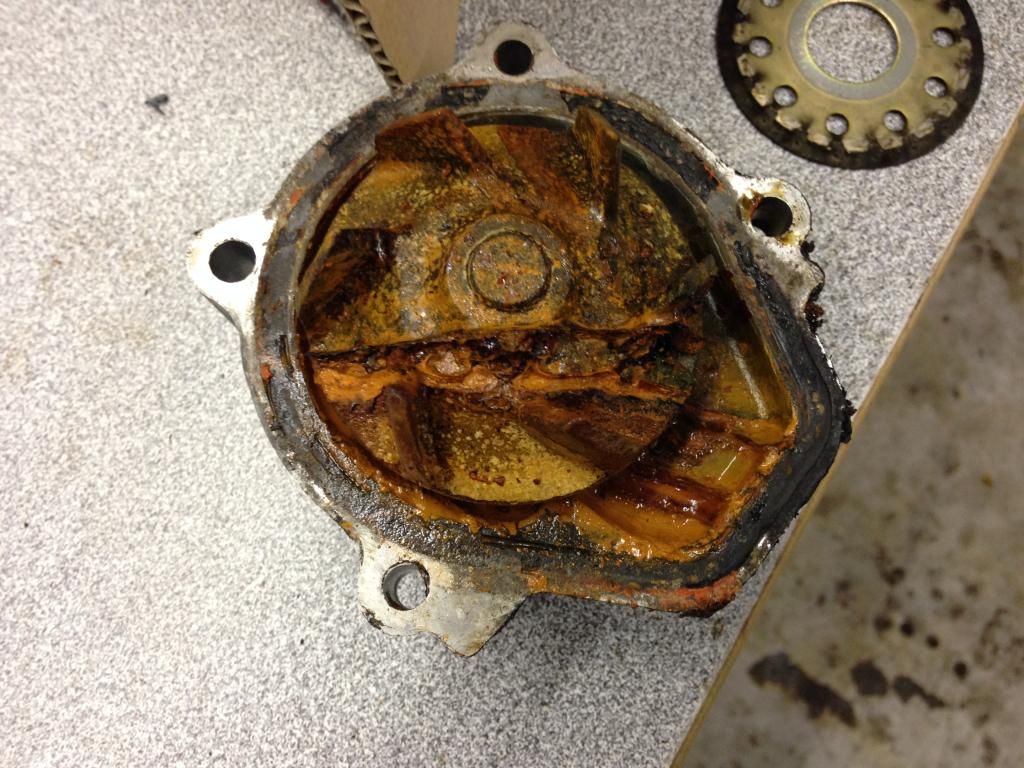
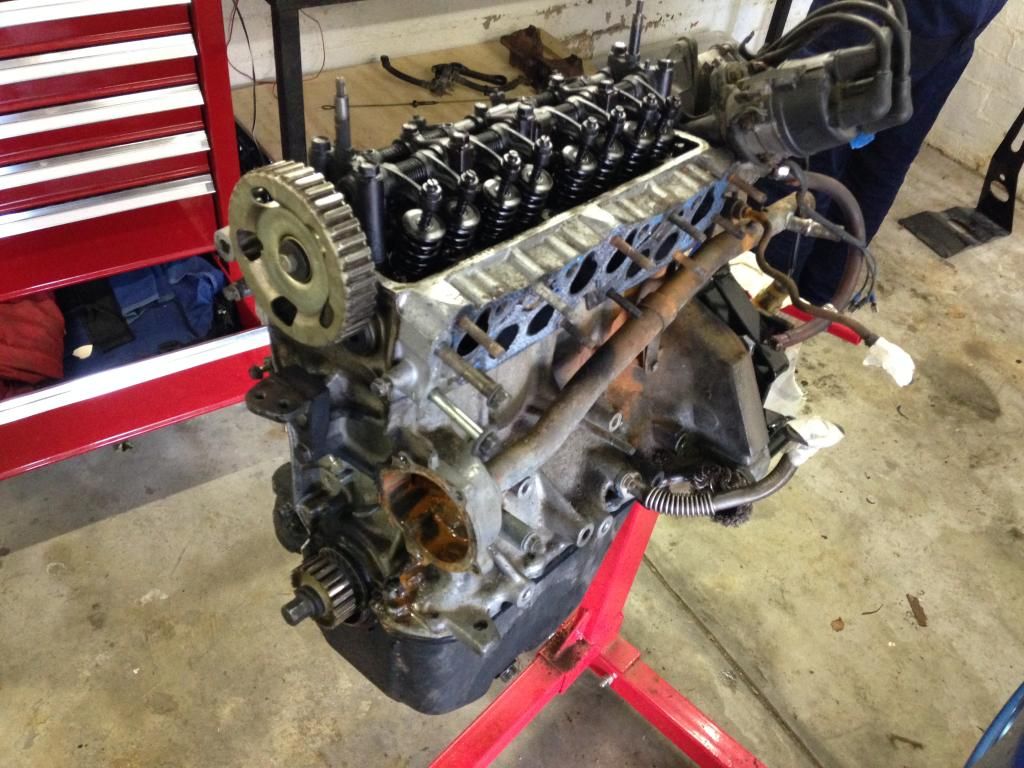
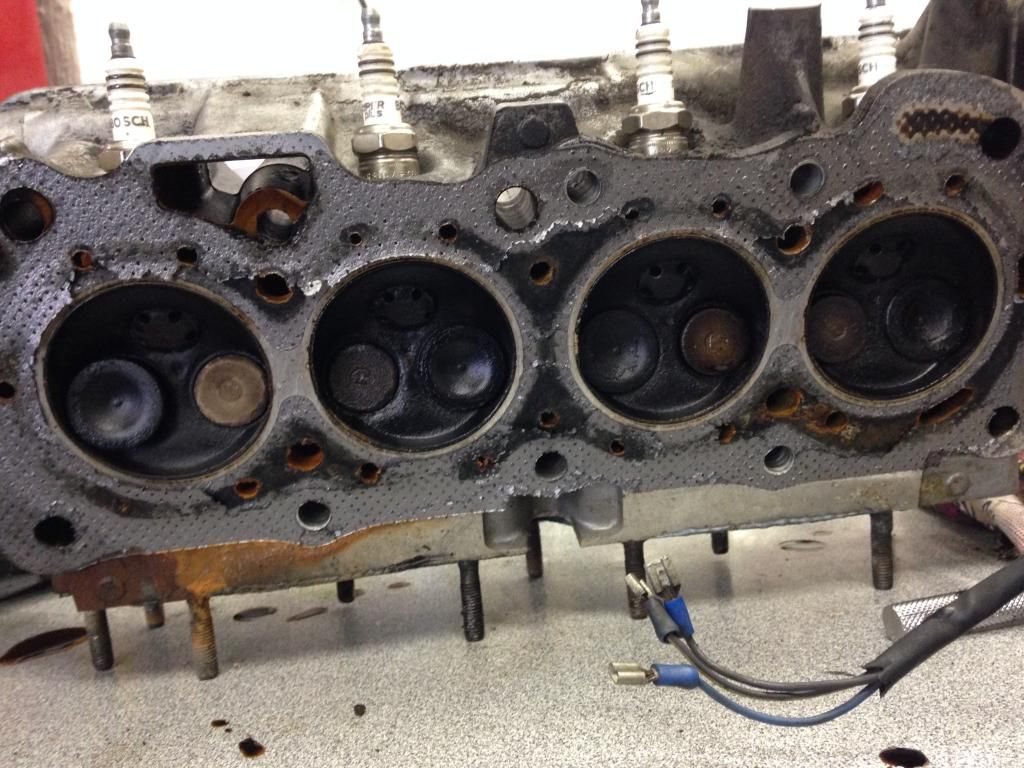
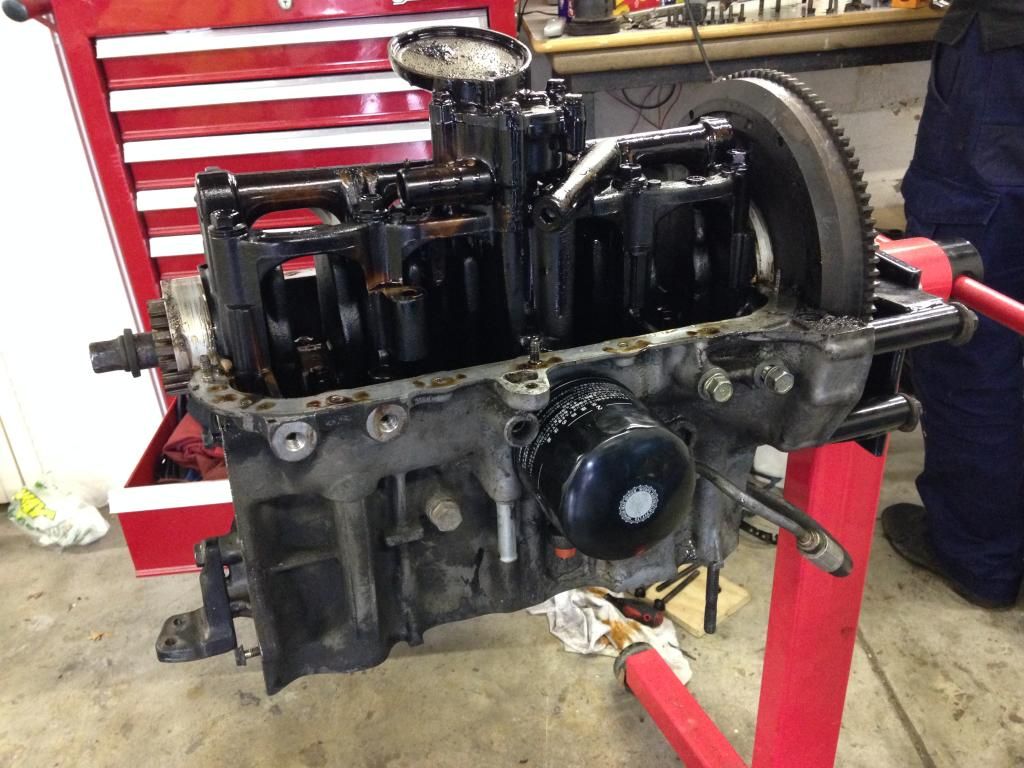
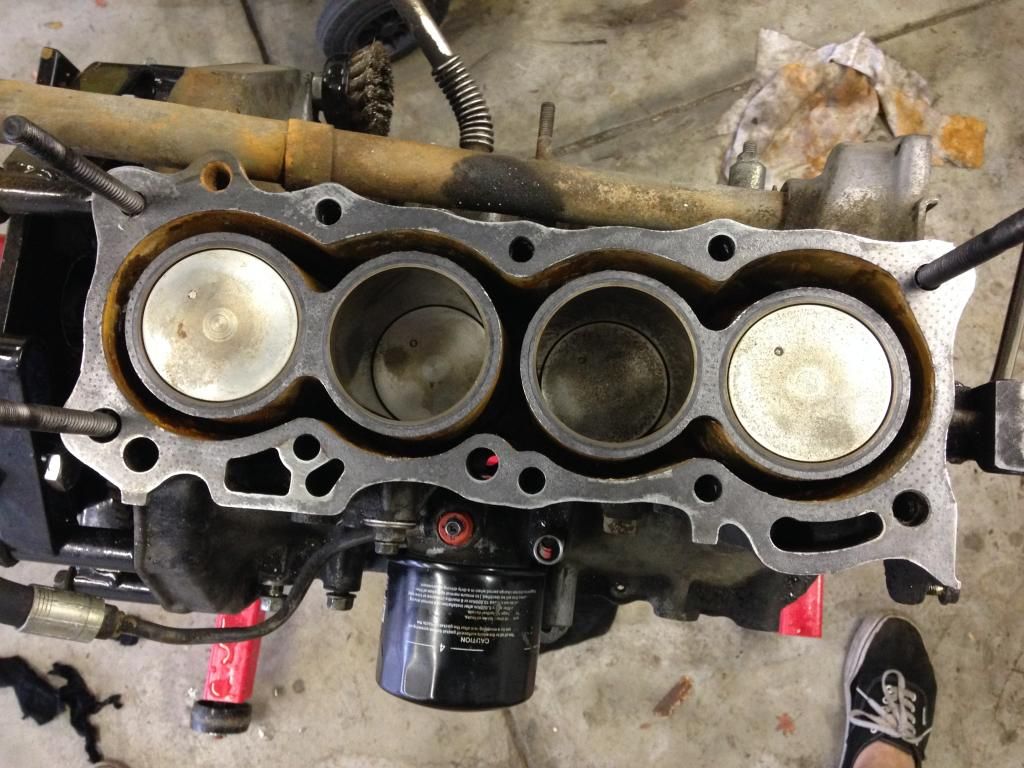
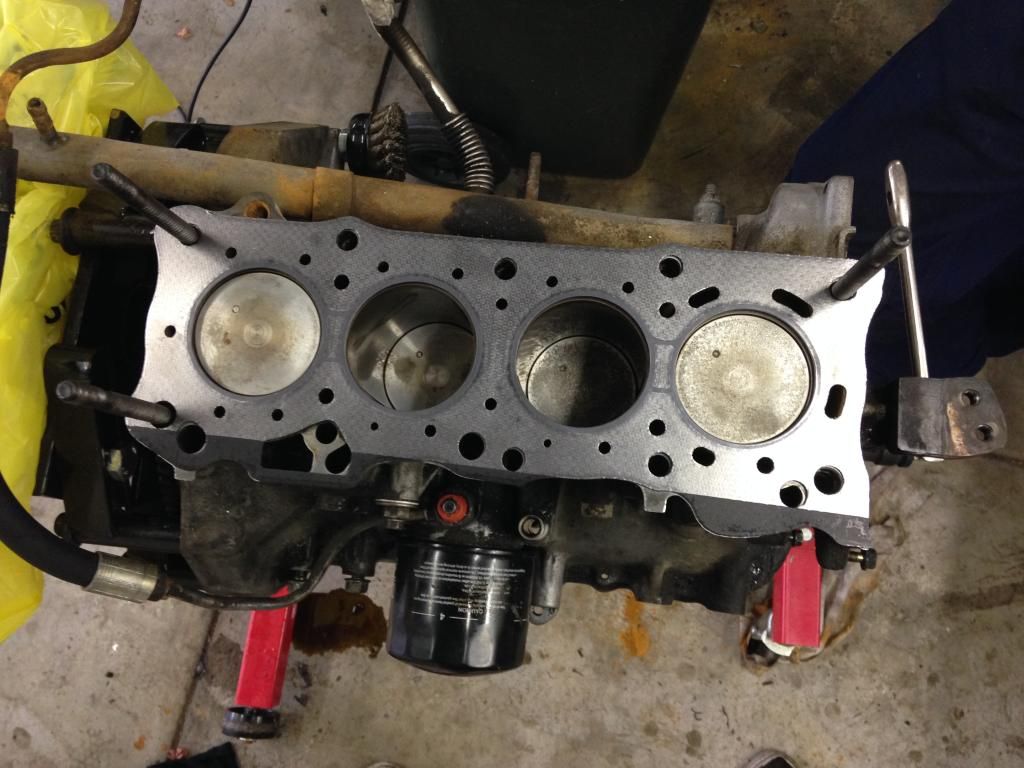
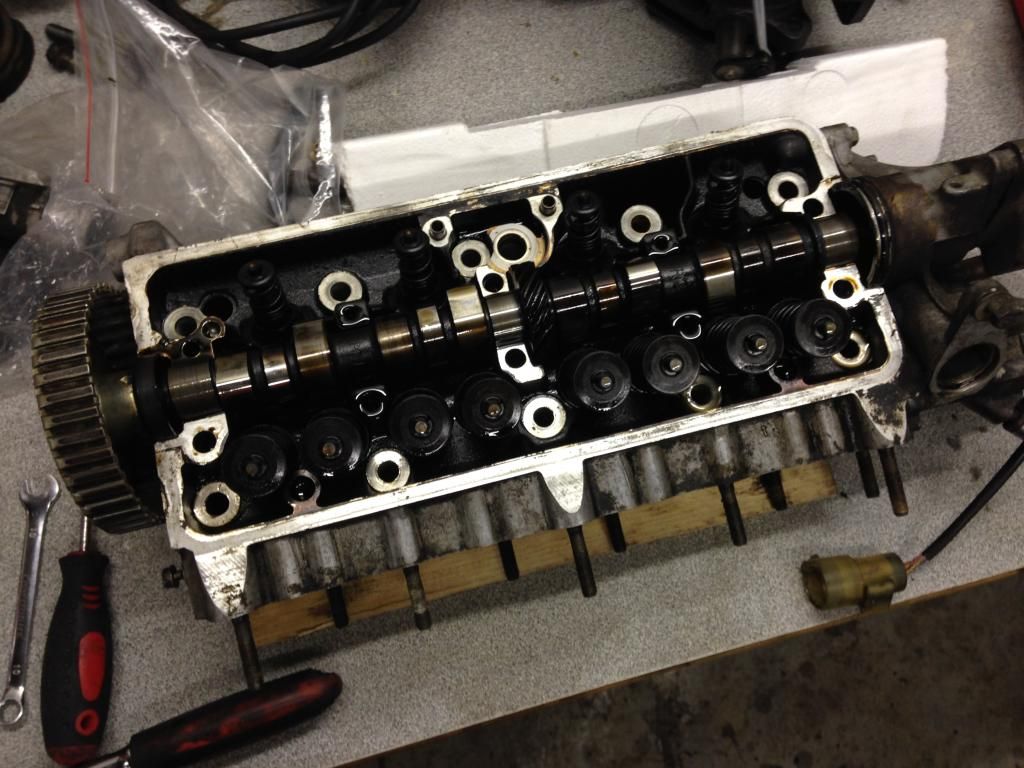
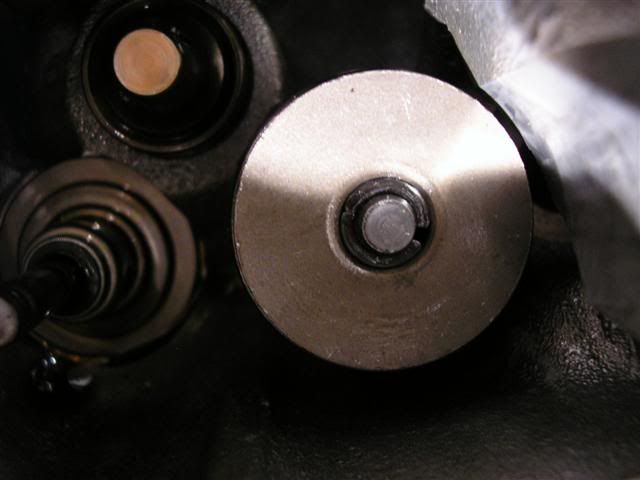
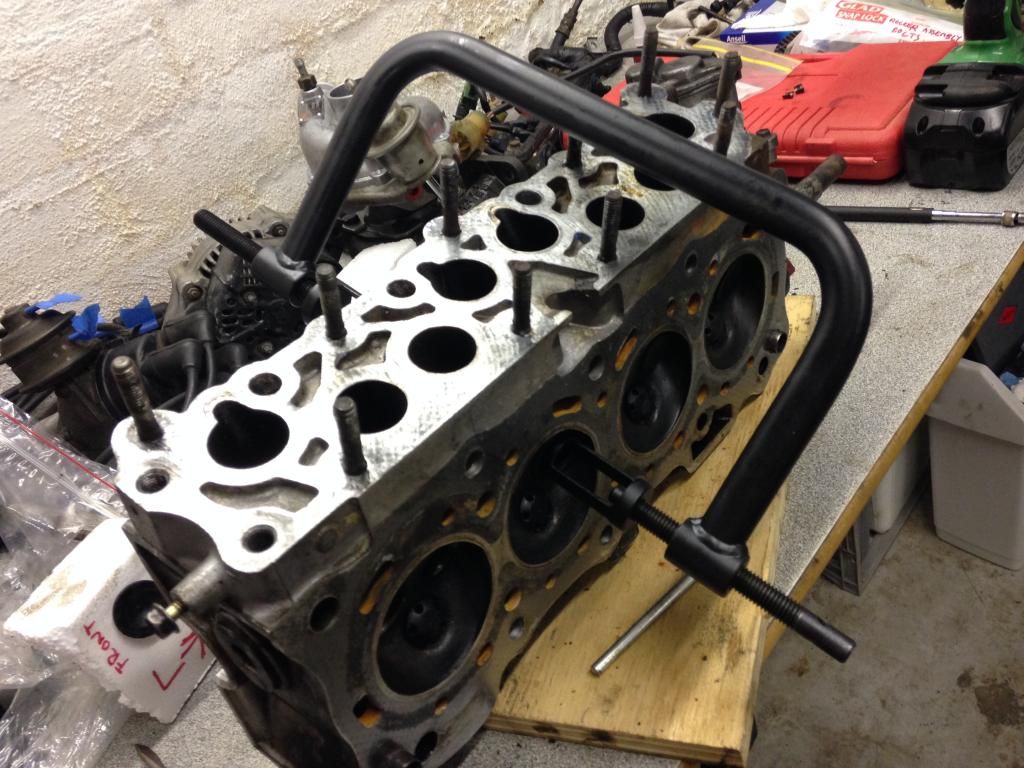
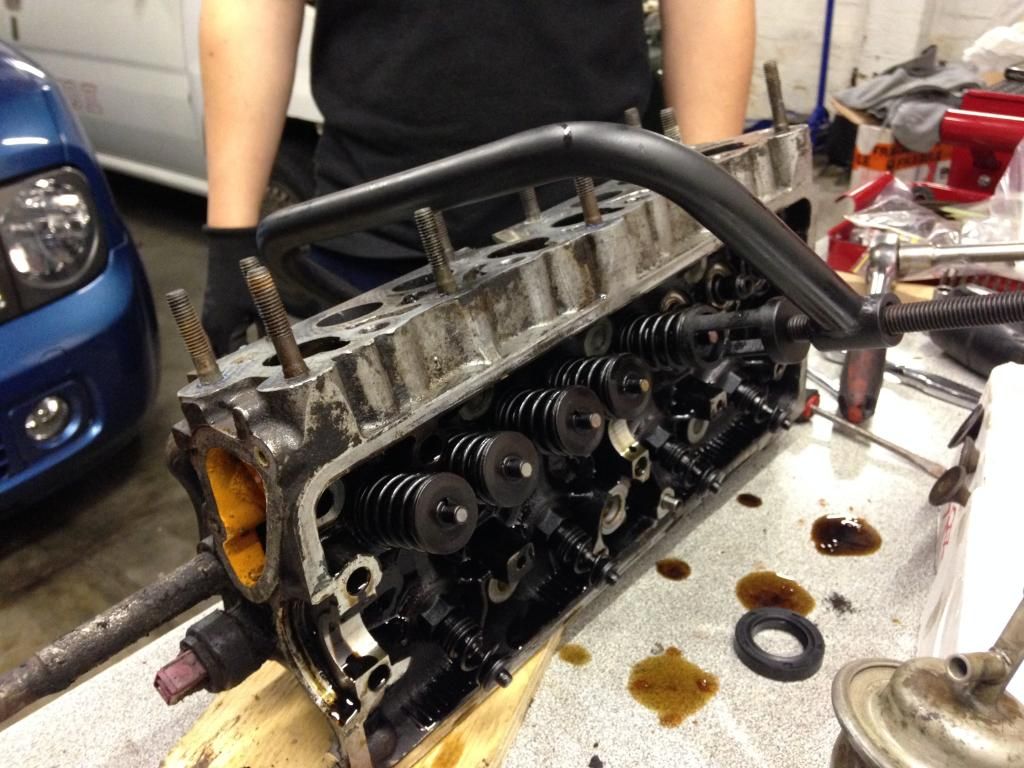
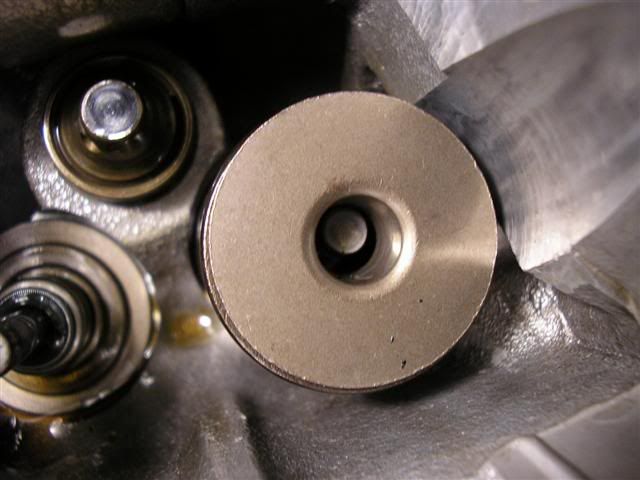
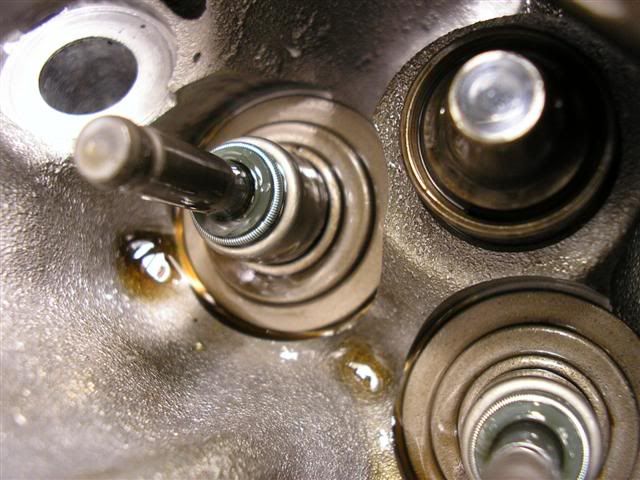
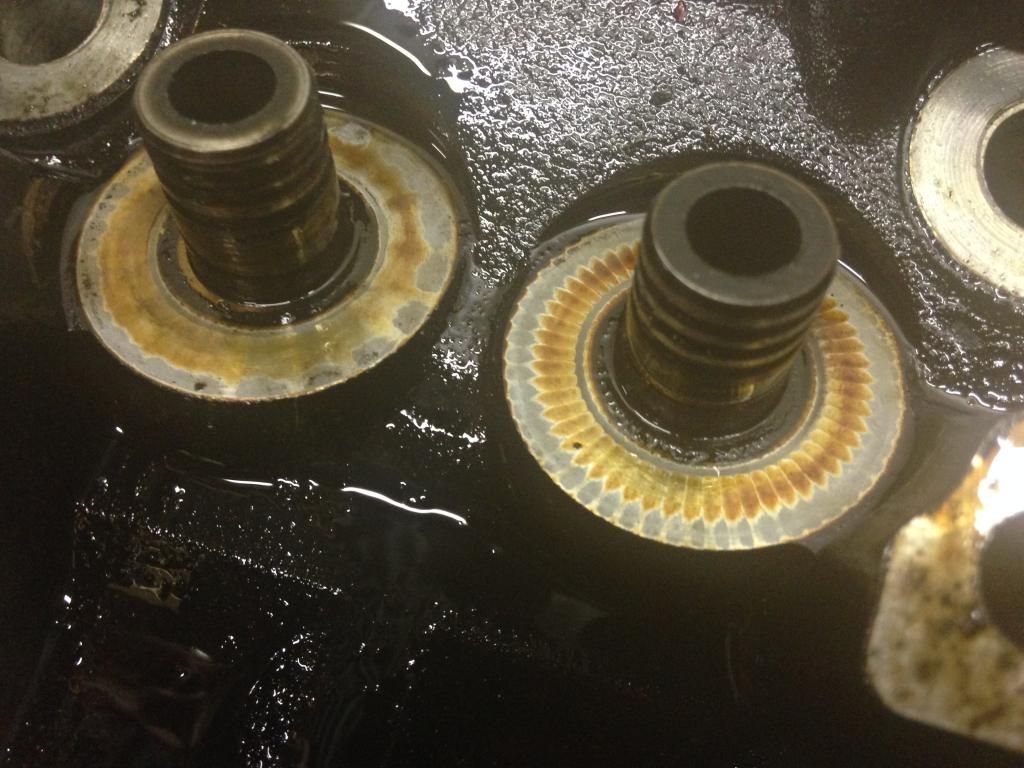
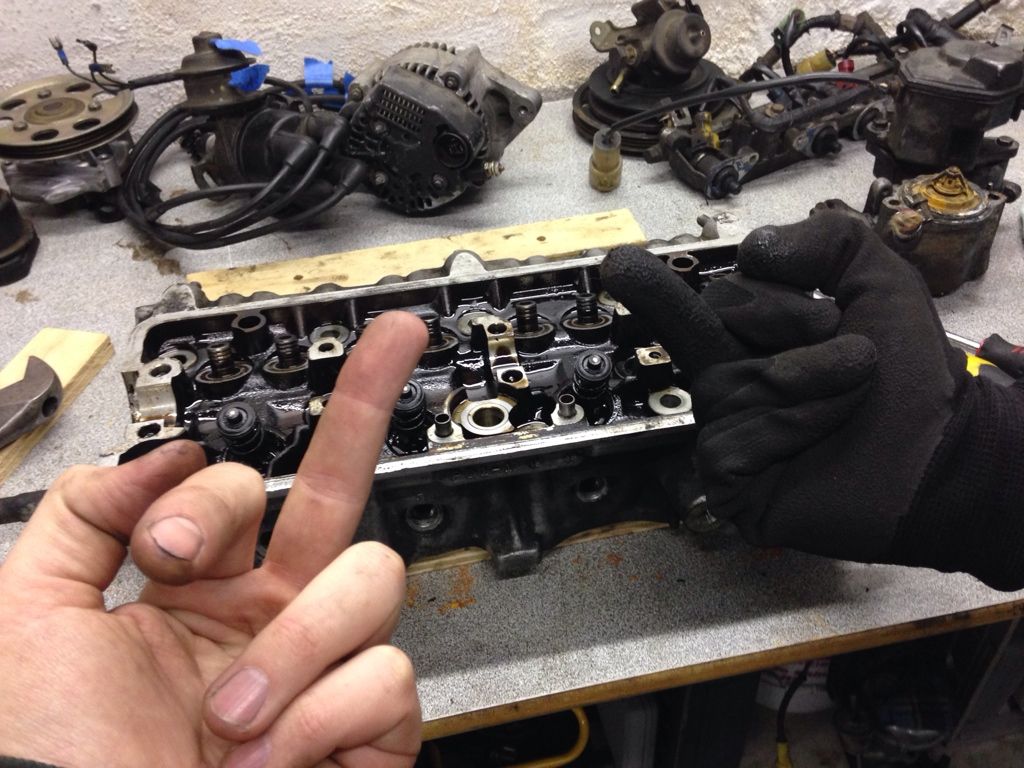
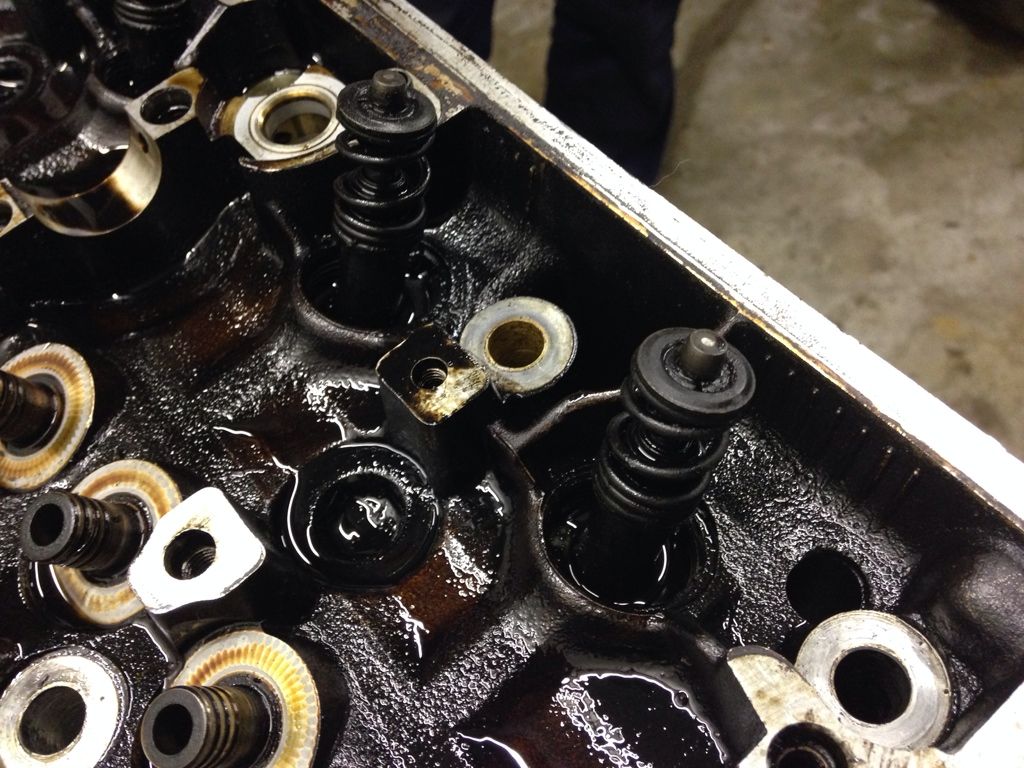
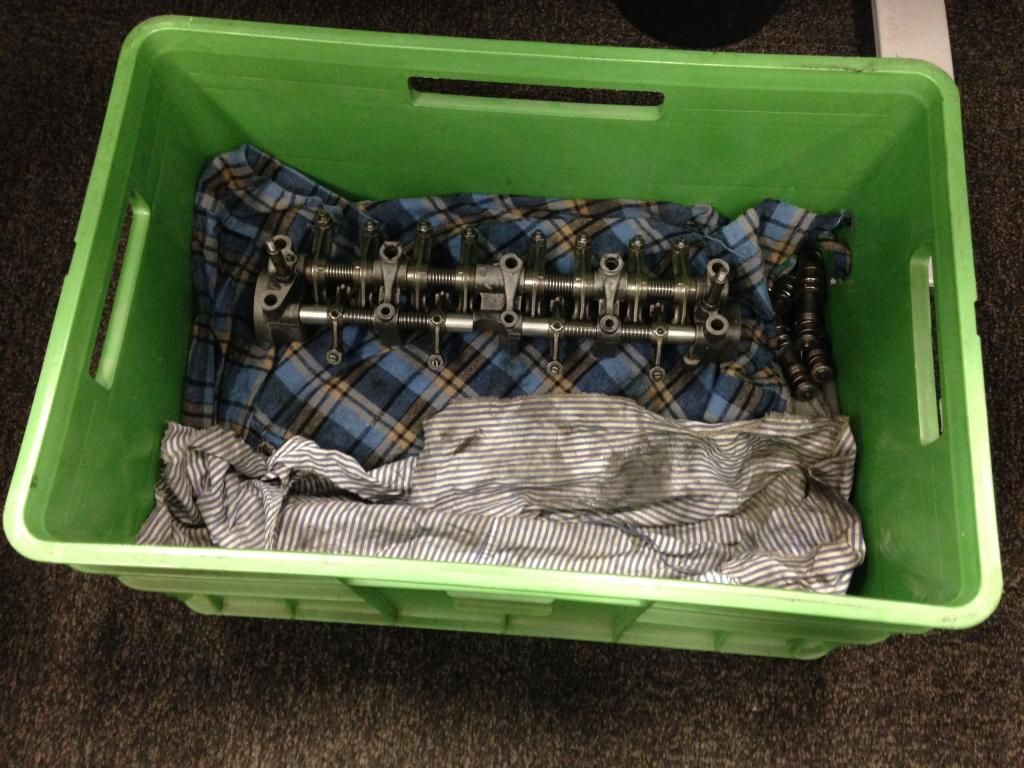
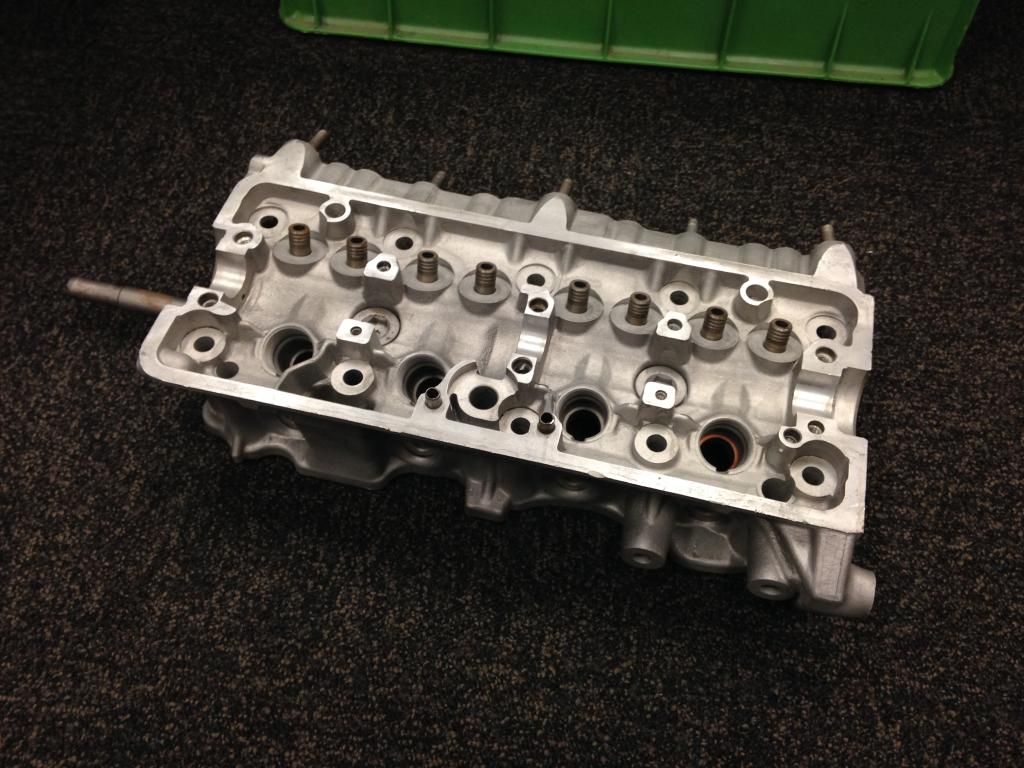
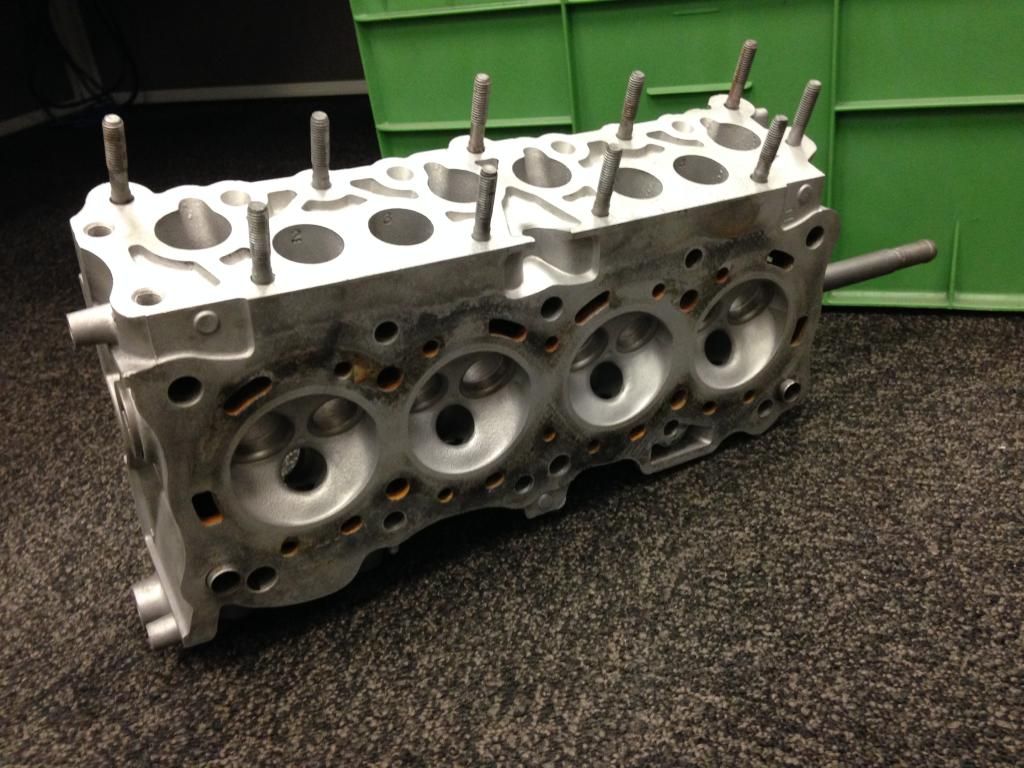
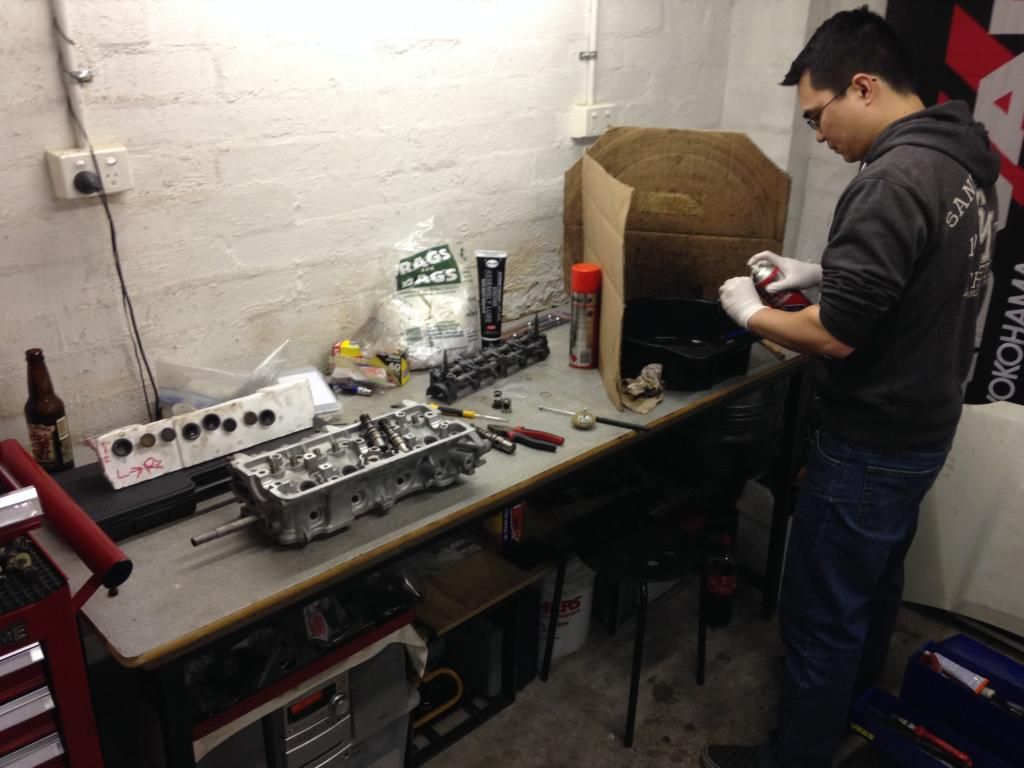
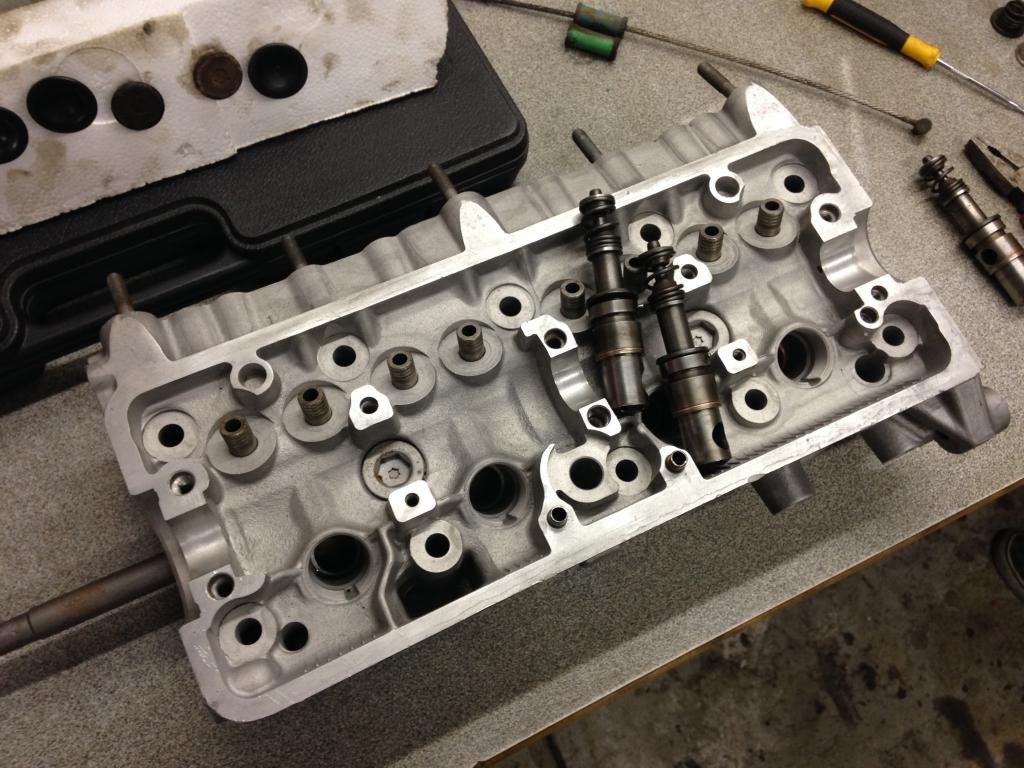
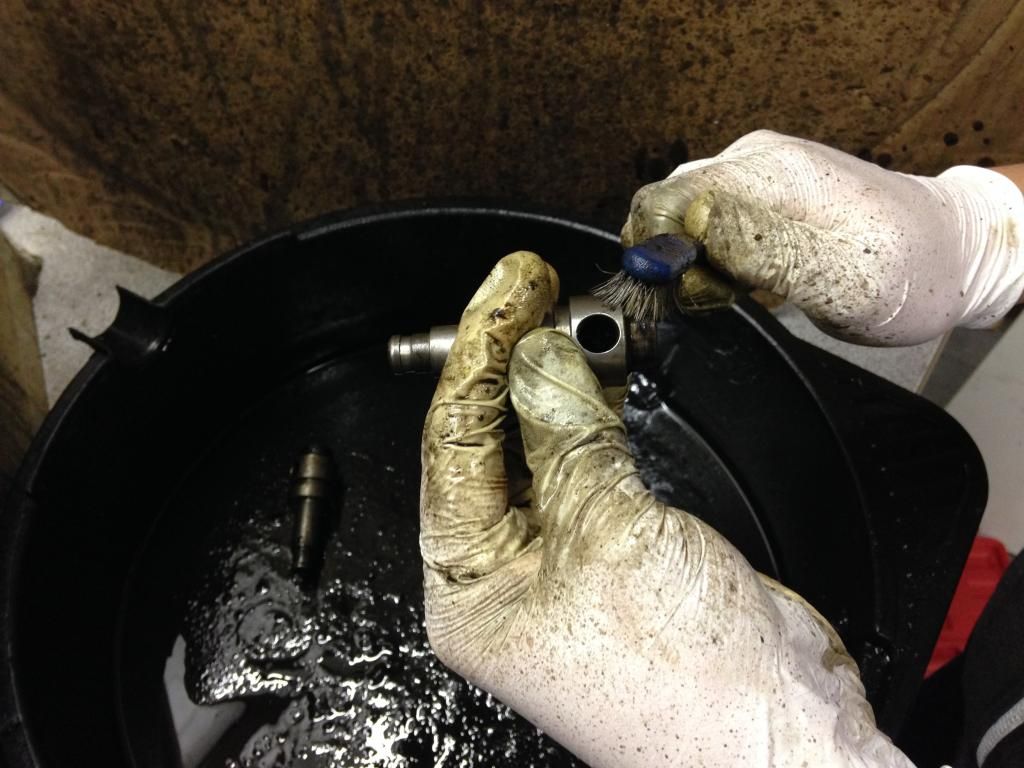
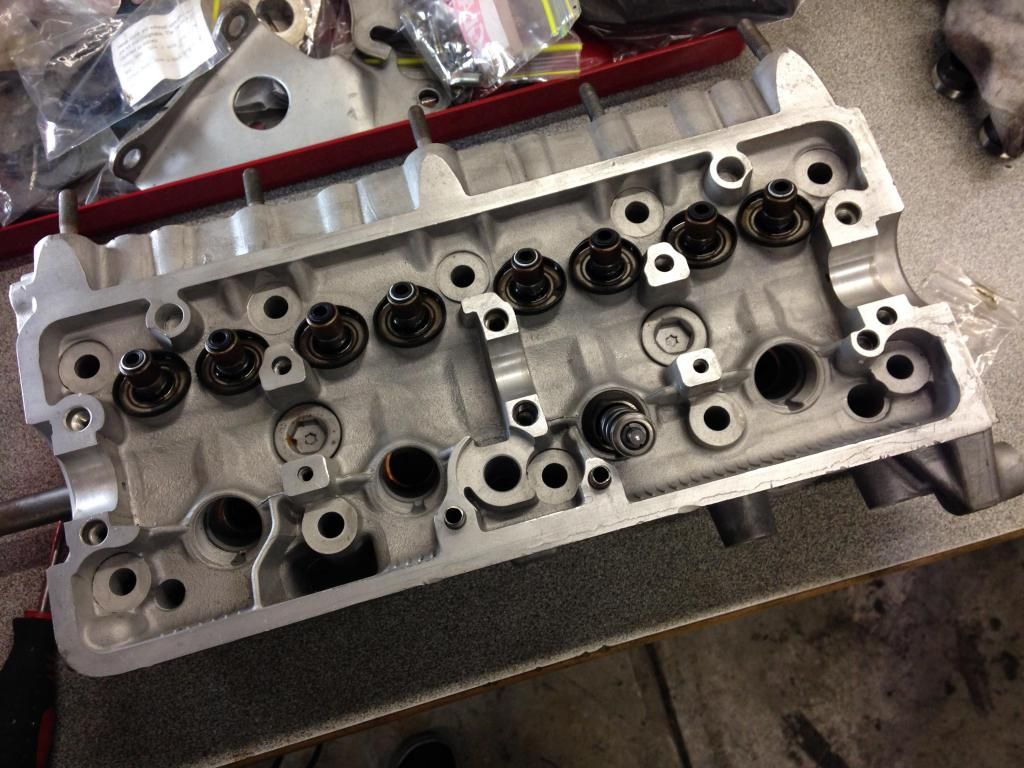
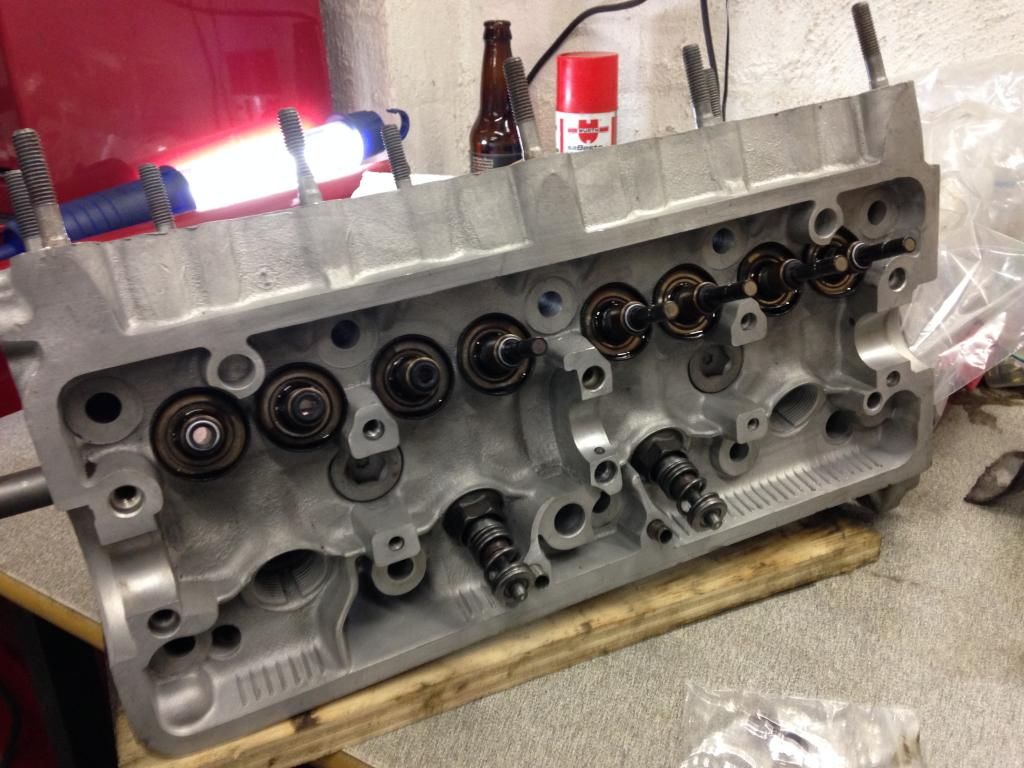
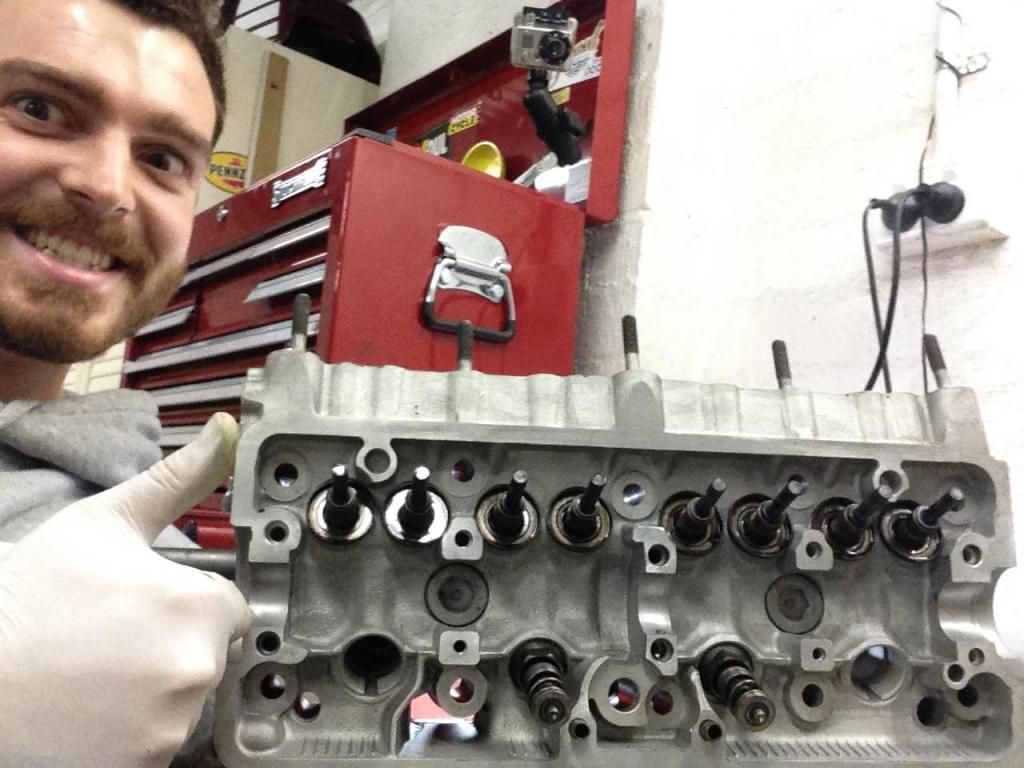
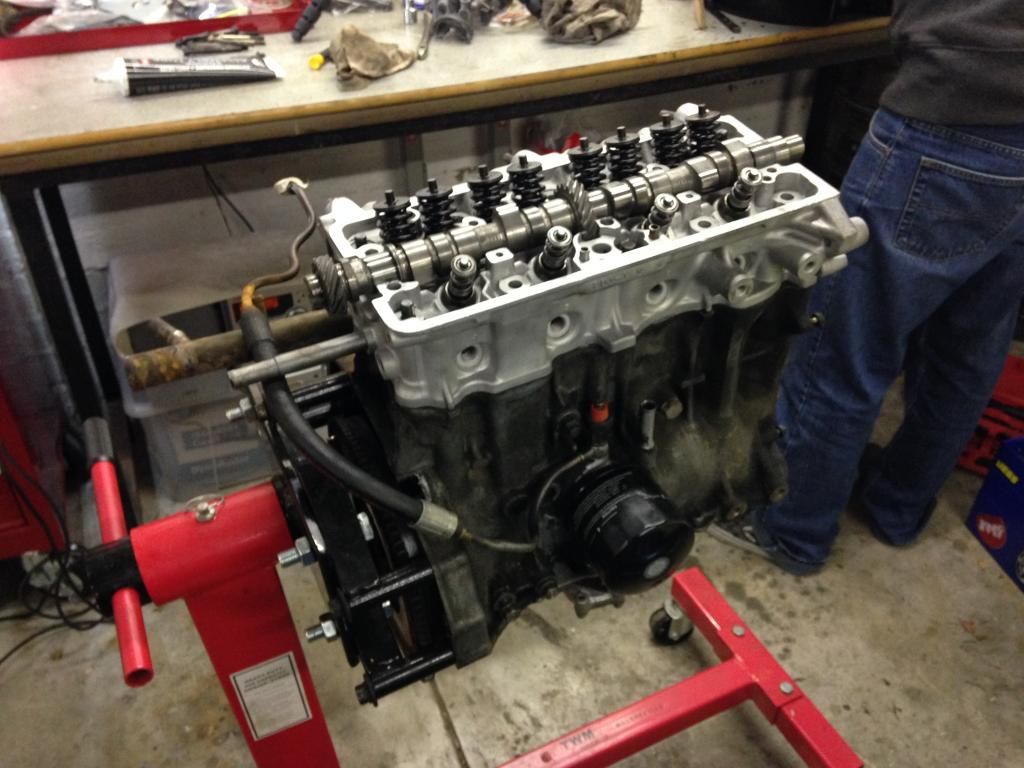
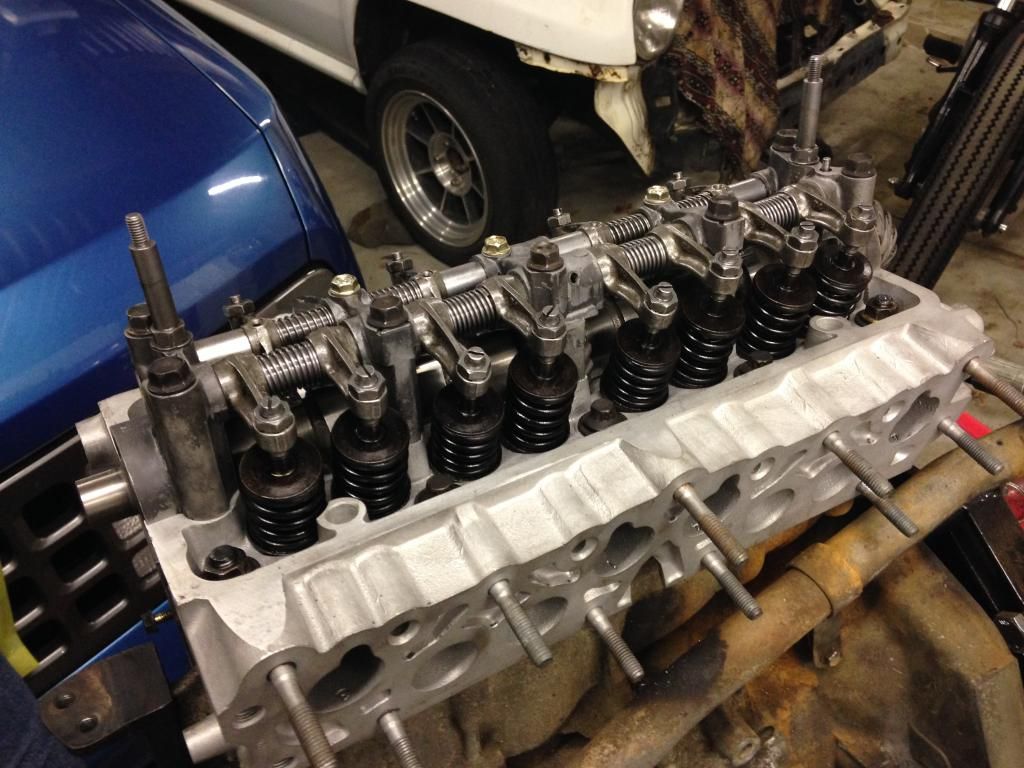
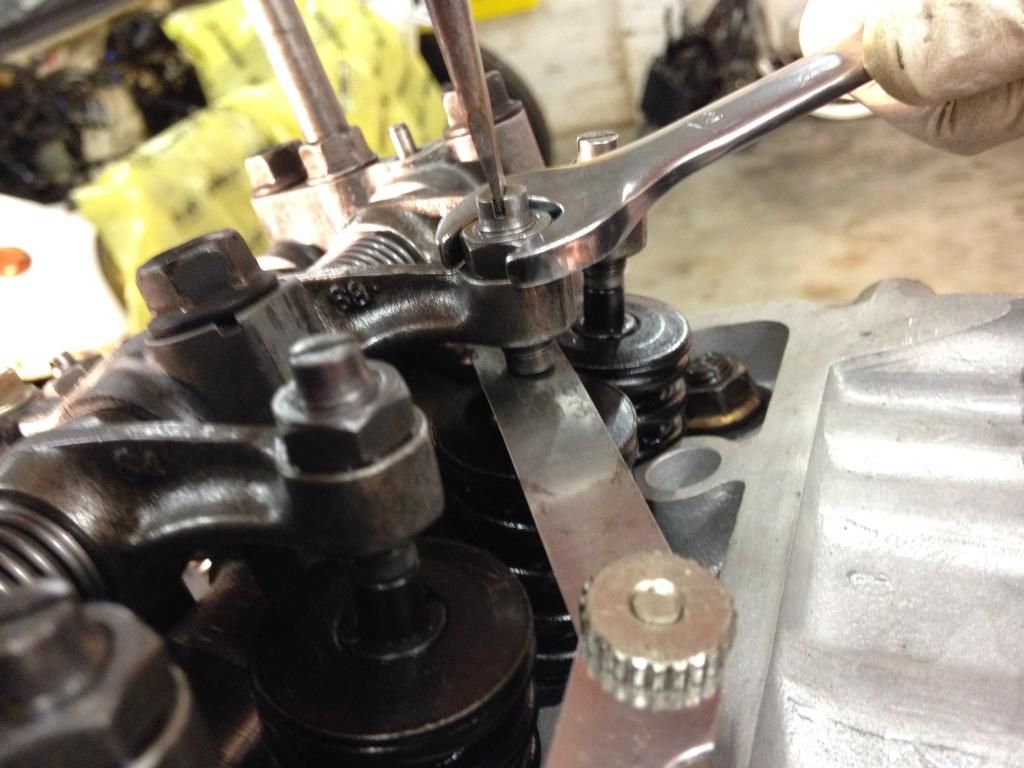
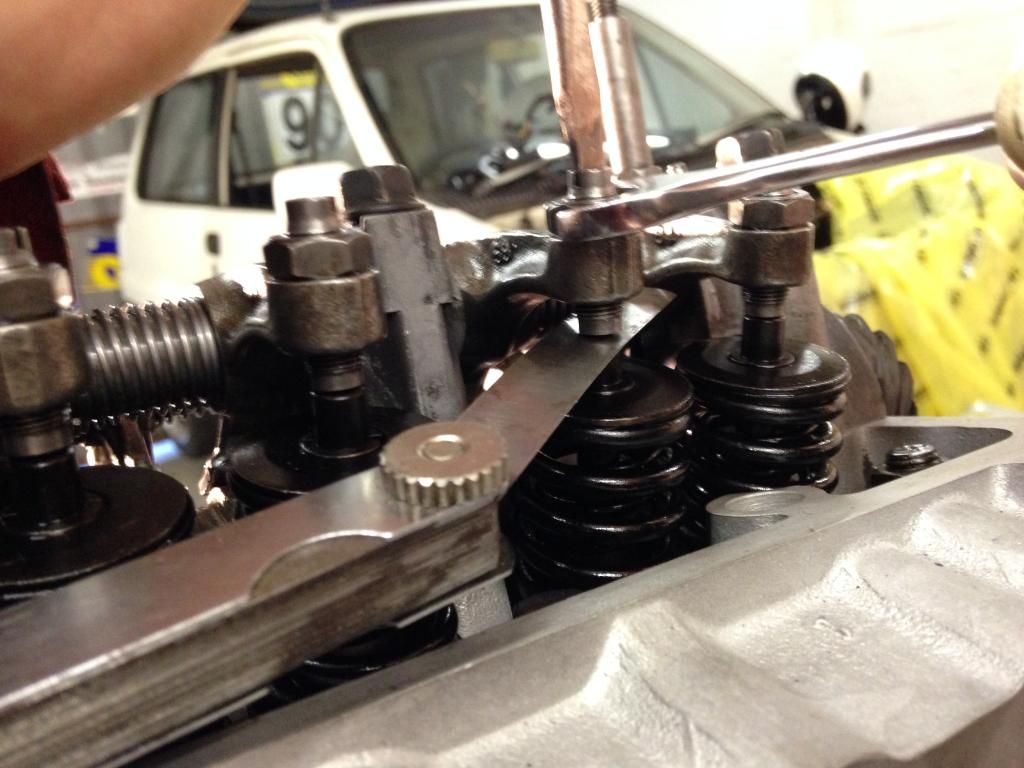
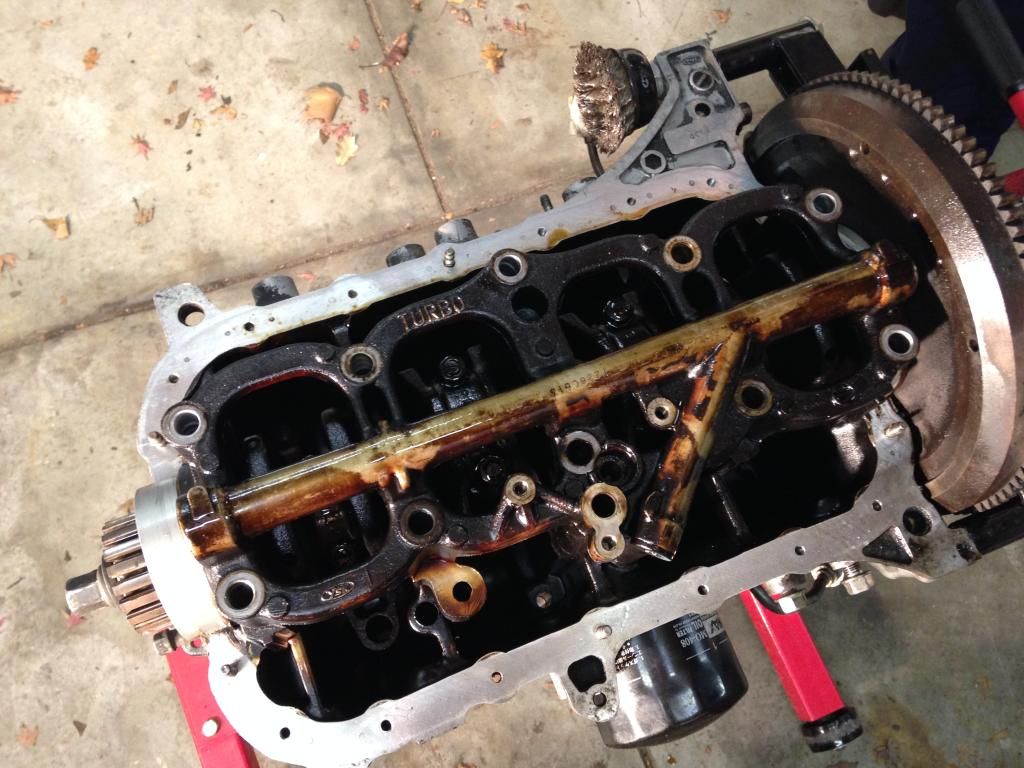
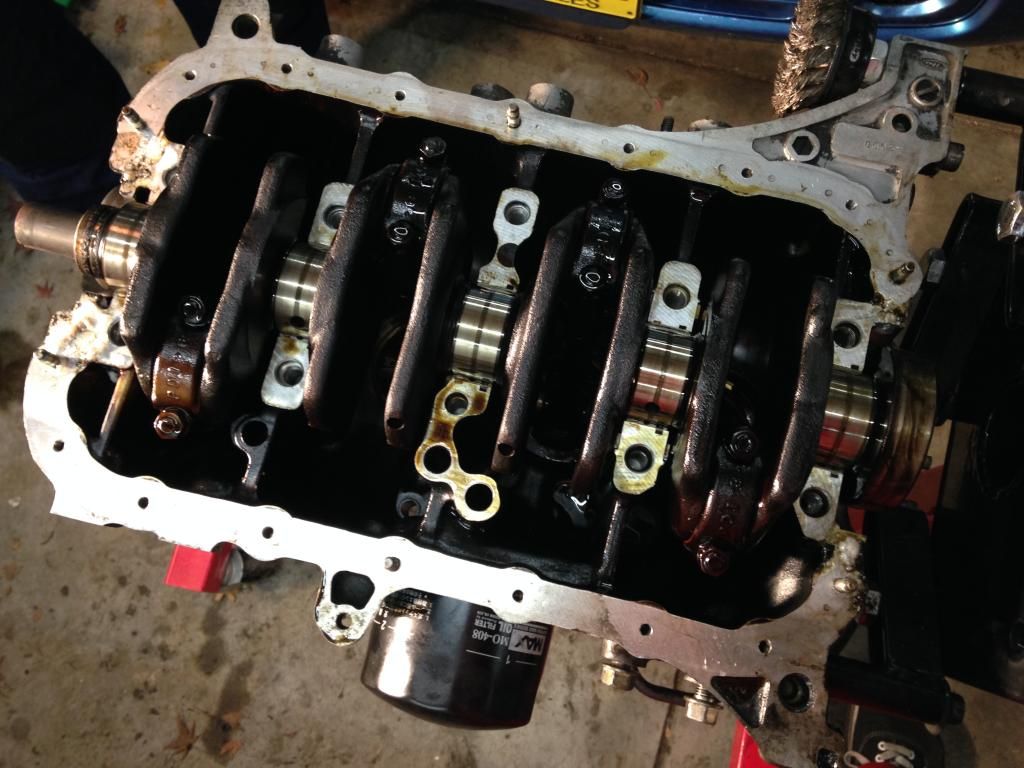
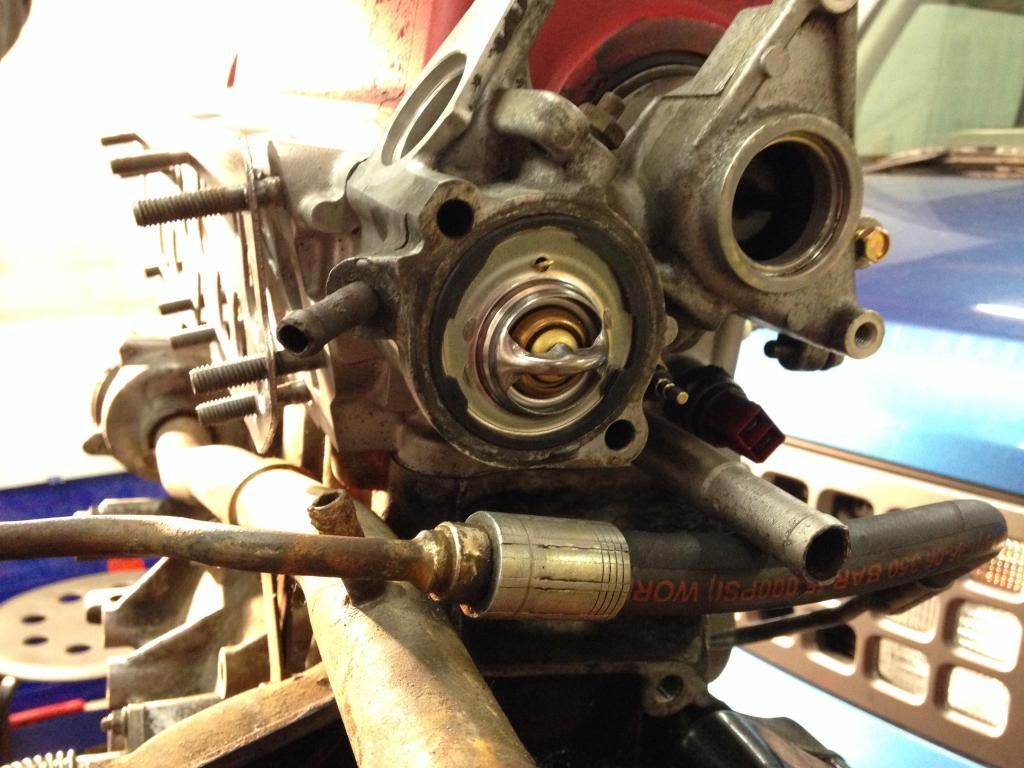
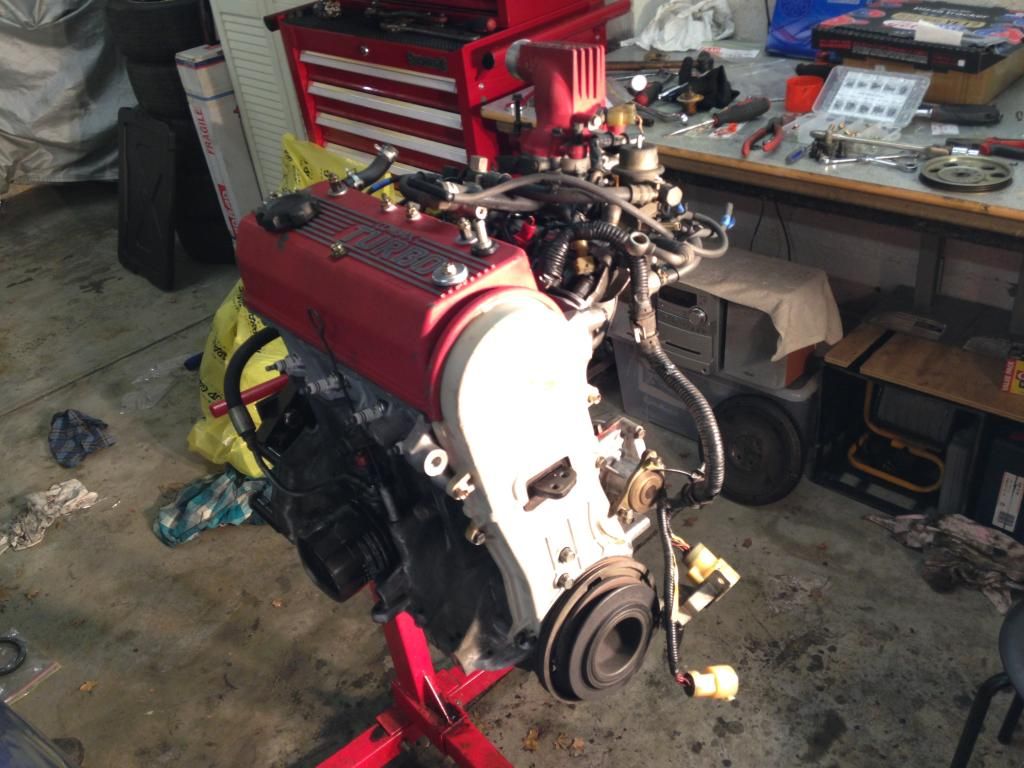
    I'd never had an engine stand at home before but I'll never go back now! So good to have it at bench height. The motor looks to be in pretty good order. We're told that it had good, even compression across all cylinders but there's a lot of caked on carbon under the valve cover. We don't want to commit to a total nut and bolt overhaul so we'll just have to see how it goes.


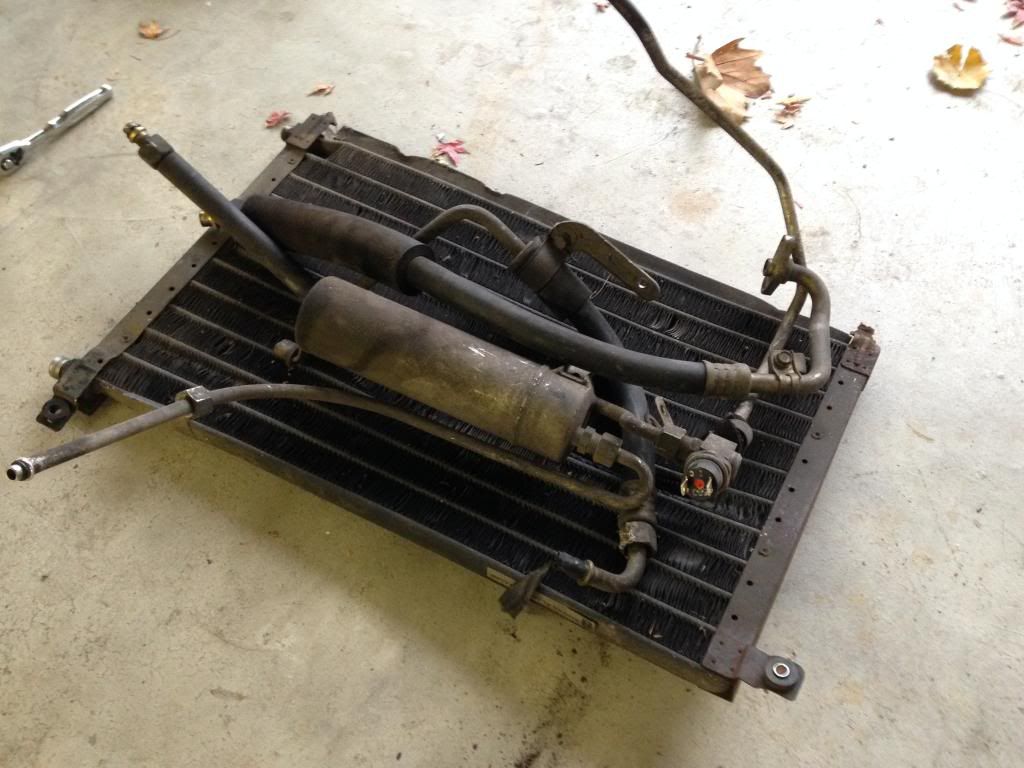
    The A/C stuff we've binned so far. The car didn't have a compressor in it when we got it. Removed a few kilos there.


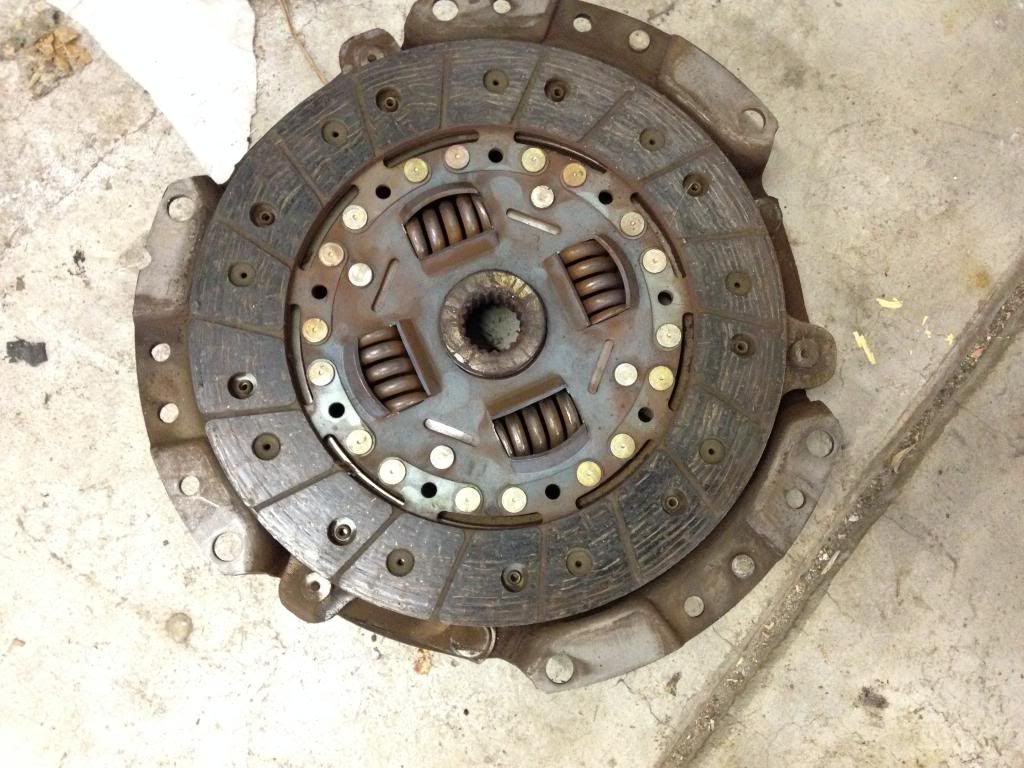
    Fairly sure this is the original clutch but it's good to go back in. Pressure plate and flywheel look fine too. I should also mention that this is a low budget build. We're trying not to get into it for more than the car will be worth when it's finished.


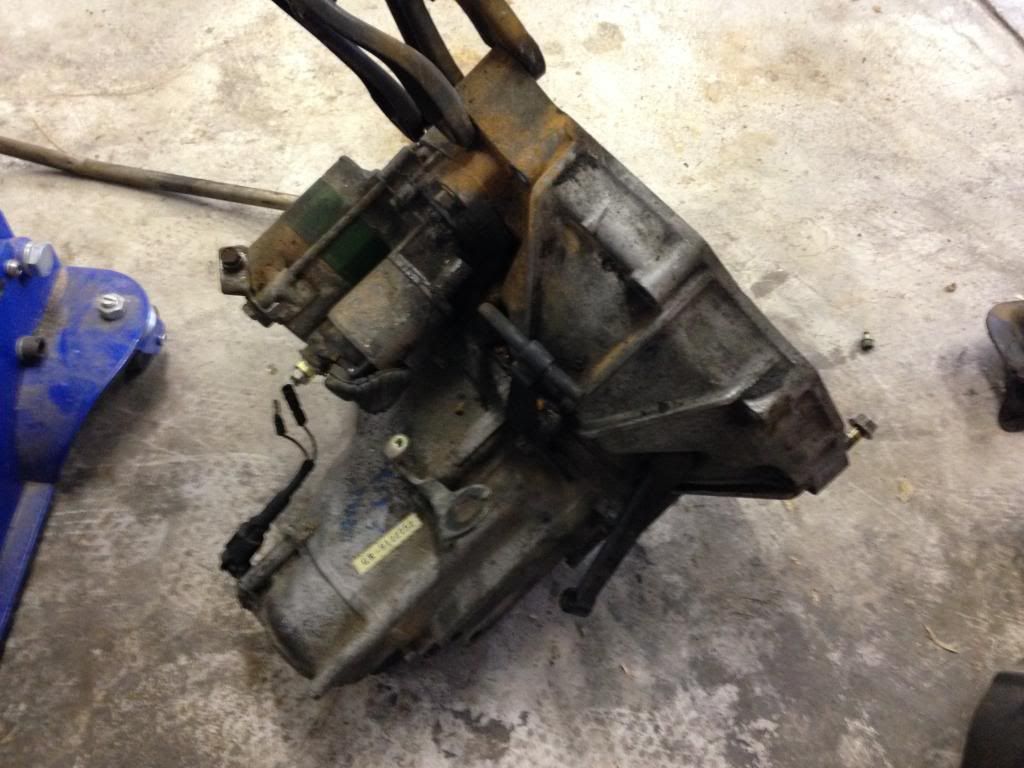
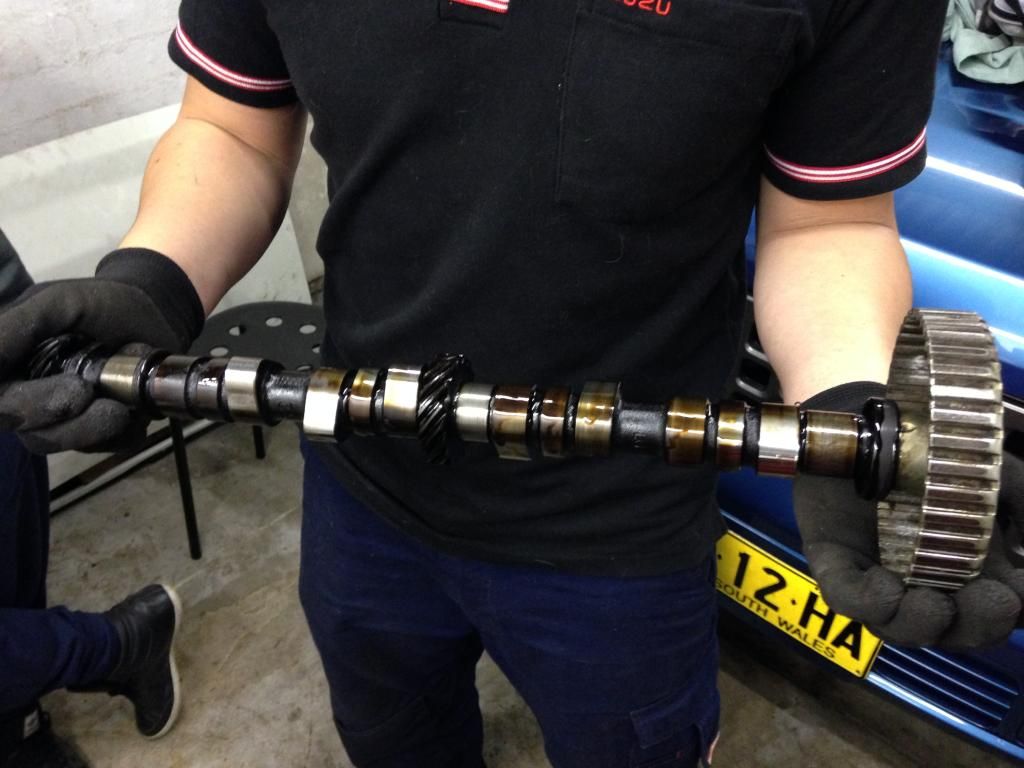
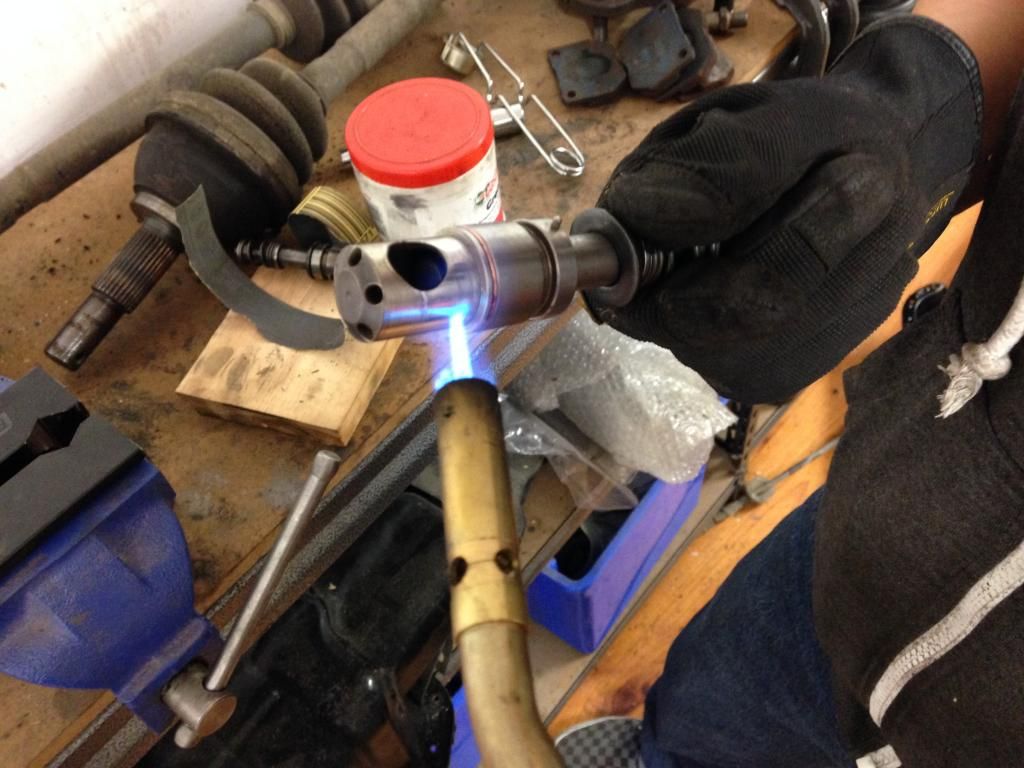
    Little five-speed 'box all looks fine. Throwout bearing needs to be replaced but that's it. City Turbo stuff isn't exactly dime a dozen but we've found stuff pretty easily in New Zealand.

    #2


    The interior served up a few laughs. These 'Admit Two' passes for Men's Gallery have to be a couple of decades old. They were stuffed into the refrigerated compartment (!) on the dash.


    We were happy to find this guy buried in the back! Original gearknob in good nick. I should've snapped a shot of the horrendous thing stuck to the shifter with Blu Tack when we got it. It was insta-binned. Also note the optional Citizen dash clock.


    Unforgivable banana milk vinyl shift boot over the top of the standard one! Ugh.


    ... yep

    Also: DIGIDASH


    So far all good! The front end has had a minor shunt at some stage (taco-shaped A/C condenser as a result) but the rad support and bumper reo are all straight.

    Comment


      #3
      Next up we had a win for the turbo situation with Project Honderp. How we were going to get this thing making boost again was worrying us from the day we got the car. The original ad on Gumtree said the car had a blown turbo and that it came with a replacement from a turbo diesel Pajero which would apparently work.

      I don't have any great photos of the Pajero turbo, but suffice to say it is waaaaaaaay too big to be re-purposed into the City, and different to the standard turbo in almost every conceivable way, from the physical size of it to the manifold flange and exhaust flange to the compressor inlet and outlet. No good.

      Back to the factory turbo and the ad was somewhat understated. It is beyond dead, as this video will attest.


      We did a bit of hunting for another standard turbo, which was fruitless. In our search we turned up a thread about adapting one from a turbo diesel Rodeo to the City. It's a relatively common mod (meaning 4 or 5 guys have done it, which is a lot in City circles) but it's a bit of a hack job.

      Eventually we concluded that rebuilding the turbo we had would probably work out best since a second-hander is likely to be flogged and in need of reco anyway, that's if we could find one.

      So I took the turbo to Advanced Turbo Performance. After a long chat with the bloke he went to his warehouse and miraculously dug out a bootleg IHI turbo with an identical core to our little RHB51. It was a real fluke. These little cores are fairly unique in that they don't use water cooling, just oil.


      Externally the dimensions were identical. The flanges for oil feed and return were the same, even the banjo bolt thread was the same, so we dismantled both on the spot.


      The new one is actually an RHB52 so the turbine and comp wheels are slightly larger than standard. Our old exhaust housing will fit with some machine work - enlarging the exhaust outlet to suit the larger turbine of the RHB52 - to create a perfect, bolt on, high-flow turbo. Score.


      You can kinda see the difference in size here. 3-4mm will have to be machined out of our housing for clearance. There's just enough material between exhaust outlet and wastegate.


      We're using the new RHB52 comp housing so that we can keep the bigger impeller and don't have to machine our old comp cover. Outside diameter of the inlet is a match for our intake piping, inside diameter is larger for the larger impeller. The only difference is the placement of the hose fitting for the wastegate actuator but a new bit of hose takes care of that.

      Since we have all the bits, we're just waiting on the exhaust housing to be acid bathed and machined and the whole thing reassembled at ATP.

      Since playing the waiting game sucks, I went on a trek to pick up an old high school science lab bench for my garage. That gave us space to start the engine tear down. We took both manifolds off and separated the throttle body and fuel rail.

      At some point a real amateur has been through this before and put it back together using all of the original gaskets. They've compensated for that with a liberal coating of gasket goo between every mating surface. For example, head - gasket goo - gasket - gasket goo - manifold. They would've gone through tubes of the stuff.

      Plan is to replace the head gasket and valve stem seals at least. We don't have a manual for this car in English but we're going to forge ahead. I haven't done a rebuild like this before so it's a great opportunity to learn. Hopefully it works out to be the project to do it on.

      It's a shame we've never seen the engine running to know what its oil consumption is like. Given the hefty carbon build up under the valve cover it seems to have a bit of an issue. Could well be piston rings but we're definitely leaving as much of the bottom end alone as possible. We just want to have some quick fun in this thing but it's so hard to let things slide!

      Since my garage roof leaks some water we had to cover the engine last night. You might think you're JDM, but you ain't this JDM. :P

      Comment


        #4
        Another weekend another wrenching session. Time to crack open the motor.


        Here's our valve train looking sorry for itself. Lots of caked-on carbon. We'll get this taken care of before we start the head rebuild.


        This rusty coolant stain on the back of the block sort of looked like it could've been from a blown head gasket. More likely the source was that vertical hose fitting on the bypass pipe where there's more staining, but we're doing the gasket anyway so off with its head.


        Crank pulley, water pump, tensioner and timing belt removed. No nasty surprises so far. Timing belt is okay but will be replaced while we're here.


        Obviously the motor has been sitting for a while judging by the gunky water level on the impeller. The water pump has been replaced at some stage and is fine to go back on after a clean.


        Little bit of shaft polishing. I'd never seen an oil pump like this. The shaft Tony is holding runs from the valve train down to the sump. There's a worm drive sprocket in the middle of the camshaft driving the oil pump via that shaft. I'll try to get more detailed photos later.


        Head bolts out ready for lift off.


        Voila. The crusty old head gasket was definitely worth changing. No sign of a blowout but the water channels were collecting rusty build-up. Carbon on the pistons wasn't too crazy for an unopened motor from 1987. I'm still amazing by how advanced this thing was for its time. As you can see the block is open deck, and the lengths they went to for weight saving are amazing - the head is 60% titanium and the valve cover is magnesium all for the sake of lightness.


        All cylinder bores are in good shape. No scoring and the original crosshatch markings still visible.


        Head gasket still intact but it definitely feels like we made the right choice to replace it while we have the motor out.


        Base of the head. We haven't touched this yet.


        Sump off for inspection. Ew. How about the state of that oil screen?


        Diabolical. All of this grit is a bit mysterious. We got some more photos of it that I'll dig up. I originally thought it was bearing material from the turbo that had found its way down the oil drain into the sump, but it's not metallic, almost seems to be pulverised plastic or something. We thought it could've been a rogue valve stem seal, but they're all accounted for.


        Plenty more grit lining the sump.


        Overall the bottom end is looking fine. No other demons hidden inside. We should be good to go after a proper clean, new rear main and crank seals and a new sump gasket.


        It says TURBO, so you know it's good.


        Tony at our make-shift degreasing station.


        Working on the PCV baffle from inside the valve cover.


        All cleaned up.


        Tony's wonder job on the oil pump. The whole unit was dismantled into its individual components and thoroughly checked. Thankfully non of that grit made it past the oil screen.


        Looks brand new!


        Remember that rusty water pump? Well it came up pretty good too.


        Gasket on ready for the head to be mounted.


        The next thing to be tackled.

        Comment


          #5
          Max boosties arrived. Looking good. The machining is nicely done. They even honed the mounting flange on our old exhaust housing as well. Brand new core and compressor housing, with our original actuator and exhaust housing machined to suit the larger turbine wheel.


          Comment


            #6
            Next up we started the head rebuild. We're replacing valve stem seals, cam seal, bunch of other seals, gaskets and washers and the thermostat. The head, rocker assembly and camshaft will all go off for hydroblasting.


            First thing to remove is the rocker arm assembly. 10 easily accessible bolts hold it down.


            Despite all the grit in this engine the wipe surfaces look really good.


            Here's the head on the bench sans rocker assembly. Camshaft is next. The only thing holding it in is the cam angle sensor and thermostat housing which are combined into one bulky unit.


            No problems with cam lobes.


            Journals for the cam are spot on. Now we're down to the valve assemblies.


            This illustration relates to Honda B-series engines, but it's near identical to the City Turbo. If you've never removed valves before this photo should help you to understand the procedure as outlined below.


            I borrowed photos from another head rebuild thread to help explain. This is a close-up shot of the valve assembly. Those little half-circle 'clips' are the valve keepers. They jam in between the valve stem and the spring retainer so that the assembly works in unison. Those little keepers are what we need to remove in order to separate the assembly.


            There's a couple of different valve removal tools out there. If you're gonna do this with the head out of the car, get one of these g-clamp style devices. With this type of tool you can wind the valve spring down and access the keepers before you release the spring tension. Obviously it'll only work if you have the head on a bench so don't buy this type if you want to do stem seals with the head still in the car.


            One side of the clamp sits on the spring retainer ...


            ... while the other side sits on the face of the valve.


            As you wind the clamp closed, the spring compresses and the valve keepers pop out. Use a telescopic magnet or a similar to catch them.


            Here's what it looks like with the keepers removed from the middle of the spring retainer.


            Take off the retainer and here are the springs (inner spring and outer spring).


            Slide off the springs and there's your valve stem seal and the valve stem itself. Push down on the valve stem and pull the valve face from the combustion chamber side. The valve will slide through the valve guide and out of the head.


            Eventually your head will look like this with all valves removed. Note that our City Turbo head has a third perforated 'valve face' in each chamber. There's a better picture of one above. In actual fact that isn't a valve face at all, it's a fixed cup that doesn't move. This is Honda's CVCC system.

            Honda CVCC engines have normal inlet and exhaust valves, plus an extra, smaller 'CVCC' inlet valve. There are three butterflies in the City Turbo throttle body, the smallest one houses a fifth injector that leads to a separate set of intake runners. These runners provide a relatively rich air–fuel mixture to a 'prechamber' under the CVCC valve. This chamber also houses the spark plug.

            While this is happening, a leaner than normal air–fuel charge, not easily ignited by the spark plug alone, is drawn into the regular cylinder combustion chamber through the main inlet valve. The volume in the prechamber, near the spark plug, is contained by the small perforated cup. Upon ignition, flame fronts emerge from the perforations and ignite the remainder of the air–fuel charge.

            This allows stable running, yet complete combustion of fuel, thus reducing carbon monoxide and hydrocarbon emissions. This method allows CVCC engines to burn less fuel more efficiently without the use of an exhaust gas recirculation valve or a catalytic convertor, although ours is late-model CVCC-II motor with a cat converter added to further reduce emissions.


            So, we have new stem seals for these little CVCC valves as well. To remove them we can't use the clamp tool as there's no access to the valve face. There's a threaded nut locking them down which we can remove, but the rest of the process is delicate. We'll cover that when we get to it another day.


            Stem seals all exposed and ready to be removed.


            A set of pliers had to do in the absence of a proper stem seal removal tool .


            Close up of the naked valve guides waiting for new seals. Thankfully they're in great condition, no rattling of valves in guides at all. Every second spring seat has left a pattern like this one, but the ones with the pattern aren't all exhaust or all intake so that's interesting.


            Here are our spring seats, springs and retainers awaiting clean up.


            And our valves which will get a once over.

            Comment


              #7
              During this build I've done what I think everyone does, and spent a lot of time trawling through Google looking for photos and inspiration. I stumbled on an unbelievable Japanese website filled with everything Honda City. It just might be paradise. Buried deep within one of many sub-menus I found these photos. Probably the best vintage livery I've seen on a City Turbo.

              For those unfamiliar, there was a single make race series in Japan for the Honda City Turbo. The cars ran a whole mess of Mugen upgrades: camshaft, ECU, injectors, boost control (22psi), oil cooler, suspension, side exit exhaust, gear ratios, LSD, six-point cage, race seat, acrylic windows, fuel cell, body kit and wheels (F: 13x9.0, R: 13x7.5).

              As far as I know the series only ran for two years. Most of the cars were then purchased by an Aussie entrepreneur looking to move the series here. Sadly the cars were destroyed when an earthquake struck Osaka in 1995 and the warehouse they were stored in collapsed.

              This car, No.18, ran in the single make series but wasn't part of the group destined for Australia. It was found behind a workshop in 2001 having lived most of its life outdoors.


              Another one of my favourites.

              Comment


                #8
                So then the same guy who loaned us the CF-48s bought another car and needed more room in his shed. This happened:


                Don't know what we're going to do when it comes time to buy new tyres and get this thing on the road but test fitting these will be fun.

                Comment


                  #9
                  Somewhere in amongst all this my friend Anth took some photos and put up a post about us on build-threads.com which was cool.


                  Before we could send the head off to be cleaned up we wanted to get the four CVCC valve assemblies out of the head. They had other ideas.


                  We tried a few approaches to get the damned things out. No dice. They should be able to move freely once the big locking nuts are removed, but it seems the build up of carbon has properly baked these suckers into the head.


                  So we've sent the head off to be cleaned with the valves still in there and hope they're easier to free after that. It's the best chance we've got. The cleaning is being done through a bloke I work with which makes life easy.


                  Next I went and pinched a bunch of parts off the white Honda City in the background of this photo. It's about to be scrapped by the guy who owns the silver one but it has lots of stuff we can use. We really needed the handbrake cables, which I got, along with black interior bits and a few other spares.


                  We actually saw this silver car for sale on Gumtree a while before buying the one we've got now. Overall it's quite clean but the paint job is very backyard spec. Cool car, though. Note the rare CF-48s with aero discs.


                  He's got a third City being built up for Nugget Nationals down here. Those wheels on it are original Turbo II items off the silver car. There are more goodies to be had on the white car, so we'll get back there before it goes to the wrecker next weekend.

                  I did a quick test with the Streets. They're 14x6+20 and 14x6+0. Kinda bummed they're not all +20 offset, the +0 pair are just a little too aggressive on the back. I'm not giving up yet. There might be more negative camber to be had since it does feature IRS.


                  There's more room if I flip them front to back but the faces are different. The +0 rears are a little bit concave whereas the fronts are flat. I feel like it's weird to have them the wrong way around, although the race cars were set up that way.


                  This is the interior I wish we had. Red carpet (before Type R was a thing), black plastics and that rad stereo blanking plate. Ours will be kinda like this albeit more stripped out, no carpet, etc. The interior that came in the car is totally shot so it's all gotta go.


                  We've got some neat stuff to go in like a suspended single DIN unit that replaces the centre console and a rubber shift boot that works with no carpet. Should look cool.


                  Yuck.


                  World's largest ECU?


                  Race car. We used bits from the parts car to fix our broken handbrake and dropped the fuel tank to replace the pump. Getting there.

                  Comment


                    #10
                    Realising how much of the parts car we could use, we went back for more pillaging. Things like a bonnet release cable, the dashboard, spark plug leads, passenger door handle, radiator and gear selector linkages.


                    The car's cracked windscreen had been leaking water for a long time. It was pretty disgusting in there.


                    One thing we really needed was the gear selector link. Ours is badly bent but this one is dead straight. Unfortunately getting it off the car was a monumental pain. It attaches to the gearbox fork selector with a roll pin aka the bitch pin. This one was extremely resistant to being driven out with a punch and hammer, and ate through two drill bits without giving up.

                    Solution: get an angle grinder and cut it off from the gearbox side.


                    Nice glasses.


                    Tony took the link home and used a hydraulic press to get the roll pin out. Great success.


                    We got a tip off that there was a mostly complete City in a wrecking yard not far away.


                    The interior was in really good condition, and the driver's side door handle was perfect - a major bonus. We've been having trouble finding a handle that isn't broken (weak design) so this was a win.


                    We've got a pretty good collection black interior bits accumulating on the floor of my garage. Still need to find a pair of front seats we can use.


                    Overnight parts from New Zealand: air filter, thermostat, sump gasket and alternator belt.


                    The other bloke rebuilding this car with me is a stickler for cleanliness. He loves to make dirty things look clean again.


                    Here's a before photo of ...


                    ... the green bar on the right, which braces the shifter to the gearbox. Good as new.

                    Comment


                      #11
                      Head, rocker assembly, camshaft and CVCC valves arrived back at work.


                      Apparently this was a real prick of a job. For the bargain price we paid, I couldn't be happier.


                      Best thing about it is that old mate removed the CVCC valves for us. We'll get the valve stem seals swapped and fit these assemblies with new o-rings and copper washers ASAP!

                      Comment


                        #12
                        I had some brand new decals cut for the Turbo II. There's an Aussie-based forum for these cars just called CityTurbo.com. It's quiet, but the tech info in there is amazing. Someone even uploaded all these decals as EPS files so getting them made up was too easy. After the paint is cleaned up we'll stick these on. Should look mint.


                        We're almost up to date now. The time lapse video below isn't as action packed as I'd hoped, especially because the GoPro ran out of battery right as we started torquing the head studs. Still, check it out.


                        I tried to take pictures as we went.


                        Started out with the clean, bare head.


                        We hadn't been able to remove the CVCC valves before it went to be cleaned so we had to fit new seals and washers to them before we could start rebuilding.


                        That required fire.


                        There was so much built up carbon that we couldn't separate the perforated cups at my place. We made a trip to Tony's and used his propane torch.


                        Here's one CVCC valve dismantled and cleaned, add a new valve stem and the valve keepers to this and you're ready to reassemble.


                        Here's a finished one with new rubber o-ring.


                        A new copper washer goes into the head, then the perforated cup which has to be aligned so that the hole for the spark plug lines up. This is looking down from the top of the head. Another copper washer goes on top of the cup, then that assembled valve above goes on top of that and gets locked in by a special collar nut.


                        This is a close up from the side of the head where the spark plug threads in looking into that perforated cup.


                        While the CVCC bits got a clean up I started on the regular valves.


                        Spring seats go first, then new valve stem seals.


                        I used a little bit of assembly lube on each valve stem and slid them in.


                        View from the top.


                        I was really loving this. We've been waiting for this stage for what feels like ages!


                        All done. Now for the springs and retainers.


                        Using the valve tool this didn't take long at all. Wind the spring down, insert the keepers and let the tension off the spring. You can see this process fairly well in the video.


                        Camshaft next!


                        And we're ready to torque the head down onto the block with our new head gasket in between.


                        Head bolts done, now onto the CVCC collar nuts.


                        Clean rocker assembly lubed up and ready to go.


                        Rocker assembly torqued! Oil pump drive fitted as well.


                        Big milestone here.


                        Covered it up with the valve cover but we'll get back in there to adjust the valve lash before we fire it up.


                        Knocked in a new cam seal to finish off for the night.

                        Next we do the manifolds and turbo before dropping the motor back in. There's a couple more seals from NZ needed for the bottom end before we can refit the sump and call the engine done. Getting excited, though.

                        Comment


                          #13
                          And this post gets us up to date!


                          I'll skip to the chase and show you where we got to in the end. We adjusted valve lash, replaced the crank seal and rear main seal, installed the water pump, timing belt, tensioner and covers, fitted the thermostat, manifolds, fuel rail, throttle body and turbo. We're not far off now. We rigged up the GoPro again but it ran out of battery very early on.


                          What we did get is a boring video showing not much of the valve adjustment process.You need three tools to do this. Feeler gauge, flathead screwdriver and 12mm spanner. What you're doing is setting the correct amount of space (lash) between the tappet (the threaded bit adjusted with the screwdriver) and the top of the valve stem. The gap gets tighter as heat expands the valvetrain, so there has to be enough space that the valves will still close against the head completely and seal the combustion chamber.


                          It helps to have three arms or a friend to do this, but regular two-armed humans can do it solo without too much extra fuss. First, back off the locking nut with your spanner, loosen the tappet with a screwdriver then slide your feeler gauge (of correct depth) between tappet and valve stem. Adjust the tappet until you can feel resistance on the feeler gauge when sliding it back and forth, then tighten the locking nut. Rotate the engine and double check the gap. If there's still the same amount of resistance on the gauge then you're sweet. It takes some feel to get it right. Consistency comes with practice.


                          I couldn't find correct info about the adjustment sequence for our engine so I did it the slow way, one cylinder at a time. I bumped the crank around until the exhaust valve on cylinder 1 started to open then set the lash to 0.15mm on both cylinder 1 intake valves. Then onto cylinder 2, then 3, then 4, then started again at cylinder 1 with the 0.20mm feeler gauge, rotating the crank until the intake valves started to open then adjusting the exhaust valve. Repeat for the other three cylinders.


                          We did this using the original timing belt with my timing marks on it from disassembly. Those marks were transferred onto our new timing belt, proudly supplied by MITSUBOSHI - 'Surprisingly JDM!™'


                          Before we could fit the timing belt we wanted to remove the crank girdle to replace the rear main and crank seals. Oil pump off, girdle bolts out and flywheel about to be removed after some negotiations with the engine stand.


                          Here we go. The journals all look good. Bearings are fine too. The seals have been removed from both ends of the crank in this photo and there's some gasket stripper doing its thing to eat away the last bits of goopy gasket cement.


                          To avoid pinching the new seals we torqued the crank girdle down first.


                          All cleaned up and awaiting new rear main seal. We got the seal most of the way in but will have to finish it off once we get the engine off the stand.


                          New crank seal went into its new home with no trouble. I forgot to take photos of the new seals installed.


                          Timing belt, tensioner and water pump done!


                          New thermostat installed.


                          Fresh gasket for the manifolds/head.


                          Intake and exhaust manifolds bolted up and turbo installed! This was a cool milestone to reach. Looks awesome with the turbo hanging off the side.


                          Oil lines plumbed to the turbo, fuel rail and throttle body all fitted.


                          Timing belt covers and crank pulley also fitted. Feels so good to have less loose parts lying around and an engine looking like an engine again. More to come soon.

                          Comment


                            #14
                            woah man my eyes were just glued to this thread! so awesome keep the updates coming!

                            Comment


                              #15
                              Wow!!! Just incredible.
                              I am going to check out this thread again tomorrow on a PC... Brilliant work!!
                              | 1991 Formula Red NSX | 1999 CW DC2R #00-193 | 2013 Black CBR1000RR

                              "And so you touch this limit, something happens and you suddenly can go a little bit further. With your mind power, your determination, your instinct, and the experience as well, you can fly very high." - Ayrton Senna

                              Comment

                              Working...
                              X