Below is the chargeR™ method of installing ESMM inserts in any DC5 without lowering the subframe. Lowering the subframe is not a good idea as it will mess up your wheel alignment which will then cost money to have fixed. It seems foolish to spend $100 on an alignment after installing a 50 dollar part. I take no responsibility for any misadventures that may befall you if you attempt this DIY, please use your own discretion and only attempt the DIY if you have adequate mechanical knowledge. Thanks to daz for the pictures and supplying his car for the install. If you have any questions or if any parts of the DIY are unclear then post up!
Items required:
Jack
Jack stands x 2
Socket set (including 12mm, 14mm and 17mm sockets and a variety of extensions)
17mm Spanner
Torque wrench
Items that are helpful:
Silicon spray
Ratcheting spanners
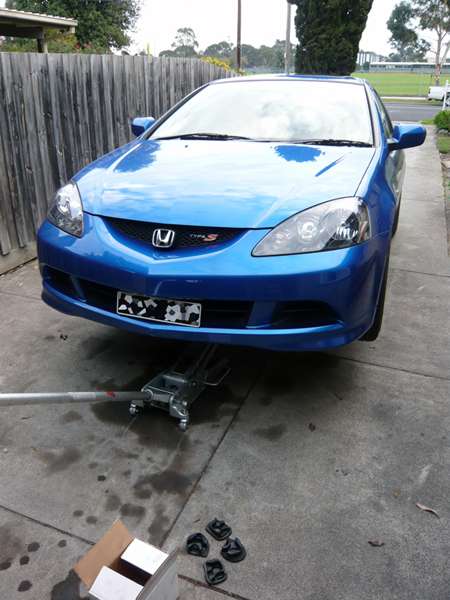
1. Jack up the car and place the front on stands. Get the car as high as possible to make life a bit easier. Refer to Figure 1 below for what the car should look like after this step .
.
Figure 1: Jar jacked up and appropriately supported.
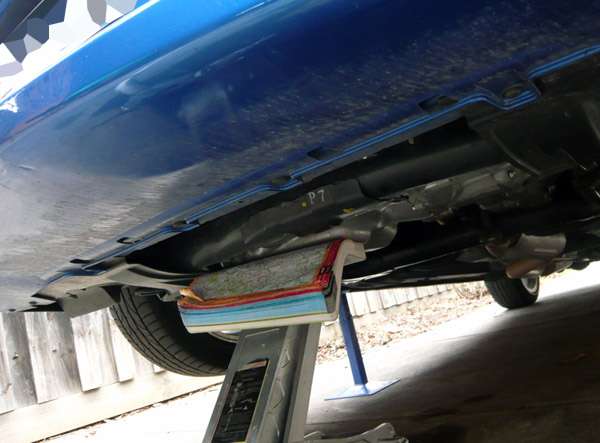
2. Support the bottom of the engine with the jack with something compliant on top to prevent damage to the sump. I used my trusty Melways as shown in Figure 2.
Figure 2: Engine supported with jack.
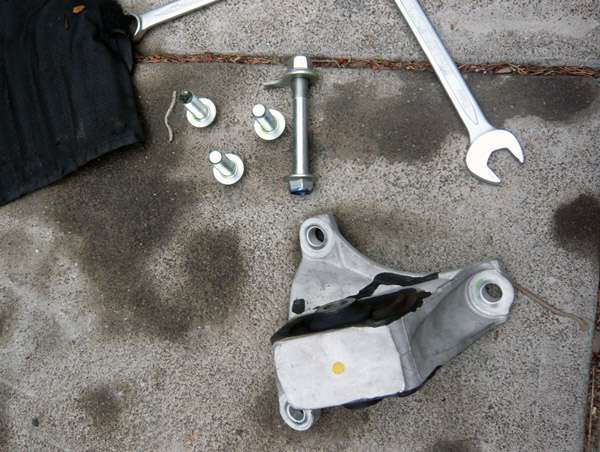
3. Beginning with the front mount (Shown in Figure 3) loosen the 3 bolts holding the mount to the block and the one large bolt that goes through the mount. A 17mm ring spanner is best for this as area is quite confined. Remove the bolts. Also unclip the wiring harness that clips on just above the mount. Now the mount must be wiggled free of its place, this step can be a little difficult but the mount will come out with a bit of persuasion. Once you have the mount out you should be left with bits looking like Figure 4.
Figure 3: The front engine mount.
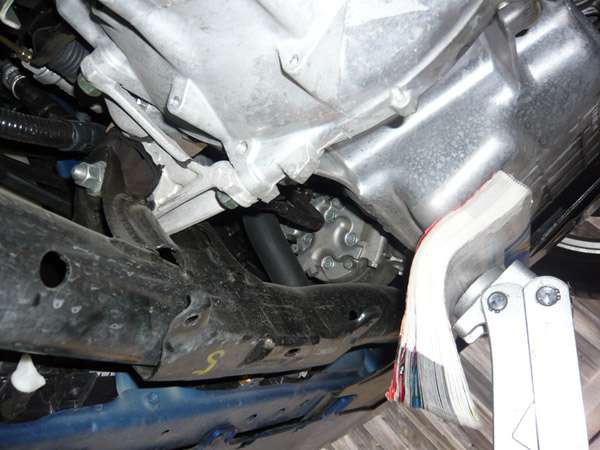
Figure 4: The front engine mount and associated hardware after removal.
4. Push the inserts into the sides of the mount. This may require some lubrication, I used silicone spray as it shouldn't damage the rubber of the mount. The mount with inserts is shown in Figure 5. The mount can now be reinstalled in the reverse of removal, coating the outside of the mount with lubricant will make the process a lot easier. The torque setting for the main through bolt is 64Nm. The other 3 I have no idea on and it is pretty difficult to get a torque wrench in there anyway so just do them up tight. The manual also advises you to replace the main bolt that goes through the mount but I never have in the multiple times I have removed and installed engine mounts. The installed mount is shown in Figure 6.
Figure 5: Inserts installed.
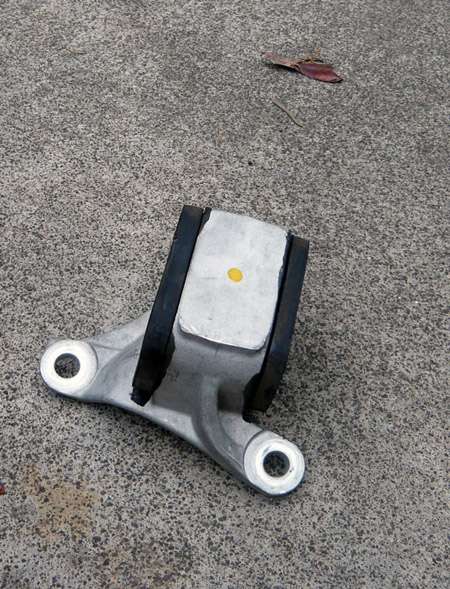
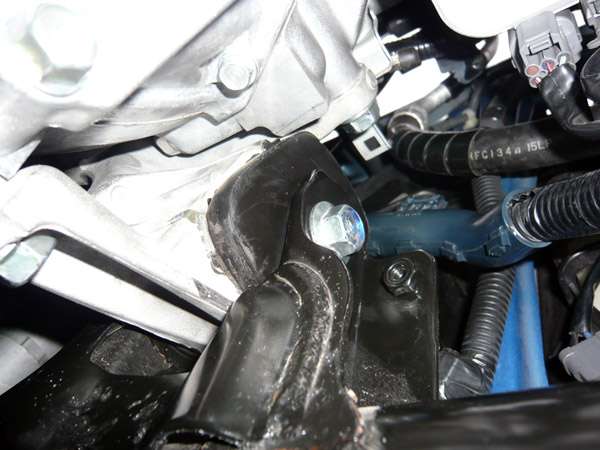
Figure 6: Front mount installed with ESMM. Also shown here is the wiring harness that needs to be unclipped to remove the mount.
5. Next is the rear mount. I moved the jack such that it supported the rear of the engine more fully. Remove the two spring bolts that hold the cat/downpipe section of the exhaust manifold on using a 12mm socket and a long extension. The mount and the disconnected cat/downpipe are shown in Figure 7. This is to give more maneuvering room around the mount. Loosen the main through bolt on the mount (17mm socket) and the three smaller bolts fixing the mount to the subframe (14mm socket). Remove the bolts and the mount. The mount is shown in Figure 8. Stuff the inserts in the side of the mount as shown in Figure 9. Install the mount in reverse order of removal and reconnect the cat/downpipe. The three smaller bolts should be torqued to 59Nm, the spring bolts on the exhaust to 22Nm, and the large through bolt to 64Nm. No pictures of the mount installed, so you will have to use your imagination.
Figure 7: The disconnected cat/downpipe and the rear engine mount indicated by the red arrow.
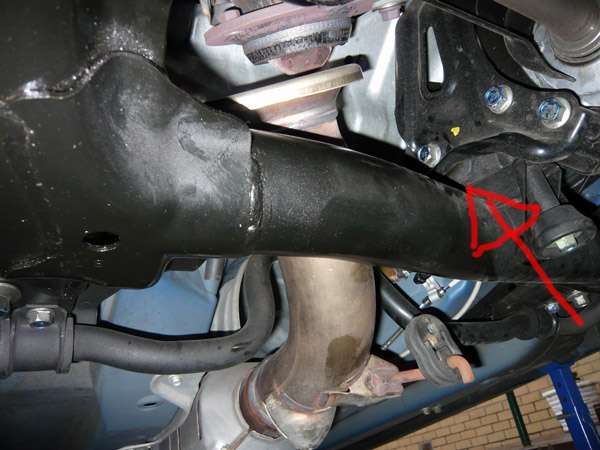
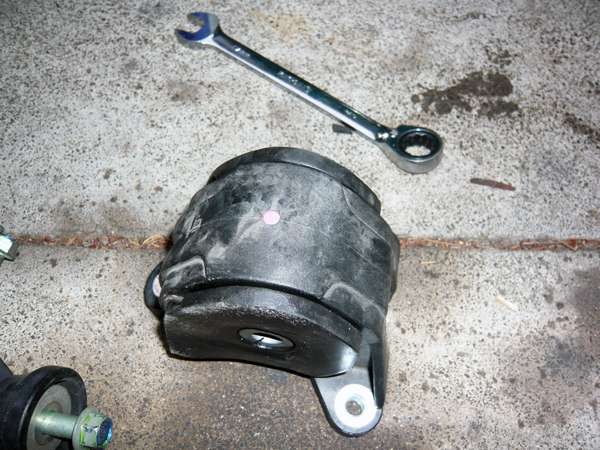
Figure 8: Rear mount and hardware.
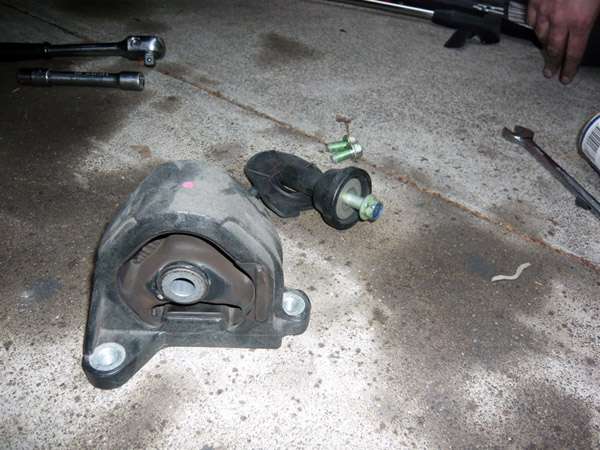
Figure 9: Rear mount with ESMM inserts installed.
6. Lower the car off the stands and you are done.
Items required:
Jack
Jack stands x 2
Socket set (including 12mm, 14mm and 17mm sockets and a variety of extensions)
17mm Spanner
Torque wrench
Items that are helpful:
Silicon spray
Ratcheting spanners
1. Jack up the car and place the front on stands. Get the car as high as possible to make life a bit easier. Refer to Figure 1 below for what the car should look like after this step
.Figure 1: Jar jacked up and appropriately supported.
2. Support the bottom of the engine with the jack with something compliant on top to prevent damage to the sump. I used my trusty Melways as shown in Figure 2.
Figure 2: Engine supported with jack.
3. Beginning with the front mount (Shown in Figure 3) loosen the 3 bolts holding the mount to the block and the one large bolt that goes through the mount. A 17mm ring spanner is best for this as area is quite confined. Remove the bolts. Also unclip the wiring harness that clips on just above the mount. Now the mount must be wiggled free of its place, this step can be a little difficult but the mount will come out with a bit of persuasion. Once you have the mount out you should be left with bits looking like Figure 4.
Figure 3: The front engine mount.
Figure 4: The front engine mount and associated hardware after removal.
4. Push the inserts into the sides of the mount. This may require some lubrication, I used silicone spray as it shouldn't damage the rubber of the mount. The mount with inserts is shown in Figure 5. The mount can now be reinstalled in the reverse of removal, coating the outside of the mount with lubricant will make the process a lot easier. The torque setting for the main through bolt is 64Nm. The other 3 I have no idea on and it is pretty difficult to get a torque wrench in there anyway so just do them up tight. The manual also advises you to replace the main bolt that goes through the mount but I never have in the multiple times I have removed and installed engine mounts. The installed mount is shown in Figure 6.
Figure 5: Inserts installed.
Figure 6: Front mount installed with ESMM. Also shown here is the wiring harness that needs to be unclipped to remove the mount.
5. Next is the rear mount. I moved the jack such that it supported the rear of the engine more fully. Remove the two spring bolts that hold the cat/downpipe section of the exhaust manifold on using a 12mm socket and a long extension. The mount and the disconnected cat/downpipe are shown in Figure 7. This is to give more maneuvering room around the mount. Loosen the main through bolt on the mount (17mm socket) and the three smaller bolts fixing the mount to the subframe (14mm socket). Remove the bolts and the mount. The mount is shown in Figure 8. Stuff the inserts in the side of the mount as shown in Figure 9. Install the mount in reverse order of removal and reconnect the cat/downpipe. The three smaller bolts should be torqued to 59Nm, the spring bolts on the exhaust to 22Nm, and the large through bolt to 64Nm. No pictures of the mount installed, so you will have to use your imagination.
Figure 7: The disconnected cat/downpipe and the rear engine mount indicated by the red arrow.
Figure 8: Rear mount and hardware.
Figure 9: Rear mount with ESMM inserts installed.
6. Lower the car off the stands and you are done.


Comment