Paint!
Continuing off from the last update, my car should've been sent off for some paint. But yet again I got delayed with my painter. Time was running out as well starting my next semester of uni soon, leaving me with a final decision to attempt a respray myself using an air compressor and spray gun.
Prior to this I've only experimented with spray cans on my friends bumpers doing small touch up jobs and watching YouTube channels including 'The Gunman' and 'customspraymods' to help me learn. So with a list of supplies in mind I went to Bunnings, Supercheap Auto and VG Auto paints purchasing the following.
Bunnings:
Dry sanding sheets 80, 120, 180, 240, 360, 400, 600 grit
Disposable Coveralls
Respirator
Tack cloths
Masking paper
Sanding Block
Utility cord
Drop sheets
VG Auto Paints:
-Concept Paints-
4L Acrylic Mixed Paint in R81 (Milano Red)
4L Acrylic Primer
4L Acrylic Clear
4L Wax and grease remover
20L Acrylic Thinner
Iwata Az3 Spray Gun with 2.0mm tip
Water separator
3M Platinum Plus body filler
Masking tape
Fibreglass Matting
Rust preventative paint
Wet sanding sheets 1000, 1500, 2000 grit
Mixing cups and stirrers
Supercheap Auto:
Septone Spray Putty spray can
Septone Primer Surfacer spray can
Septone Matt Black spray can


Stripping car:
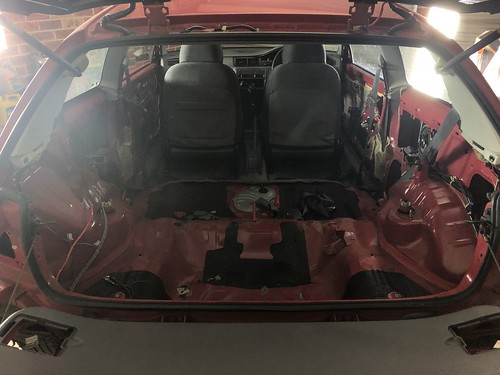
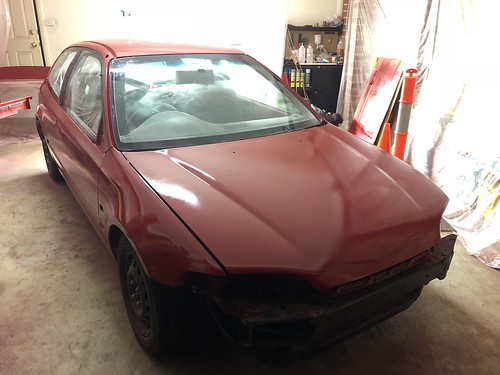
So with a majority of the equipment purchased, i backed the EG into the garage diagonally allowing maximum working space all around the car.

The next step was to remove bumpers, side skirts, fenders and interior trim so i could gain access and plug the side moulding holes from behind.

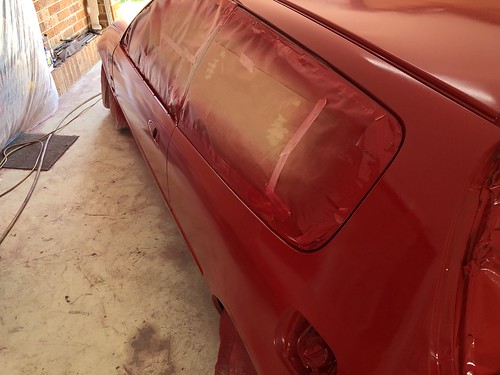
Decided to mask up windows and remaining exposed rubber trim preventing over spray from guidecoat.


Bodyworks:
The ideal method would've been to weld the holes up, but i didn't have one on hand so next option was fibreglass matting and rust preventative paint as suggested by VG auto paints.
First step was to sand the applied area back to bare metal. I used 80 grit and taped the underside to prevent the fibreglass matting from protruding past the hole and paint seeping through. I decided to experiment with a fender as that would easily be replaceable in the case that this method didn't work out.


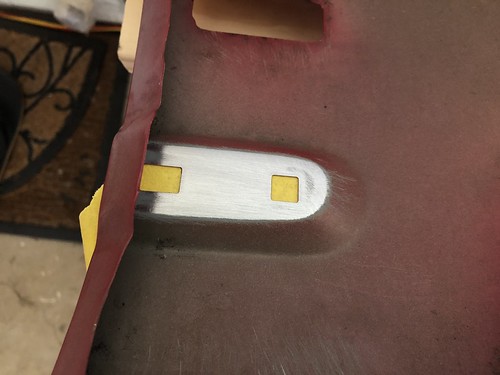
Overlaying the fibreglass ready to cut to a suitable size

Brushed on the rust preventative paint with 2 coats as it was a fairly runny consistency
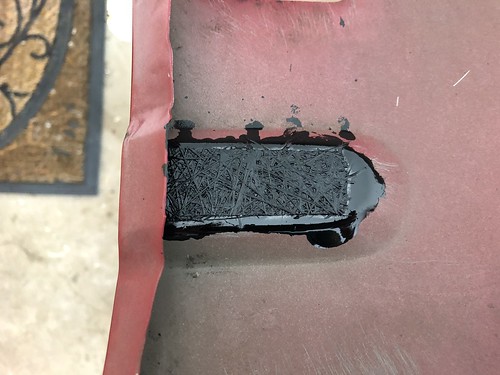
Miracle paint indeed!

I left the fender overnight and the fibreglass had hardened rock solid, even tried poking it with screwdrivers did not budge.

With one fender done it was time to do the other fender and both sides of the car. I struggled with reaching behind the doors to fill the holes closest to the dash as the window components were in the way. It was pretty hard to capture on camera as the paint was black but all the holes on this side were plugged up

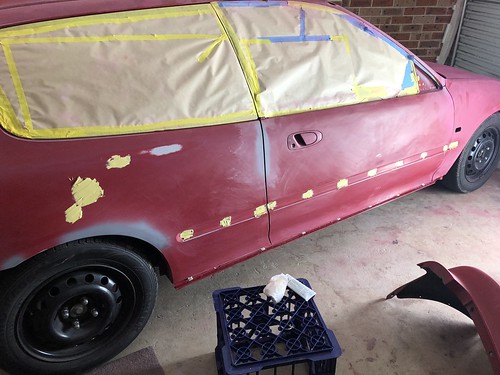
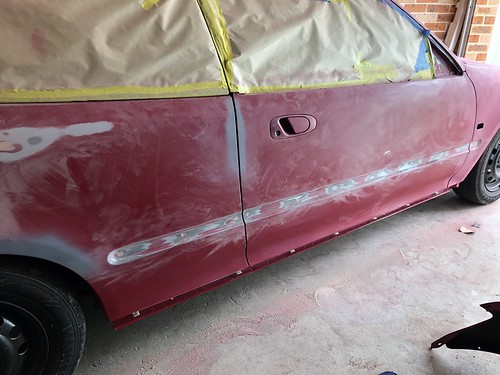
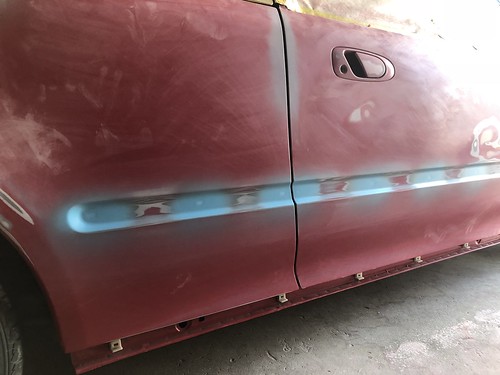
So with one panel at a time i guide coated the whole car using the Matt black paint and sanded with 360 grit dry, showing me the imperfections and small dings around the car.


Whilst i removed the antenna it revealed an unfaded portion of the paint which I thought was pretty cool!

Went around the holes again with 80 grit, this time on the exterior ready for body filler. Decided to shave the front and rear badges using this method as well.


Continuing off from the last update, my car should've been sent off for some paint. But yet again I got delayed with my painter. Time was running out as well starting my next semester of uni soon, leaving me with a final decision to attempt a respray myself using an air compressor and spray gun.
Prior to this I've only experimented with spray cans on my friends bumpers doing small touch up jobs and watching YouTube channels including 'The Gunman' and 'customspraymods' to help me learn. So with a list of supplies in mind I went to Bunnings, Supercheap Auto and VG Auto paints purchasing the following.
Bunnings:
Dry sanding sheets 80, 120, 180, 240, 360, 400, 600 grit
Disposable Coveralls
Respirator
Tack cloths
Masking paper
Sanding Block
Utility cord
Drop sheets
VG Auto Paints:
-Concept Paints-
4L Acrylic Mixed Paint in R81 (Milano Red)
4L Acrylic Primer
4L Acrylic Clear
4L Wax and grease remover
20L Acrylic Thinner
Iwata Az3 Spray Gun with 2.0mm tip
Water separator
3M Platinum Plus body filler
Masking tape
Fibreglass Matting
Rust preventative paint
Wet sanding sheets 1000, 1500, 2000 grit
Mixing cups and stirrers
Supercheap Auto:
Septone Spray Putty spray can
Septone Primer Surfacer spray can
Septone Matt Black spray can
Stripping car:
So with a majority of the equipment purchased, i backed the EG into the garage diagonally allowing maximum working space all around the car.
The next step was to remove bumpers, side skirts, fenders and interior trim so i could gain access and plug the side moulding holes from behind.
Decided to mask up windows and remaining exposed rubber trim preventing over spray from guidecoat.
Bodyworks:
The ideal method would've been to weld the holes up, but i didn't have one on hand so next option was fibreglass matting and rust preventative paint as suggested by VG auto paints.
First step was to sand the applied area back to bare metal. I used 80 grit and taped the underside to prevent the fibreglass matting from protruding past the hole and paint seeping through. I decided to experiment with a fender as that would easily be replaceable in the case that this method didn't work out.
Overlaying the fibreglass ready to cut to a suitable size
Brushed on the rust preventative paint with 2 coats as it was a fairly runny consistency
Miracle paint indeed!
I left the fender overnight and the fibreglass had hardened rock solid, even tried poking it with screwdrivers did not budge.
With one fender done it was time to do the other fender and both sides of the car. I struggled with reaching behind the doors to fill the holes closest to the dash as the window components were in the way. It was pretty hard to capture on camera as the paint was black but all the holes on this side were plugged up
So with one panel at a time i guide coated the whole car using the Matt black paint and sanded with 360 grit dry, showing me the imperfections and small dings around the car.
Whilst i removed the antenna it revealed an unfaded portion of the paint which I thought was pretty cool!
Went around the holes again with 80 grit, this time on the exterior ready for body filler. Decided to shave the front and rear badges using this method as well.


 , should have painted the side mirror areas too


Comment