this is an amazing read!!! keep up the great work!!!
-
-
In the last couple of posts I covered the process of measuring the front suspension geometry of the Sedan.
From there I went on to figure out the modifications that I need to do to the knuckles to achieve JTCC ride height AND still have sound suspension geometry.
Well I've got the drawings done for the parts for the front end!
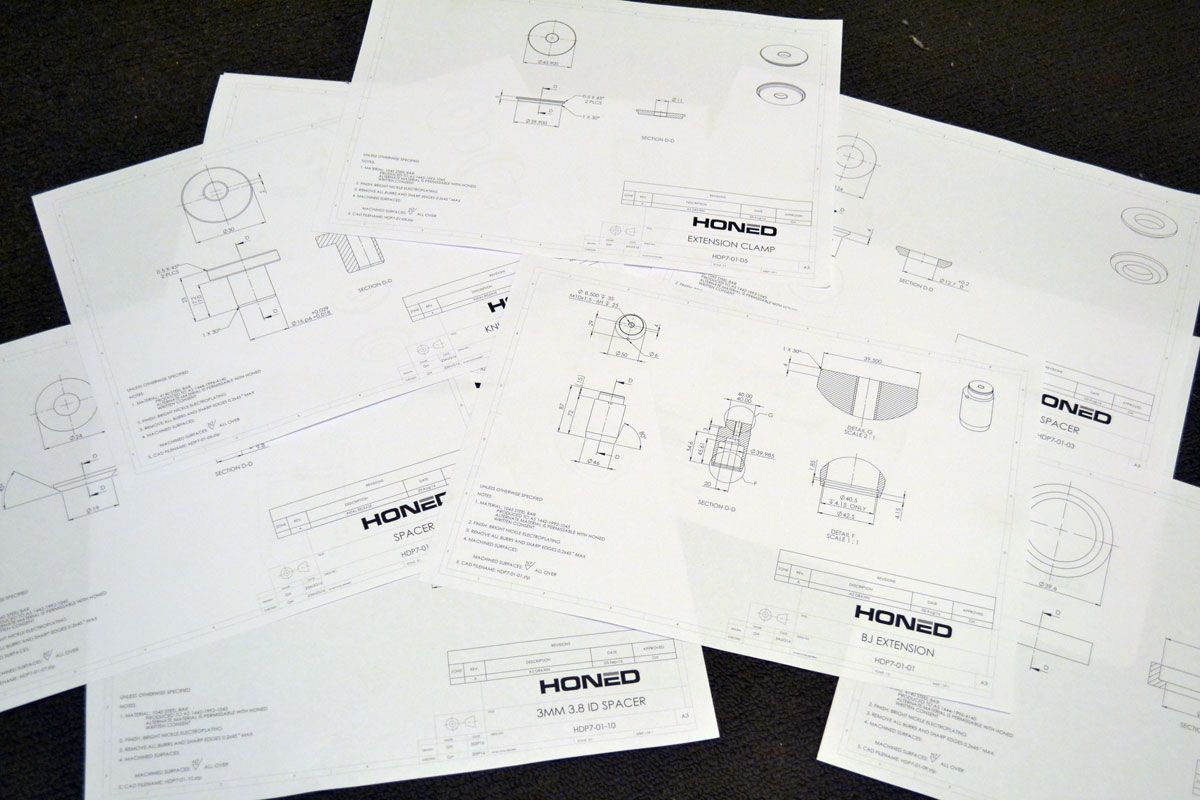
But before I send those out to the machinist, I thought it best that I check that I will be able to achieve something similar with the rear of the car.
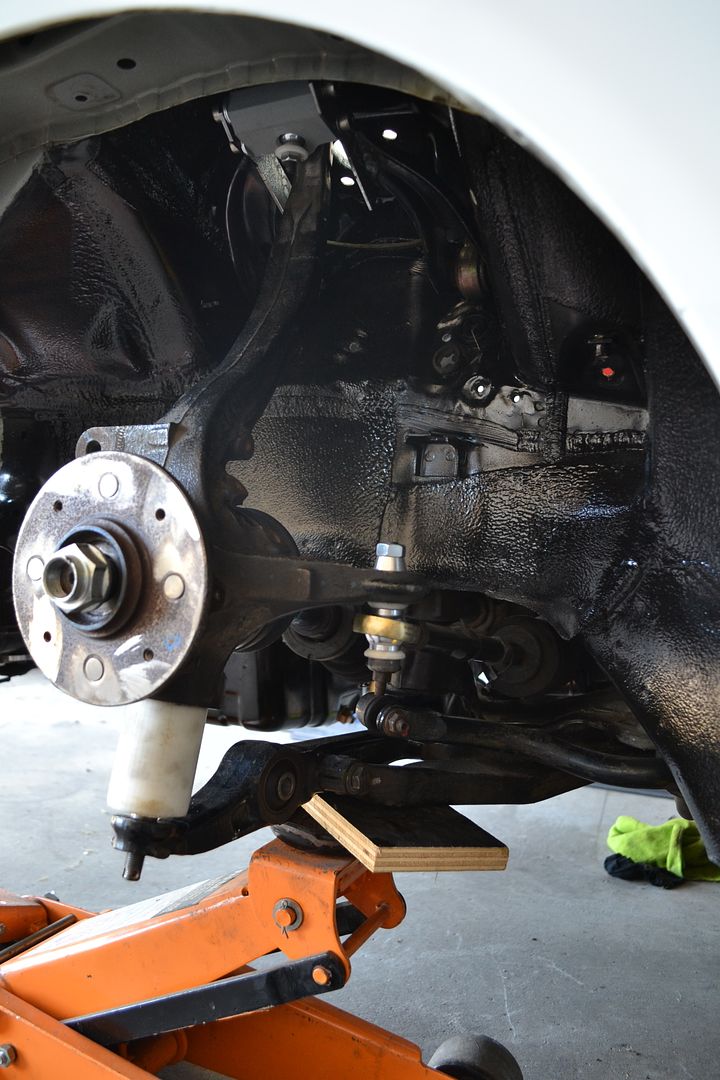
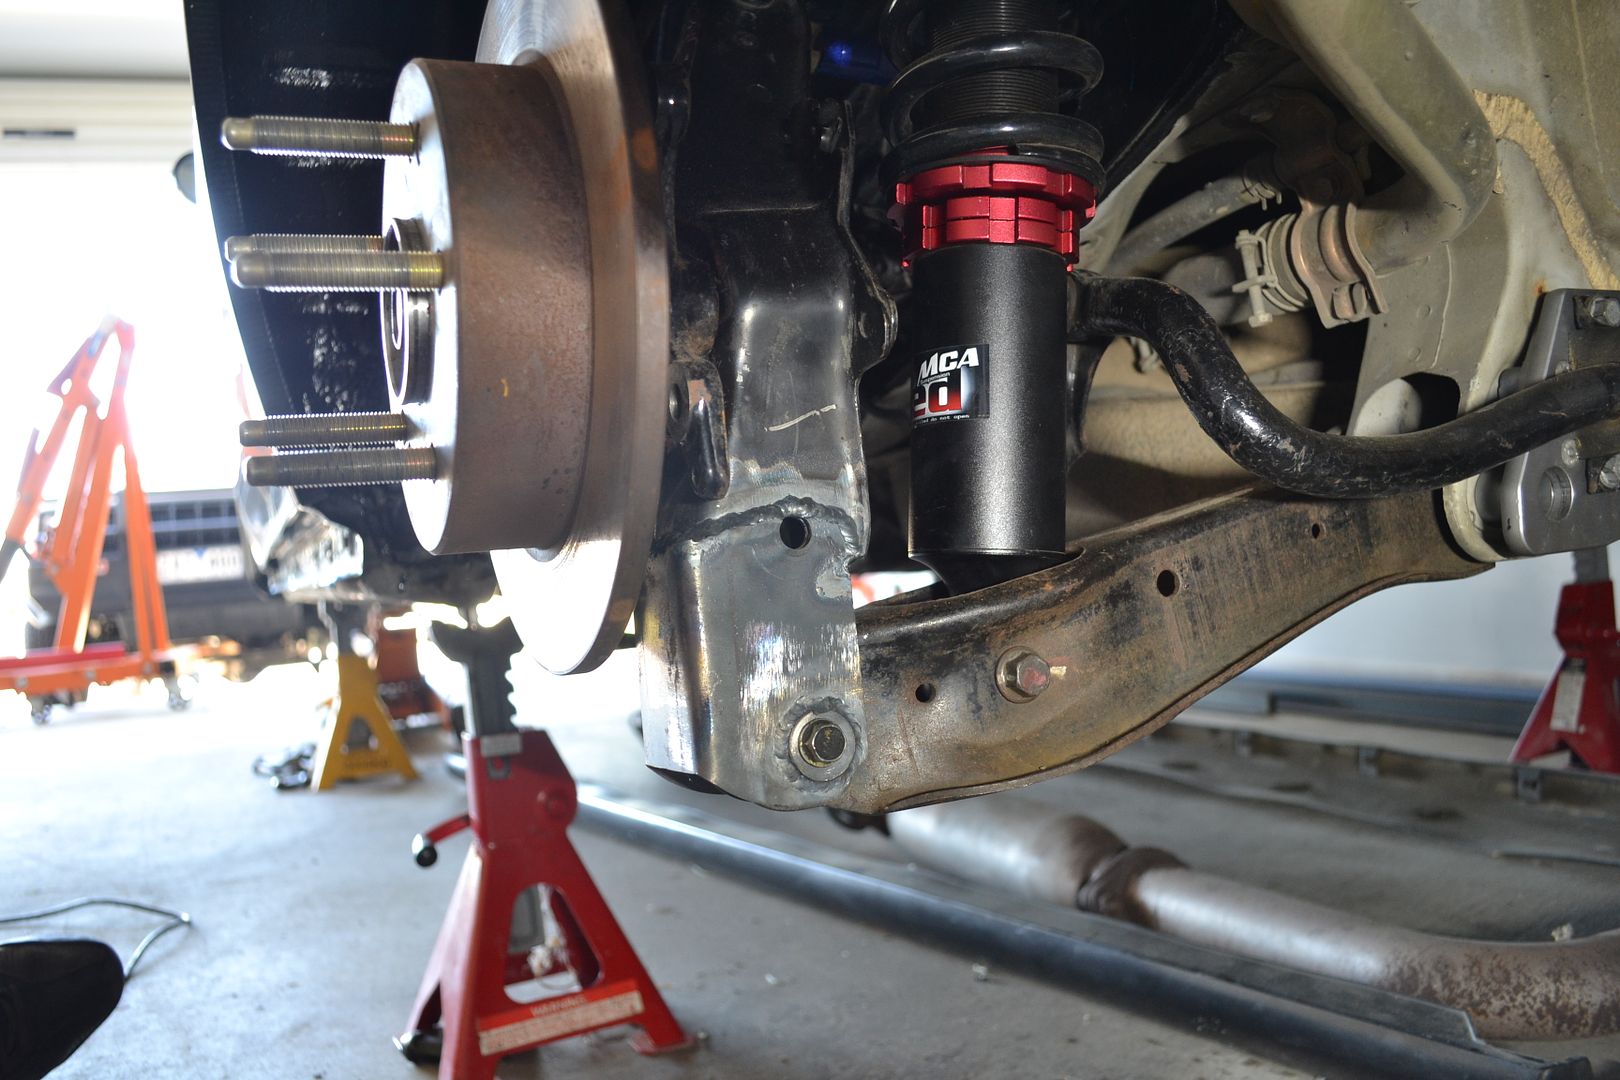
I'm measuring the rear ride height as the distance from the centre of the wheel hub to the apex of the guard.
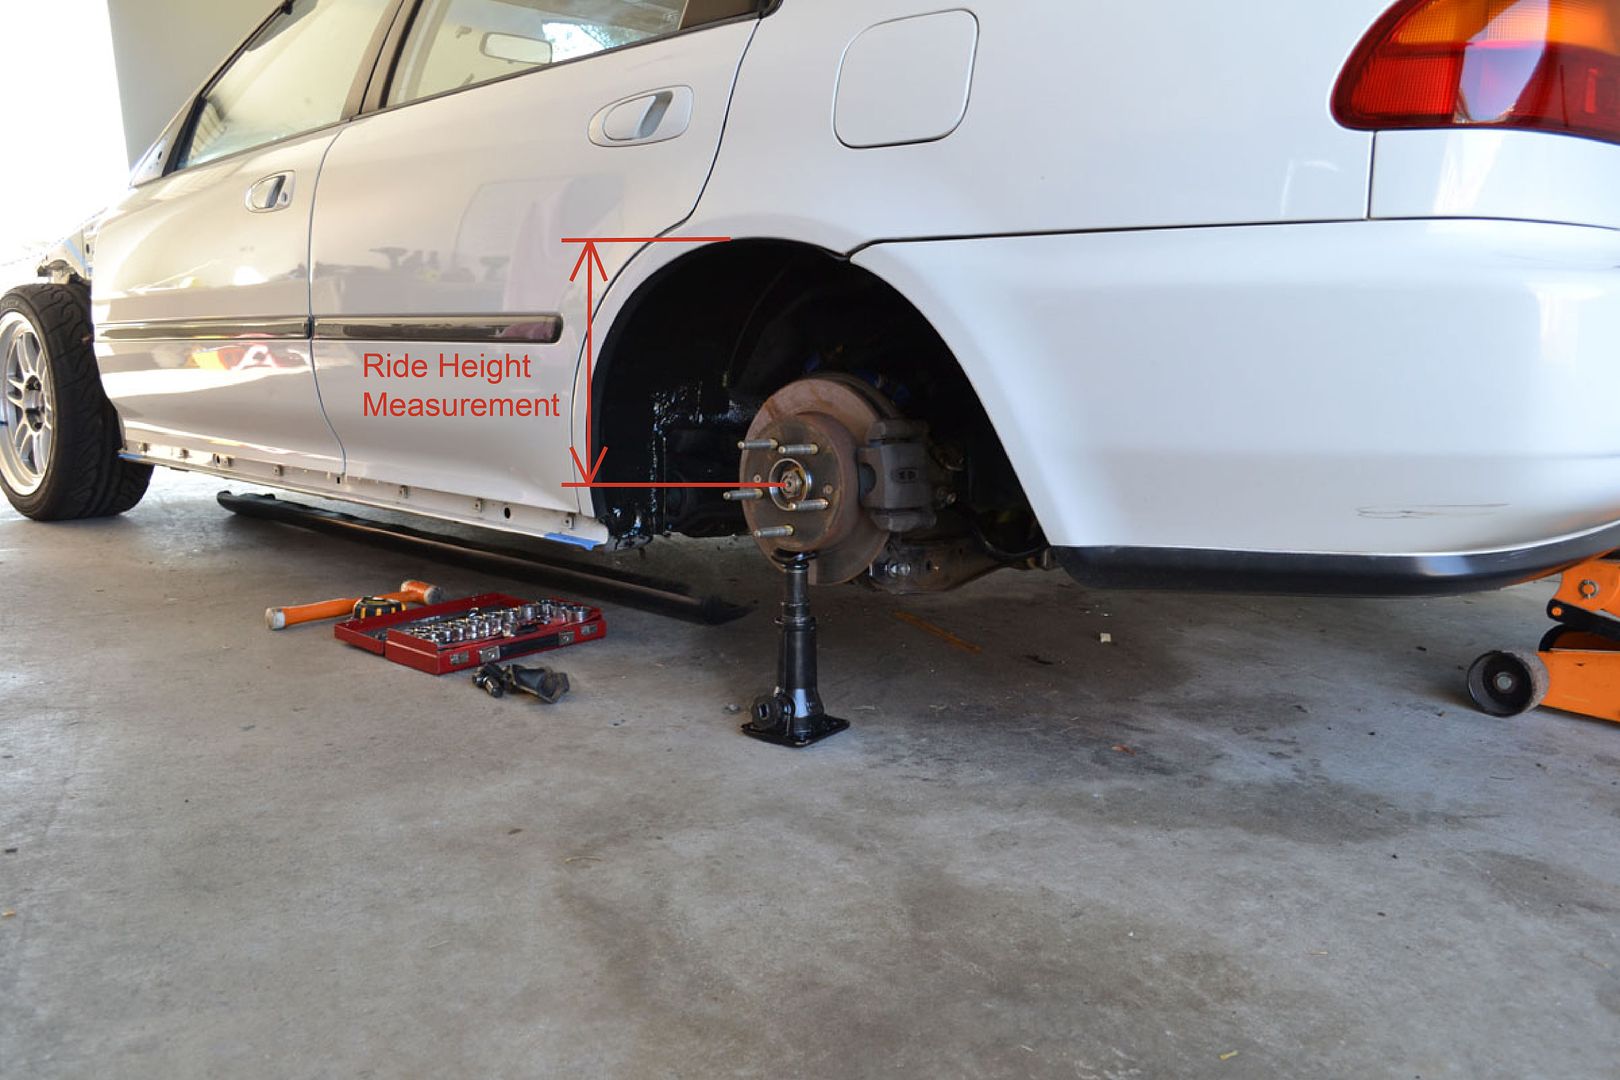
The ride height the car currently is 295mm and I think that the car needs to be 50mm lower to achieve the look I'm after.
I measured the position of all the suspension points at 295mm and then again at 245mm.
In the following comparison shots you can see what happens to the suspension links when you lower the car this much.
Keep in mind too that my trailing arms have already been modified and that my lower control arm mounting points is 25mm further down than stock!

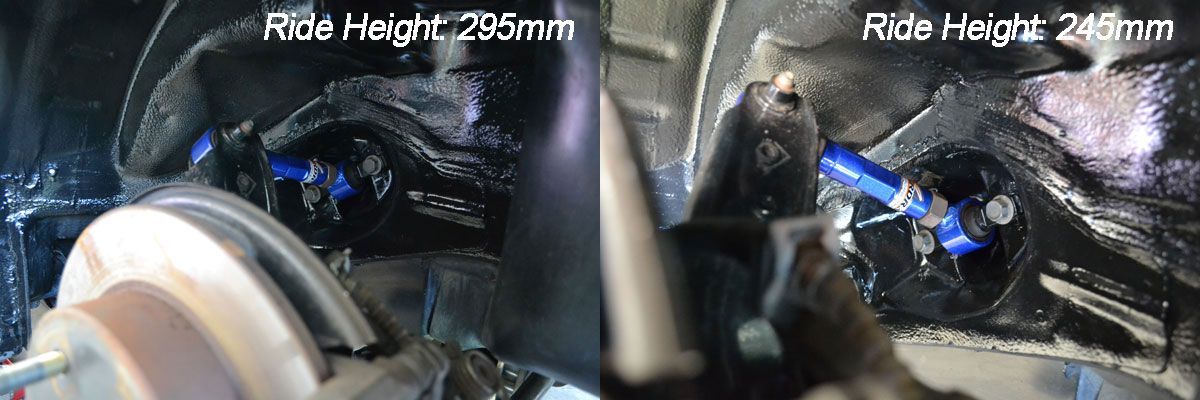
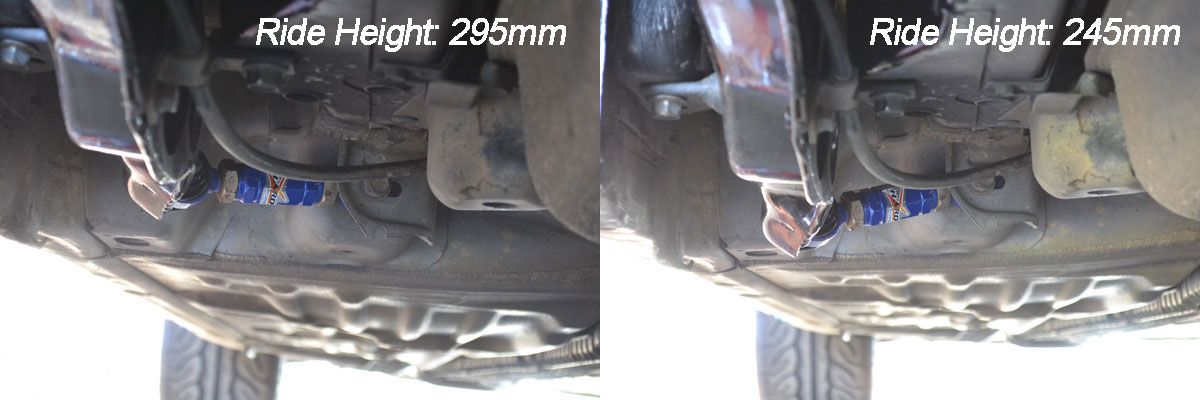
It's clear looking at these suspension arm angles, I won't get away with just lowering the car 50mm and use the trailing arms as they are.
This is what the 245mm ride height looks like with a wheel in place.
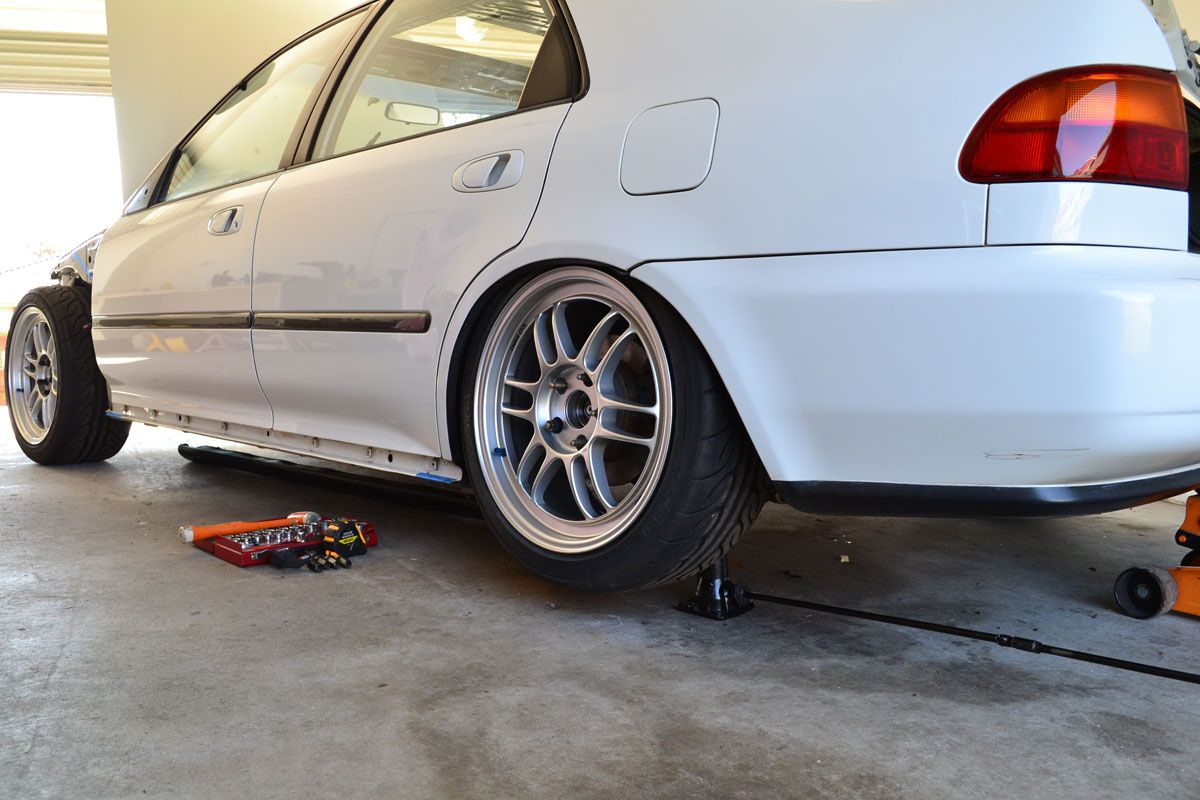
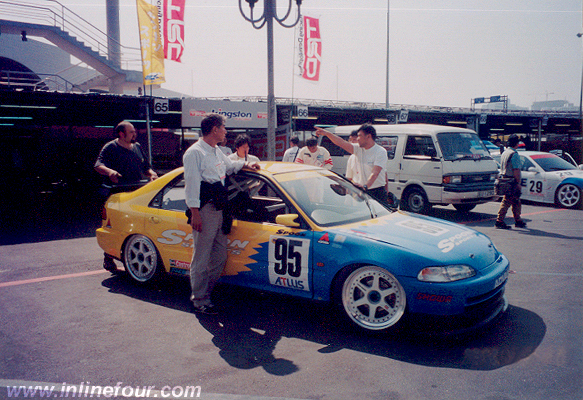
I think it achieves that "edge of the rim level with the guard" look that i'm going for.
Once I had all the measurements on paper, I plugged the numbers into CAD and compared the geometry between the two ride heights.
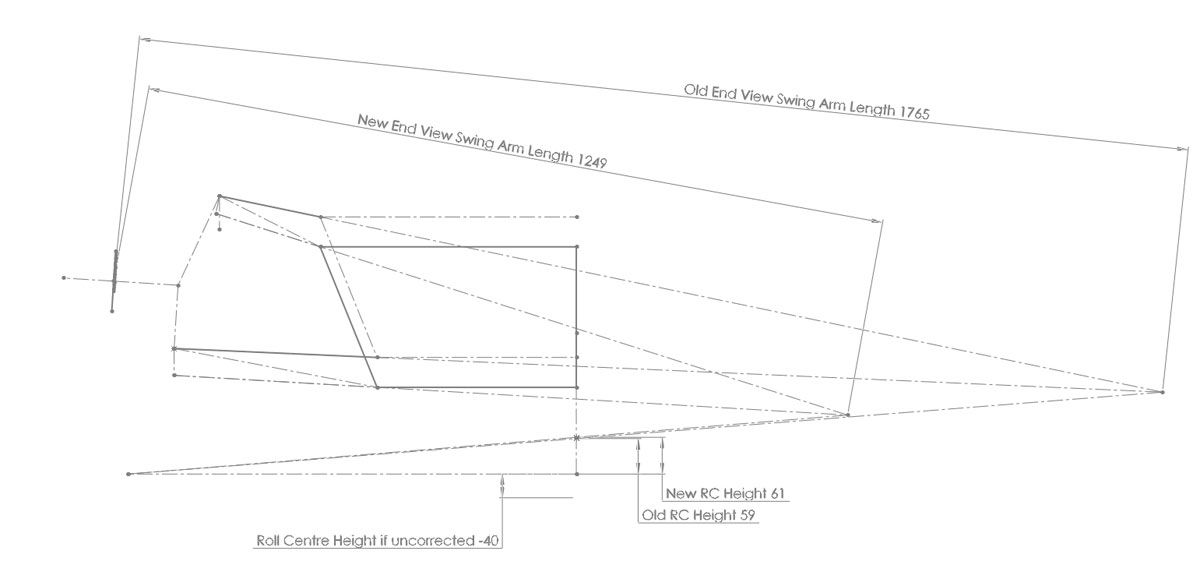
With CAD I can determine what the ideal geometry would be, but in the real world some things can't be moved as much as you'd like.
This could be because they would then interfere with something you can't relocate, like the rim, or it could be because there is no metal there for you to drill a hole into.
This means there is a fair bit of back and forth between the computer and the garage to work out what can and can't be done.
Here are the things that I can do:
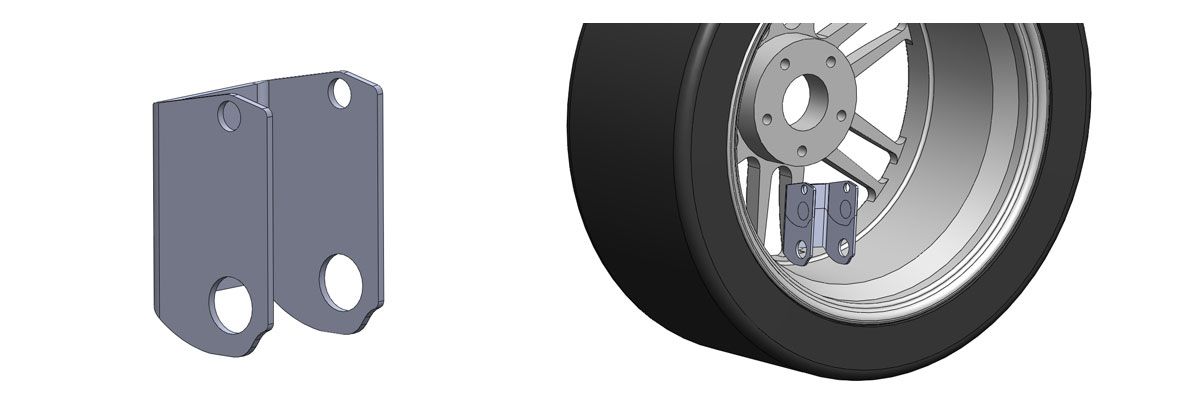
Extend the LCA mounting point on the trailing arm downward by another 45mm (70mm lower than stock!)
Modify where the camber arm mounts to the trailing arm such that the camber arm attaches to the trailing arm 30mm lower than before
Cut and rotate the front of the trailing arm so that the bit where the toe link mounts is 25mm higher relative to where it was before.
Doing those things will achieve the following:
Set the rear roll centre height close to what it was before (61mm vs the 59mm I had with my V1 modified trailing arms)
Give a toe curve that tends to positive toe either side of ride height
Achieve camber gain comparable to stock
I'm quite possibly the only person that cares about those things haha but I'll persist down this rabbit hole to satisfy myself.
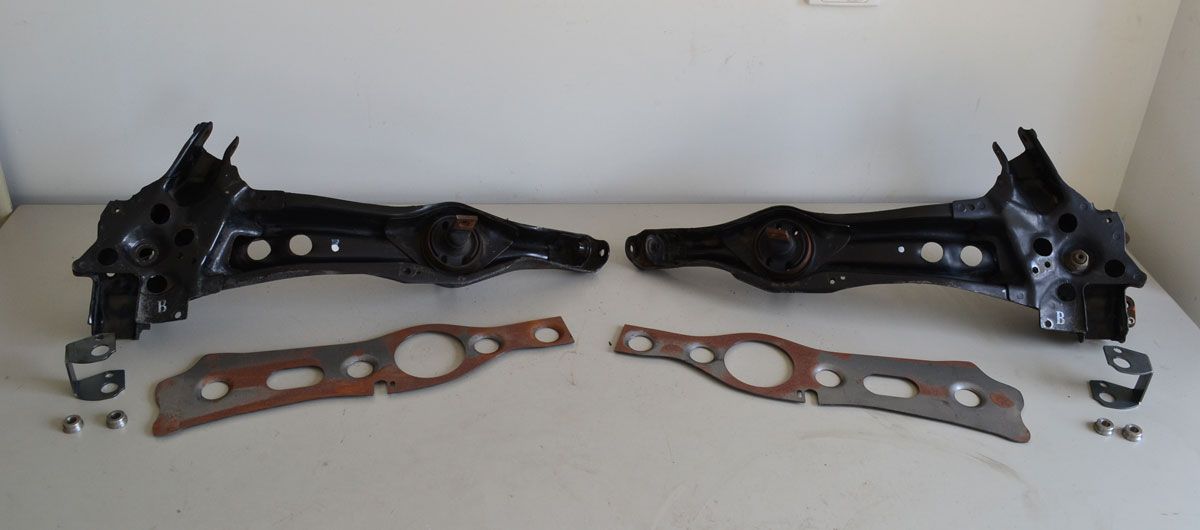
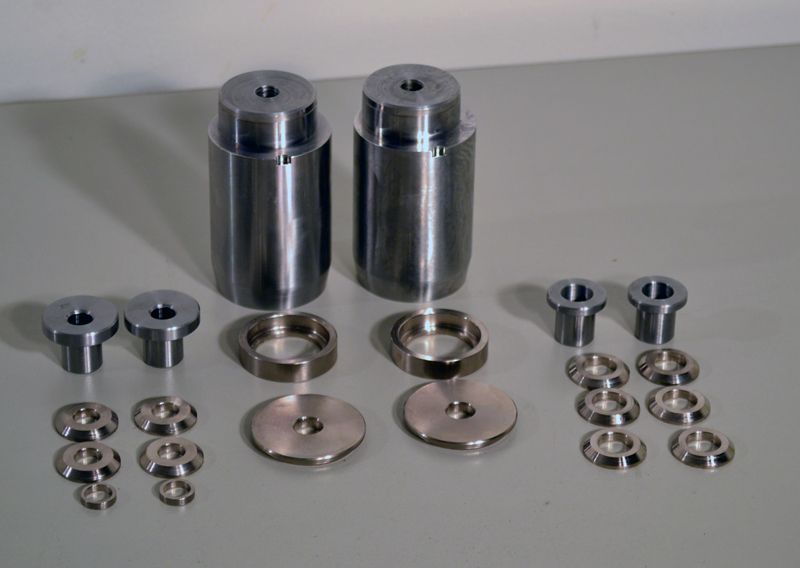
I already have a second set of trailing arms, gusset plates and lower control arm relocation brackets.
Although I will have to get new relocation brackets made but that's no big deal.
This is what the longer lower control arm mount relocation brackets look like.
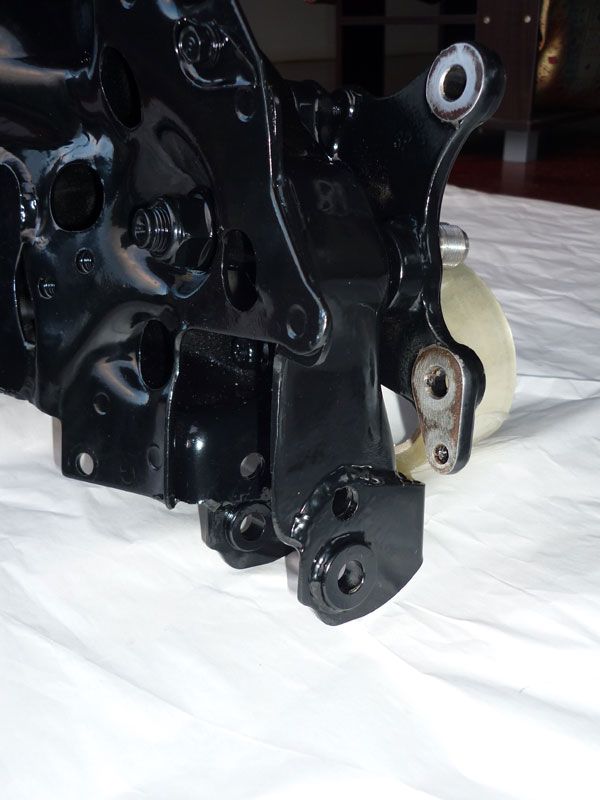
I will have to take care when putting the wheels on and off so that I don't bang up the inside of my rims as there won't be a whole lot of clearance there.
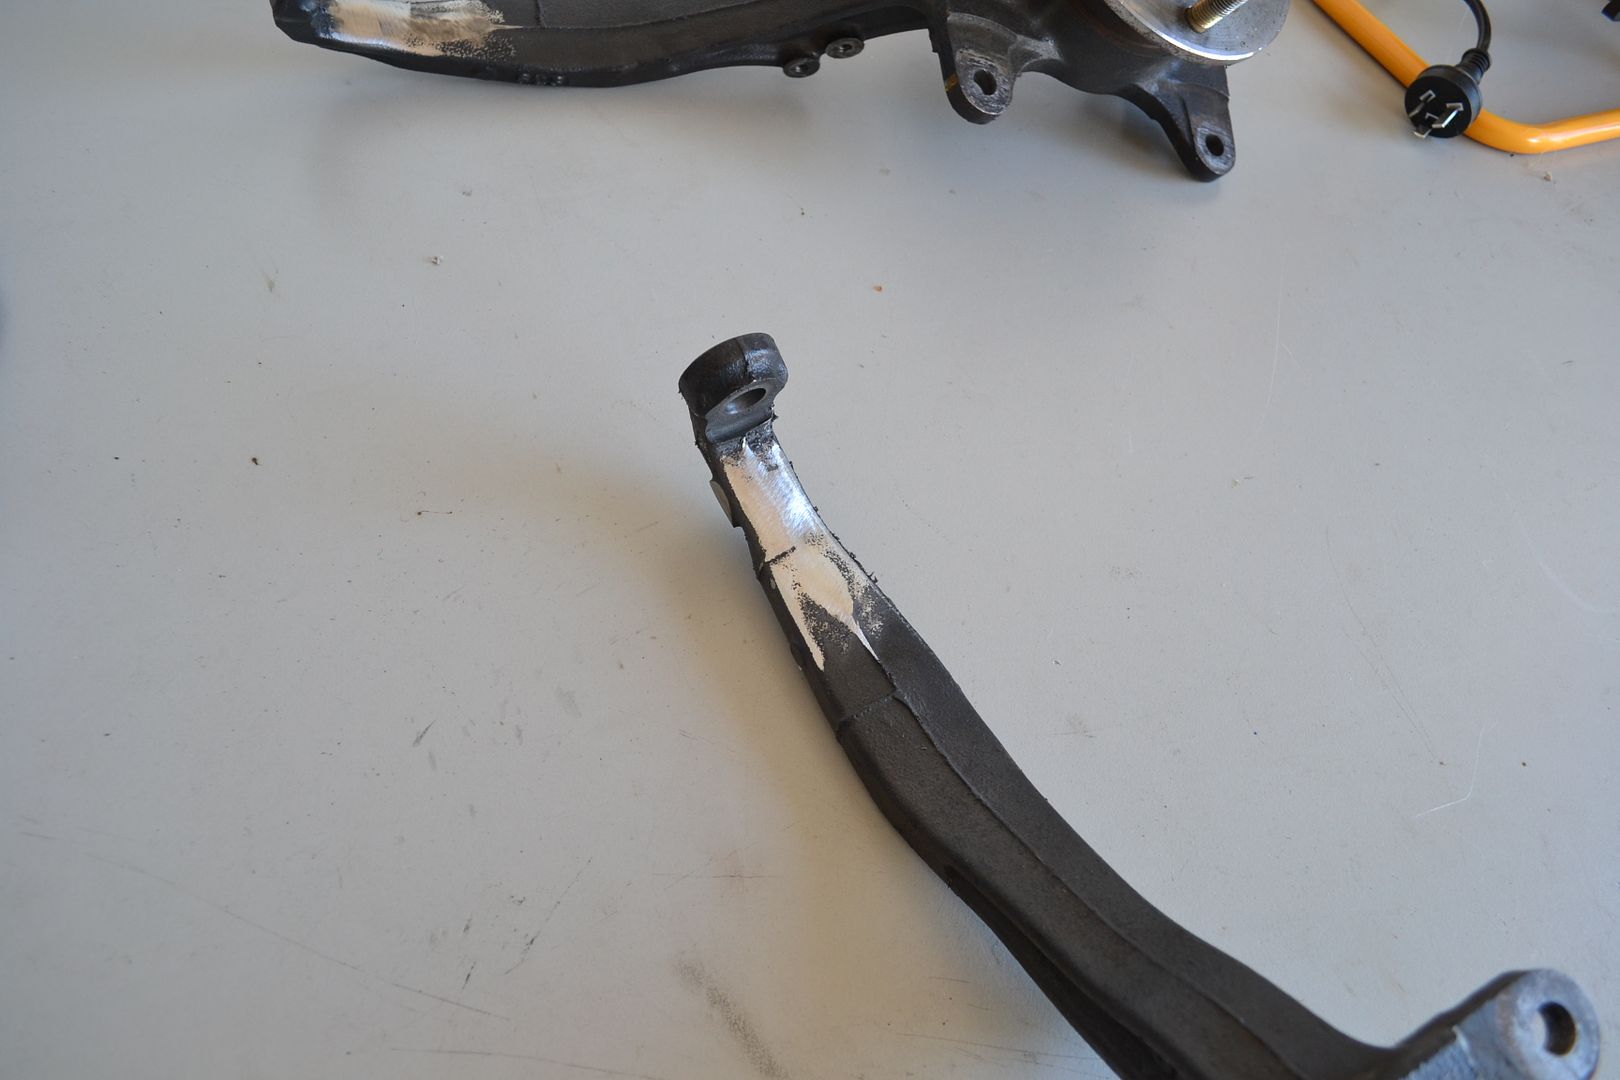
This is a photo of one of the trailing arms which are in the car now.
You can see the original LCA relocation bracket welded on.
That bracket was designed to correct the rear suspension geometry when using 15" wheels and relocated the LCA mount 25mm downward.
You can think of it as rear roll centre correction, it serves the same purpose as extended ball joints up front.
 Last edited by Grant@Honed; 05-09-16, 09:27 PM.Honed - WEB: https://honeddevelopments.com/ FB: https://www.facebook.com/honeddevelopments
Comment
-
-
fyi - 1983-87 preludes had single wiper...... retired/Comment
-
I haven't dropped of the face of the earth,
I had a few busy weeks at the start of October helping out two friends prepare their cars for WTAC (post about that to come)
I have done a few jobs on the Sedan through
I have fitted bonnet pins (what a crap job that is!)
They're not quite perfectly even but they're close enough
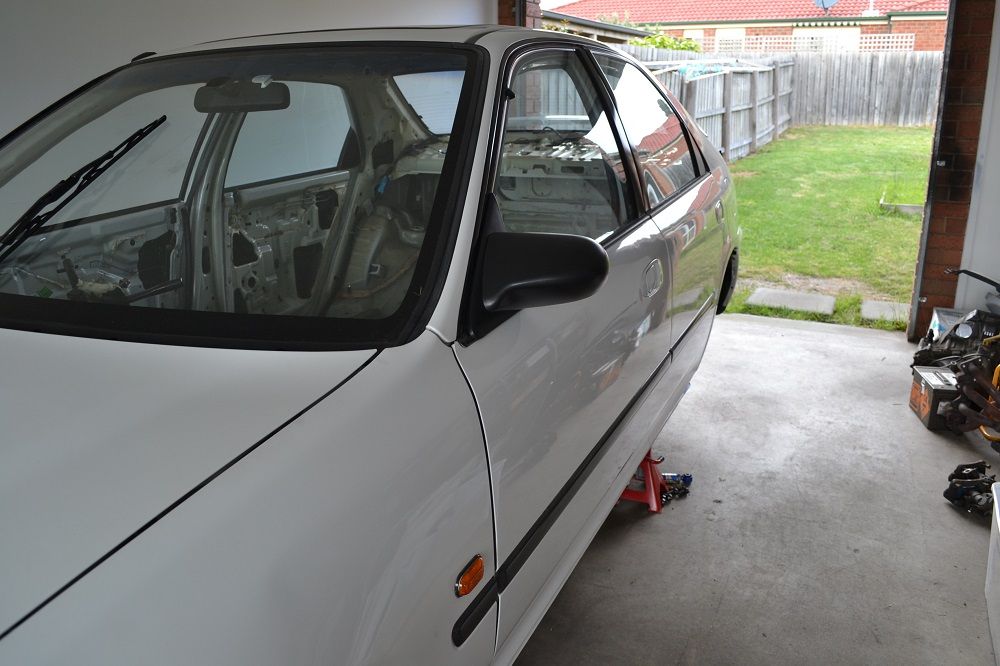
I bought some "spoon style" mirrors for the car.
I bought them knowing they were for an EG hatch but I took the chance hoping they'd fit the EH doors
Well they weren't even close and took quite a bit of re-shaping of the mounting plate to fit and then I had to devise a totally different mounting strategy, got there in the end though.
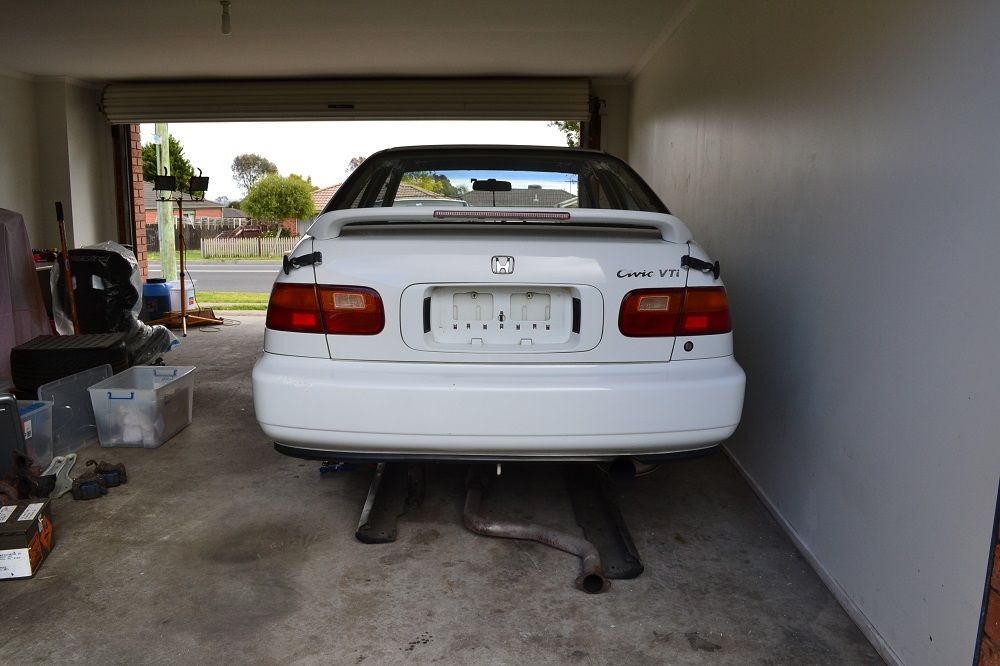
Continuing with the JTCC asthetics, I fitted some rubber pull down straps for the boot
I'm going to make a smooth plastic panel to replace the number plate cavity
My friend has a large NC router in his garage and so the plan is to machine a buck from tooling board and then take that to someone with an appropriately sized vacuum former and get a panel formed from white plastic
I bought a DC2 J's Racing tow hook for the front of the car but when I went to fit it I found that it didn't line up with the holes at the end of the front chassis rails
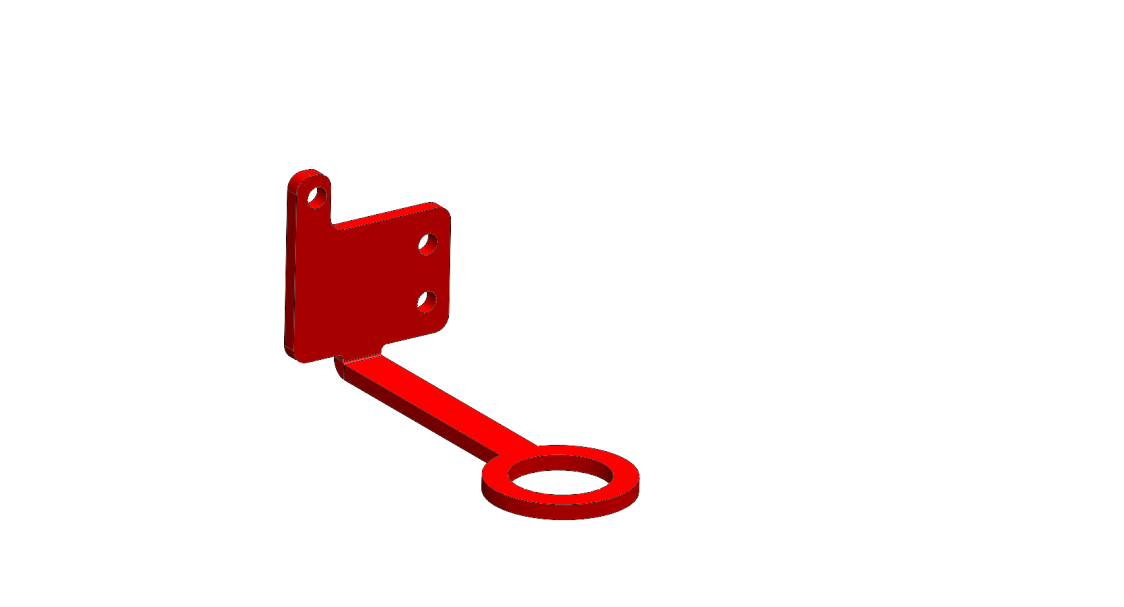
So I've designed my own took hooks and I've shaped the front one so I can retain the cross member that ties the front of the chassis rails together
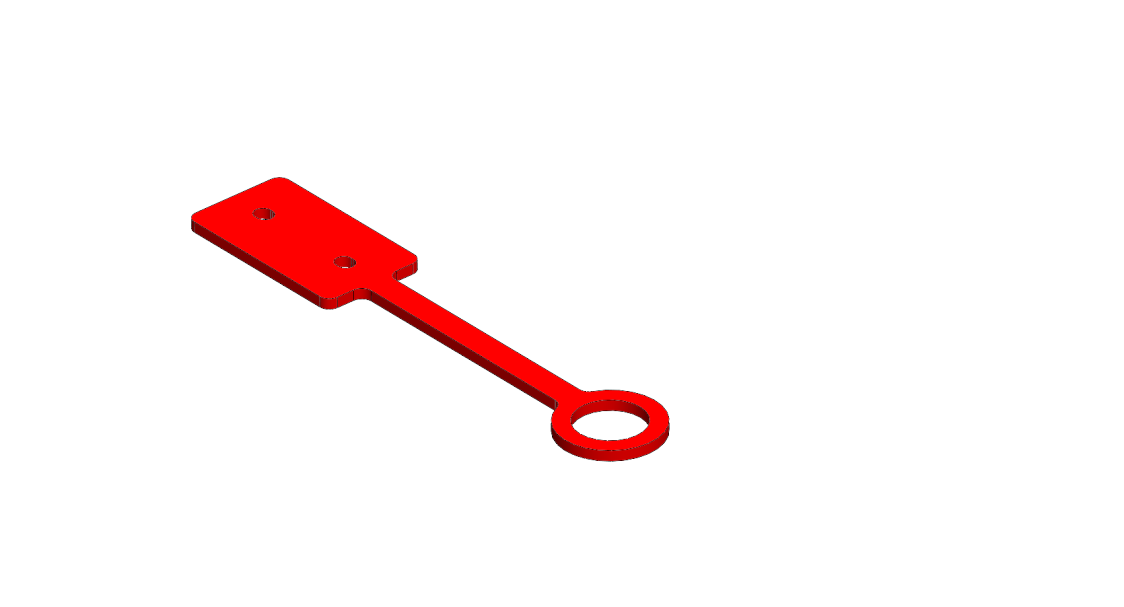
For the rear tow hook i'm going to cut a slot in the boot and slide this though, it will bolt to the two fasteners at the end of the chassis rail and then have it stick out the bumper
That probably doesn't make any sense, but it will when you see it!Last edited by Grant@Honed; 31-10-16, 06:10 PM.Honed - WEB: https://honeddevelopments.com/ FB: https://www.facebook.com/honeddevelopmentsComment
-
Originally posted by felixR View Post
Thanks Felix small progress
I hope to start the tubs and roll cage in december!Honed - WEB: https://honeddevelopments.com/ FB: https://www.facebook.com/honeddevelopmentsComment
-
Great progress as always, Grant!
Those tow hooks are of interest!!1997 Honda Civic EK4
Winton - 1:34.94
Bryant Park clockwise - 55.58
Bryant Park figure 8 - 61.30
Wakefield - 1:10.16
Phillip Island - 1:55.43Comment
-
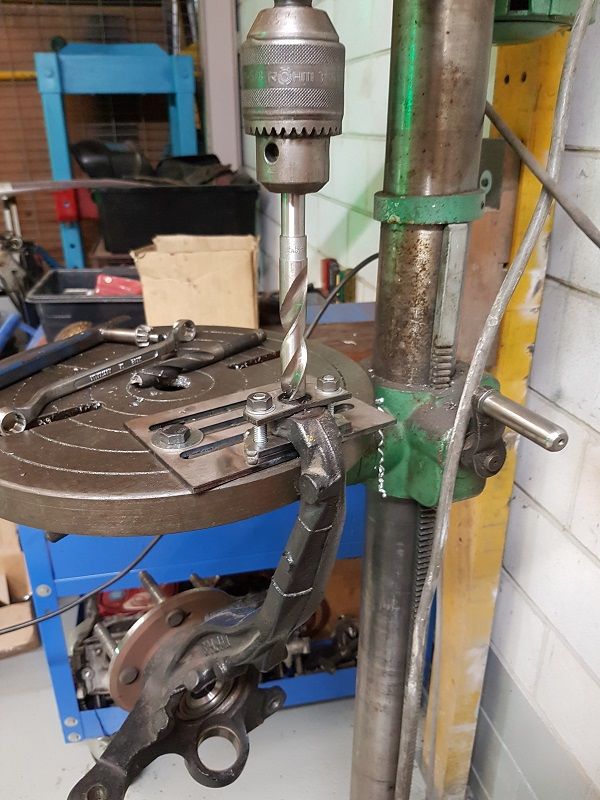
If you remember back a month or so I posted this cad image showing the modifications I intend to make to the knuckle

Well I now have those components in the metal ready to be fitted to the knuckles
To complete this task I have to make a fixture to hold the knuckle in a drill press and then drill through the upper ball joint taper and the steering arm taper
I hope to get that organised this week
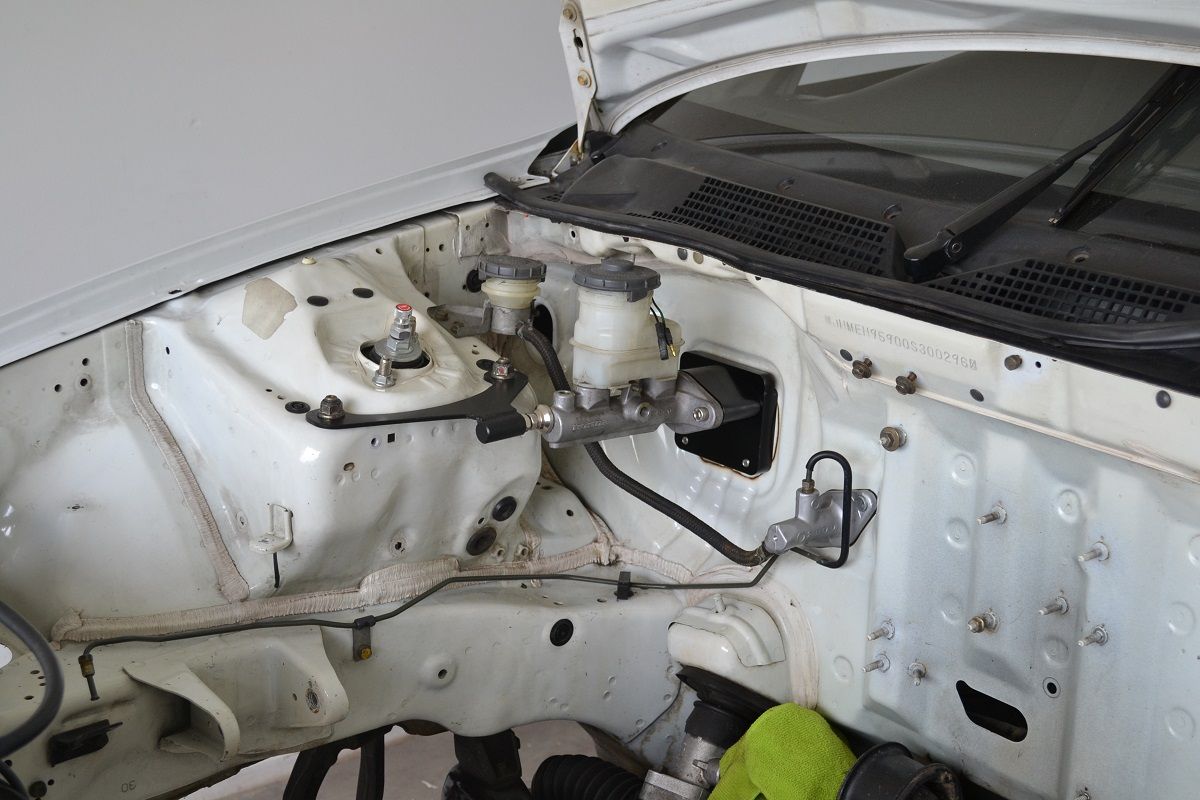
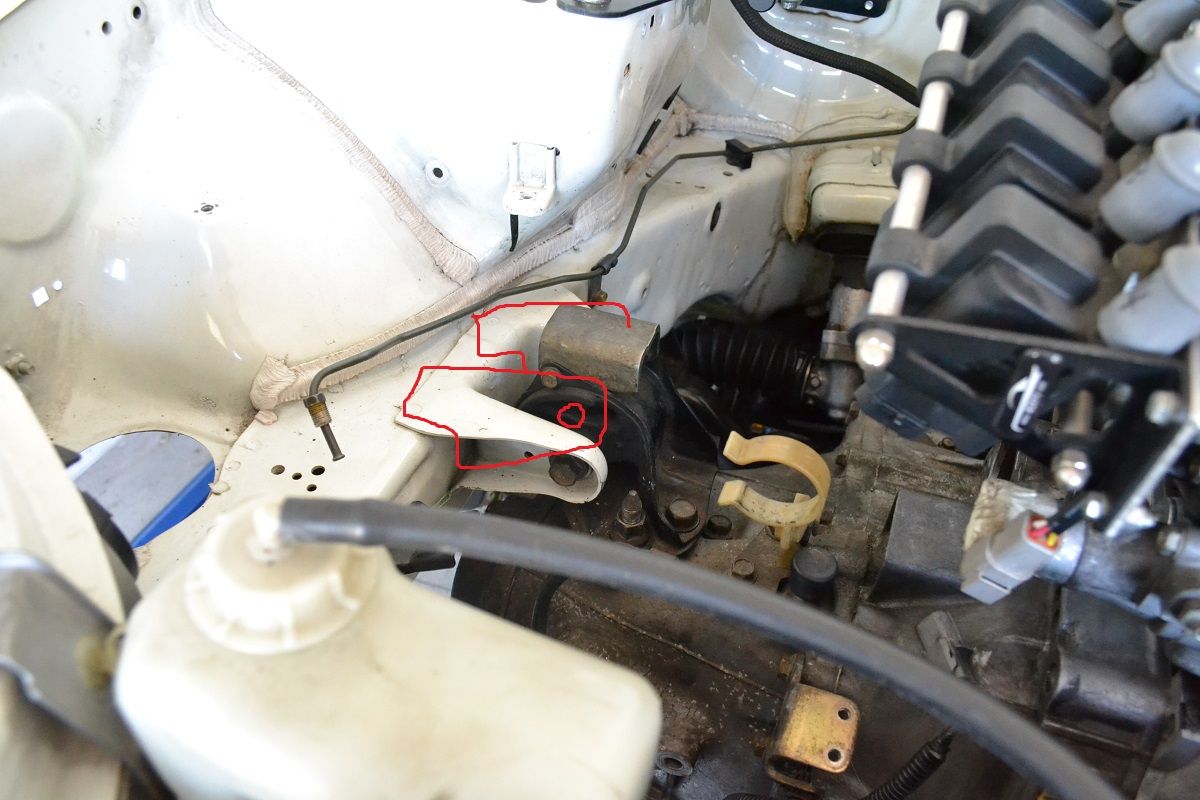
Last week I received the final version of my booster delete adapter and push rod
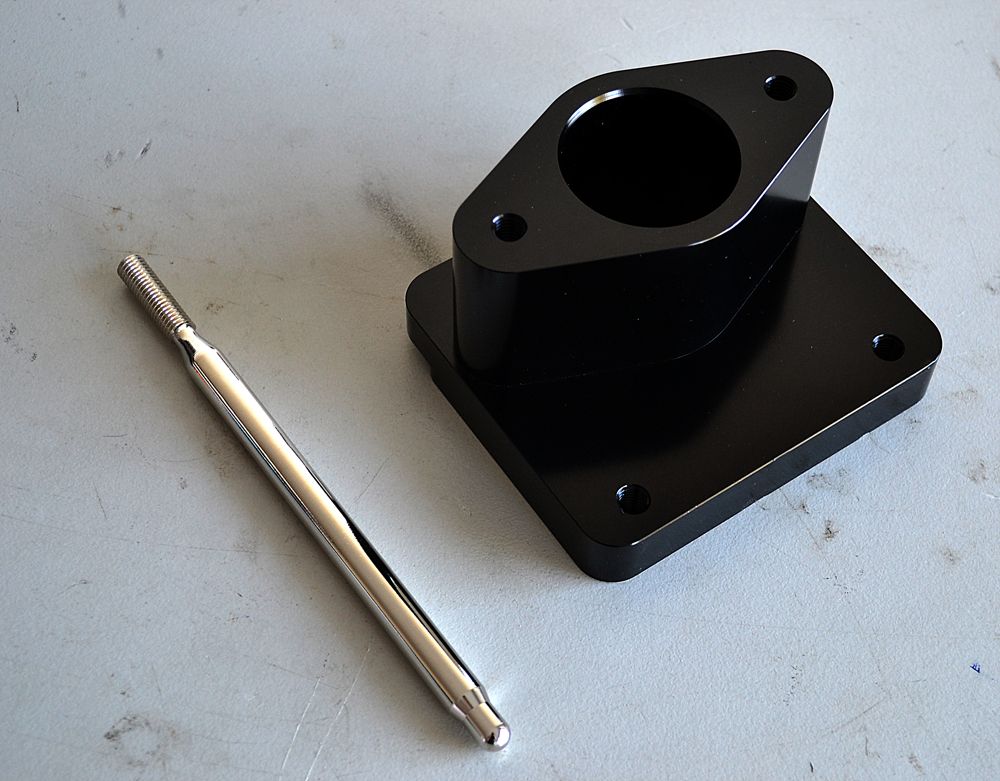
I've swapped out the EF master cylinder that I had on the Dc2 for an EK 7/8" master cylinder
The thicker adapter plate locates the lid of the master cylinder reservoir a nice distance away from the firewall

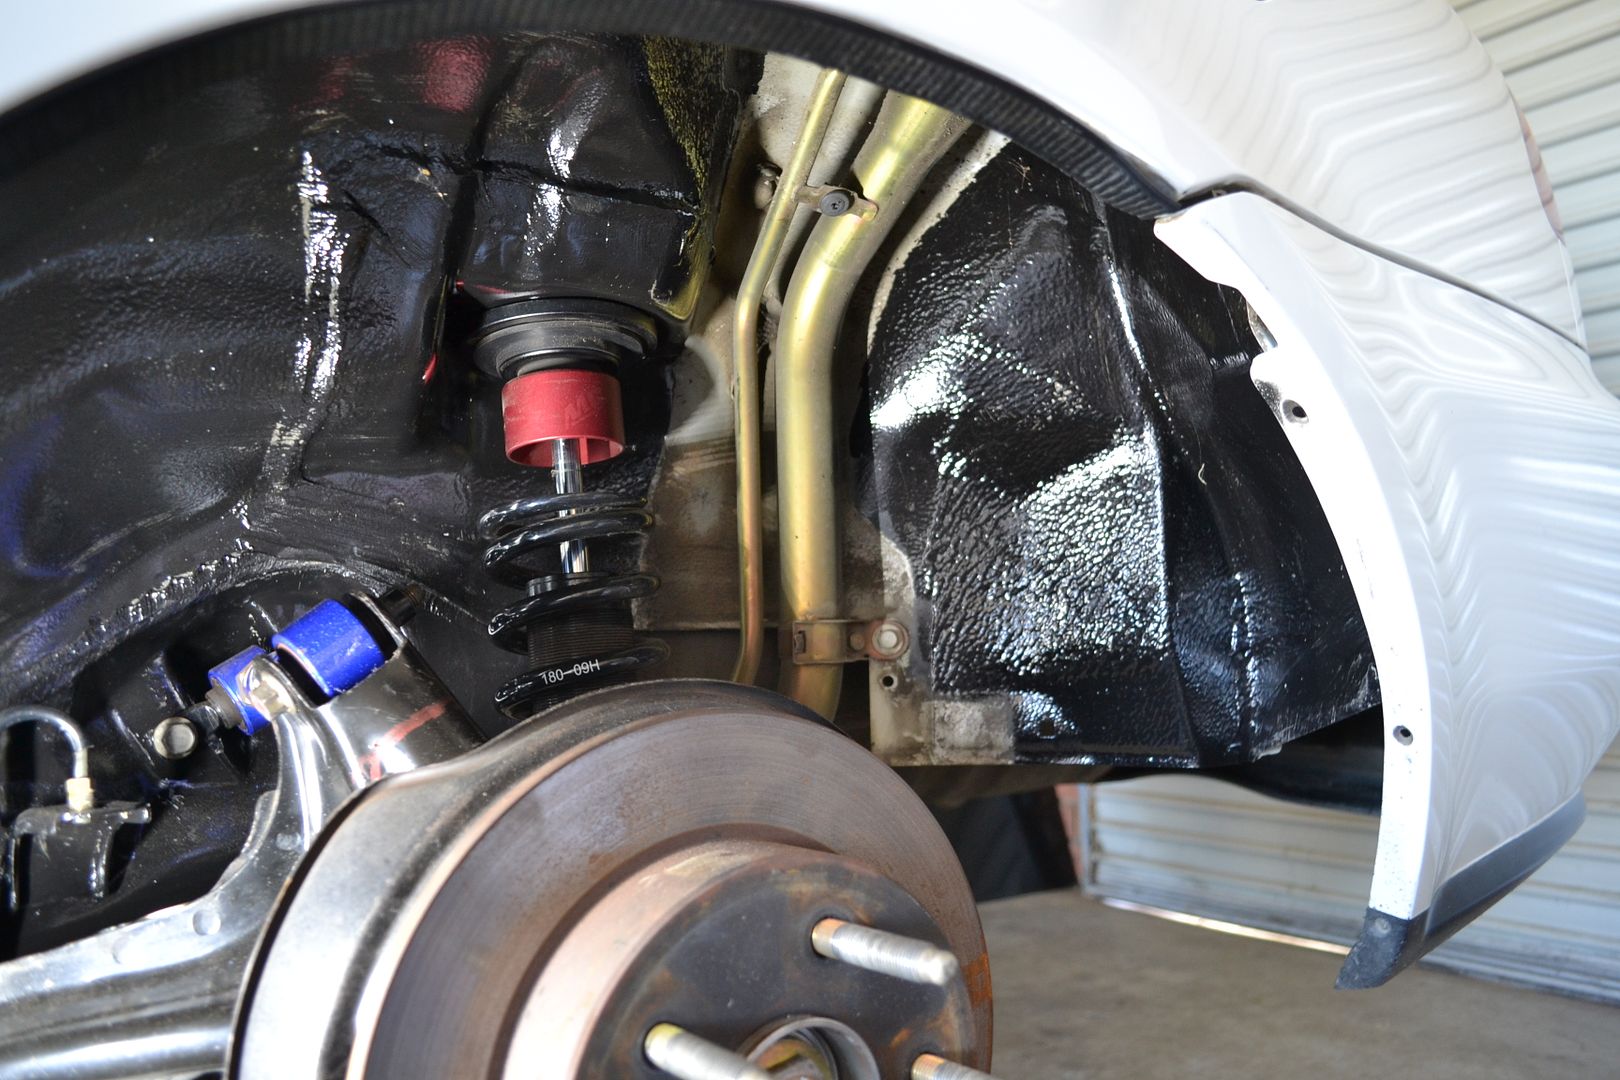
Full size radiator in EH shell using ASR mounting brackets

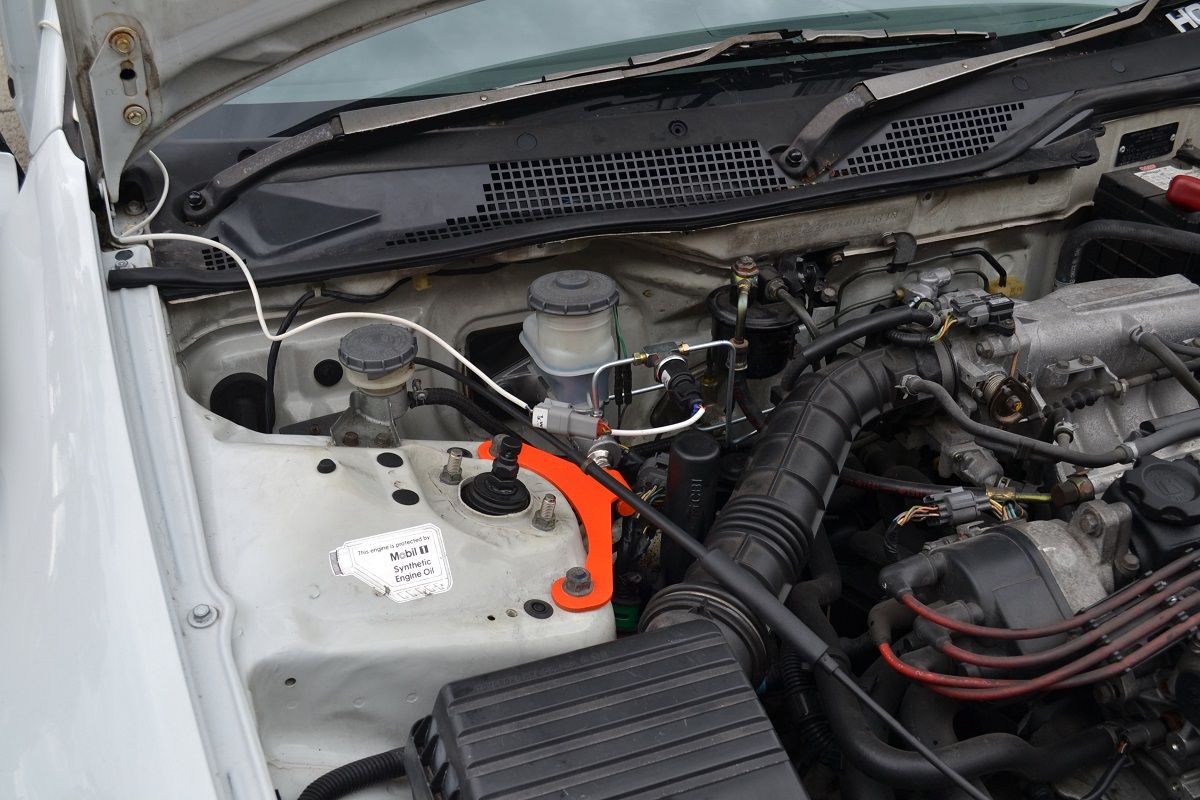
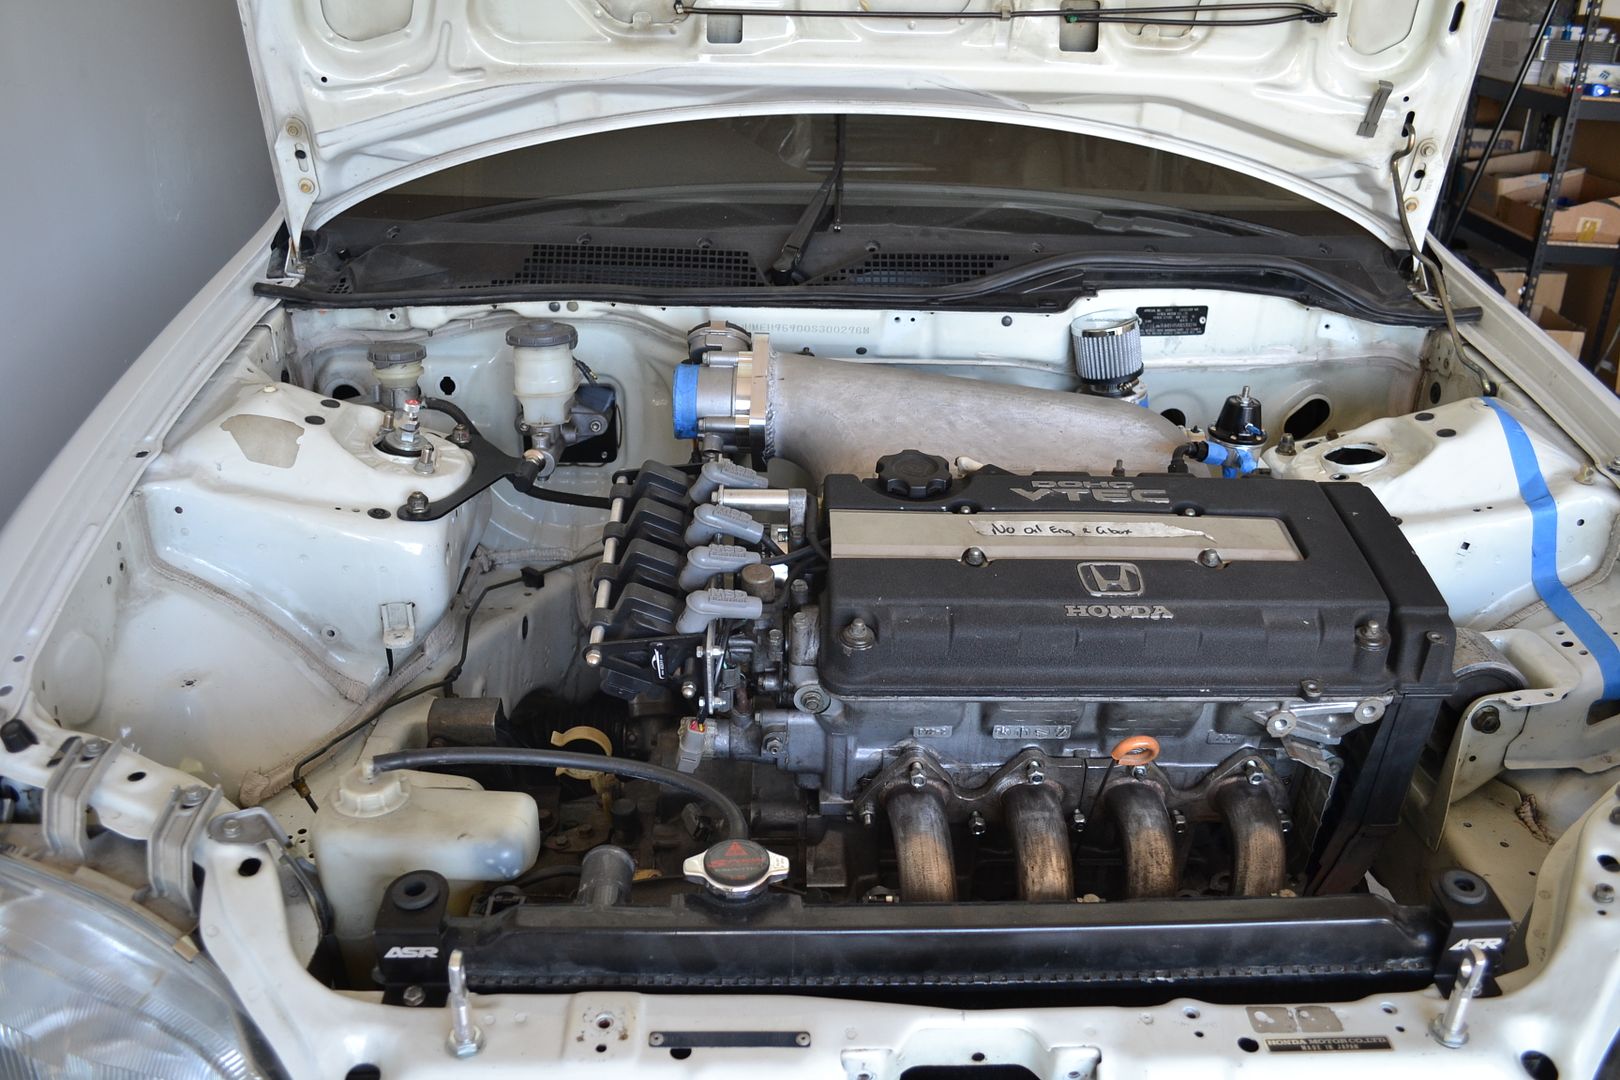
Today we welded the throttle body and vacuum port plate to my intake plenum
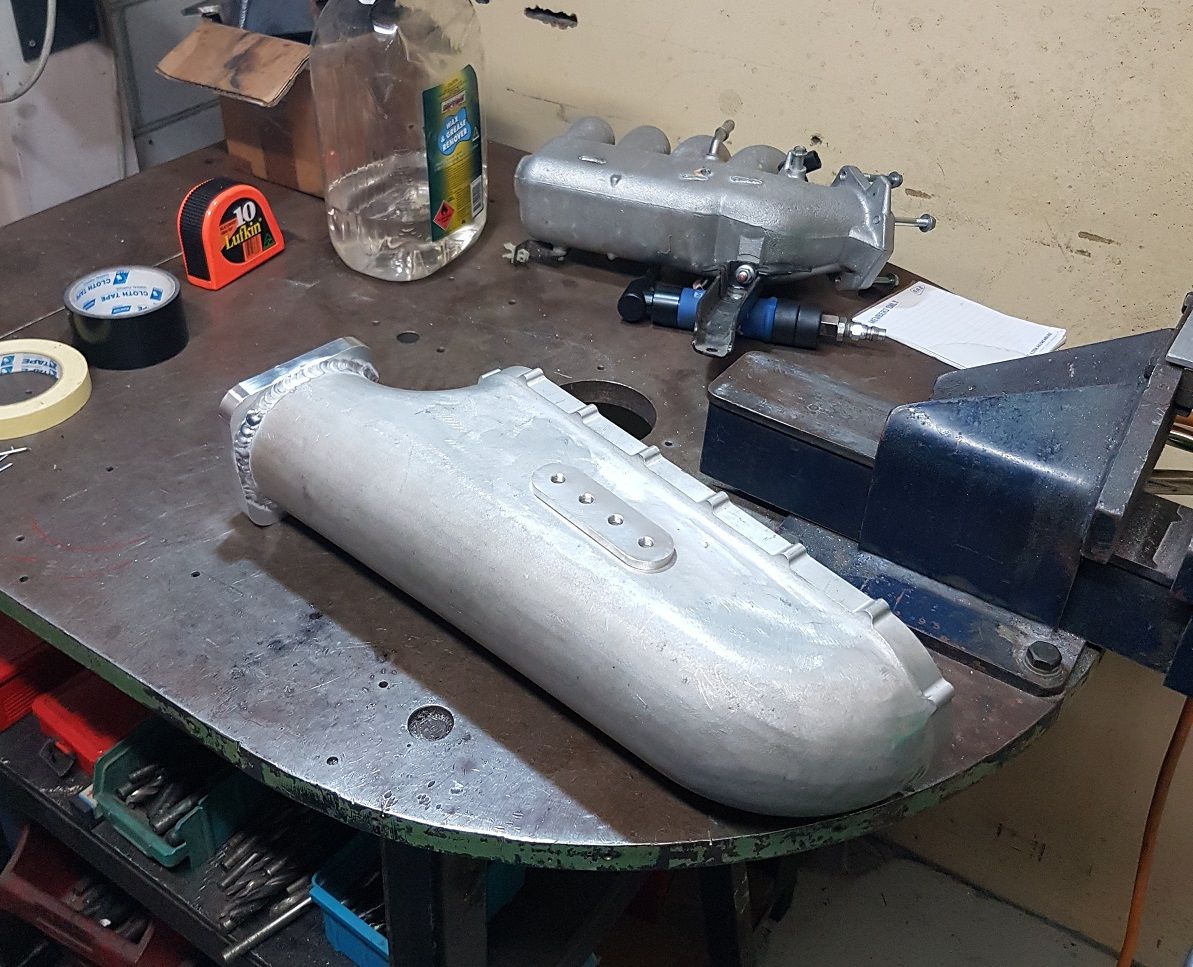
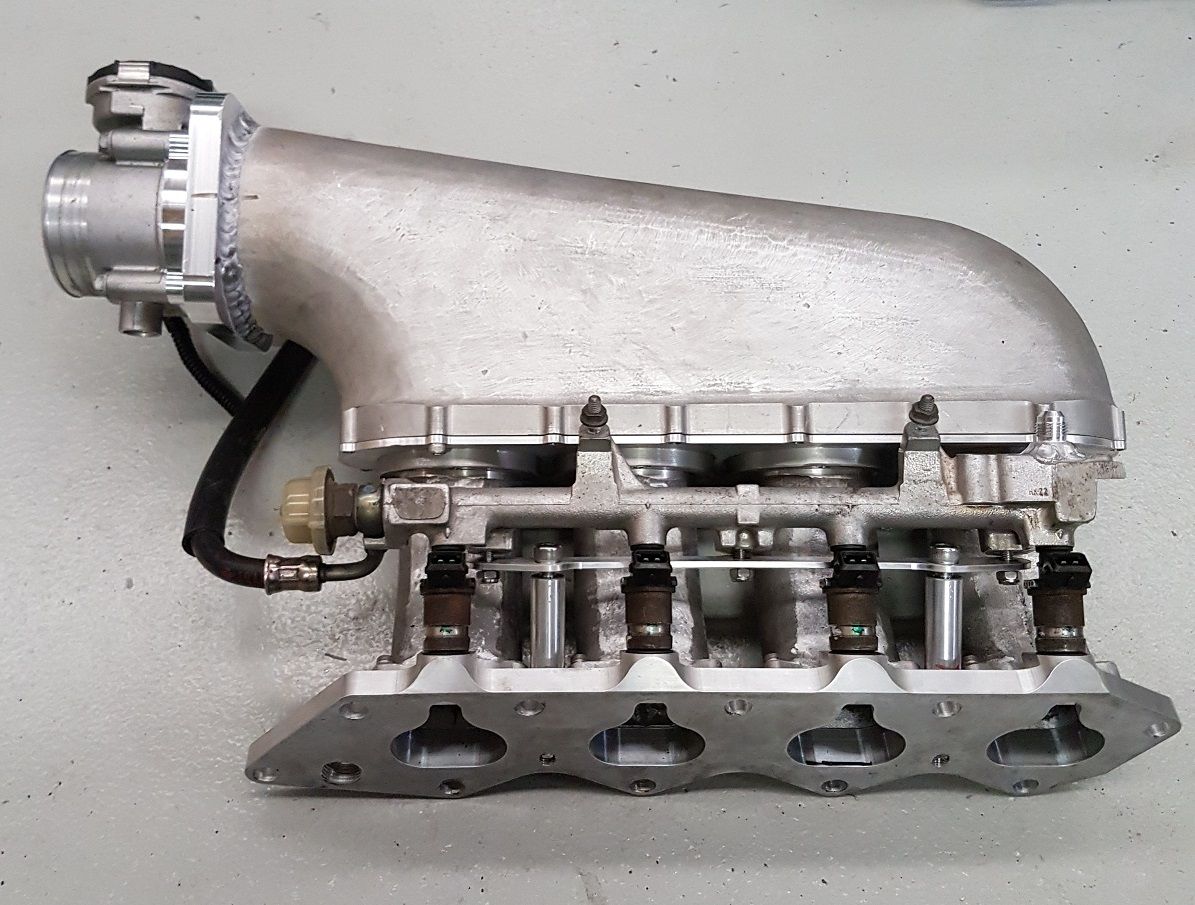
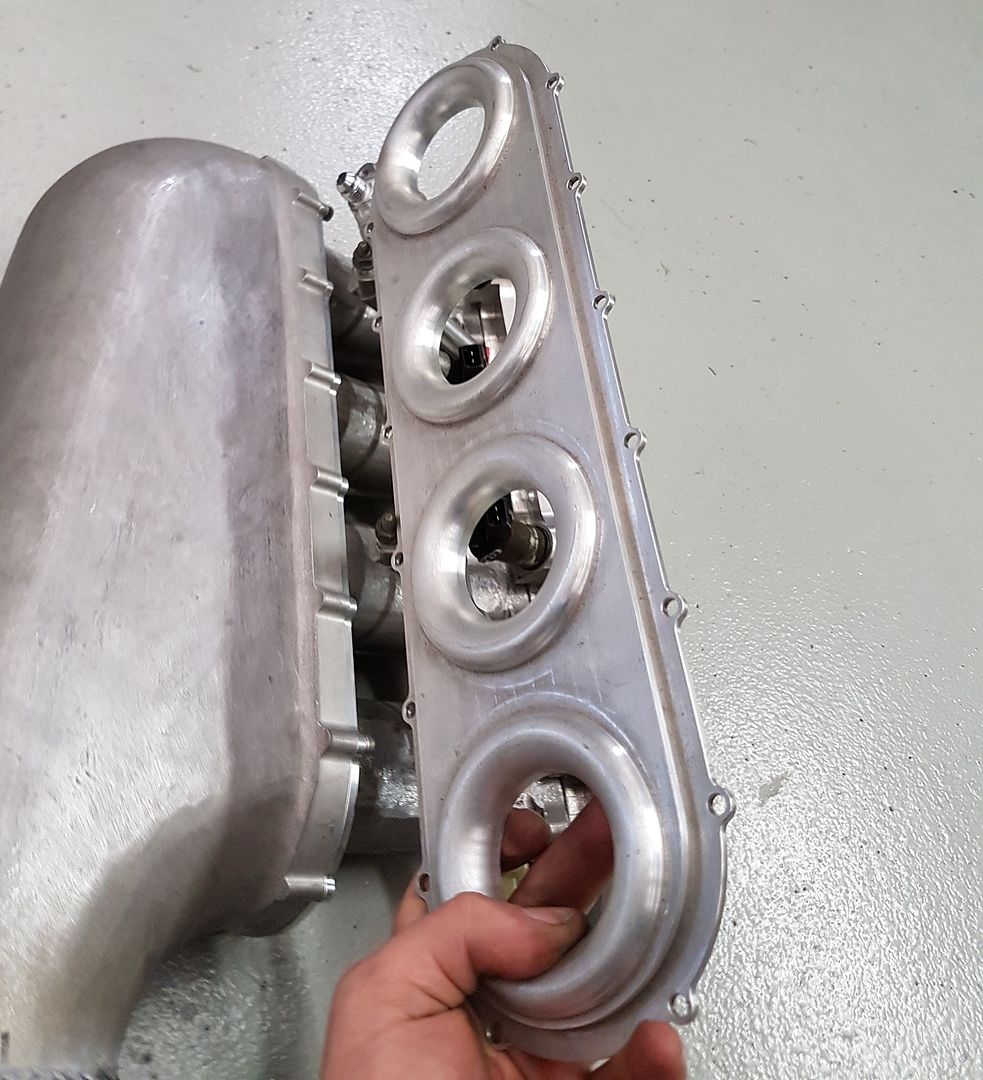
I'm using a 70mm electronic throttle body from a Holden Commodore
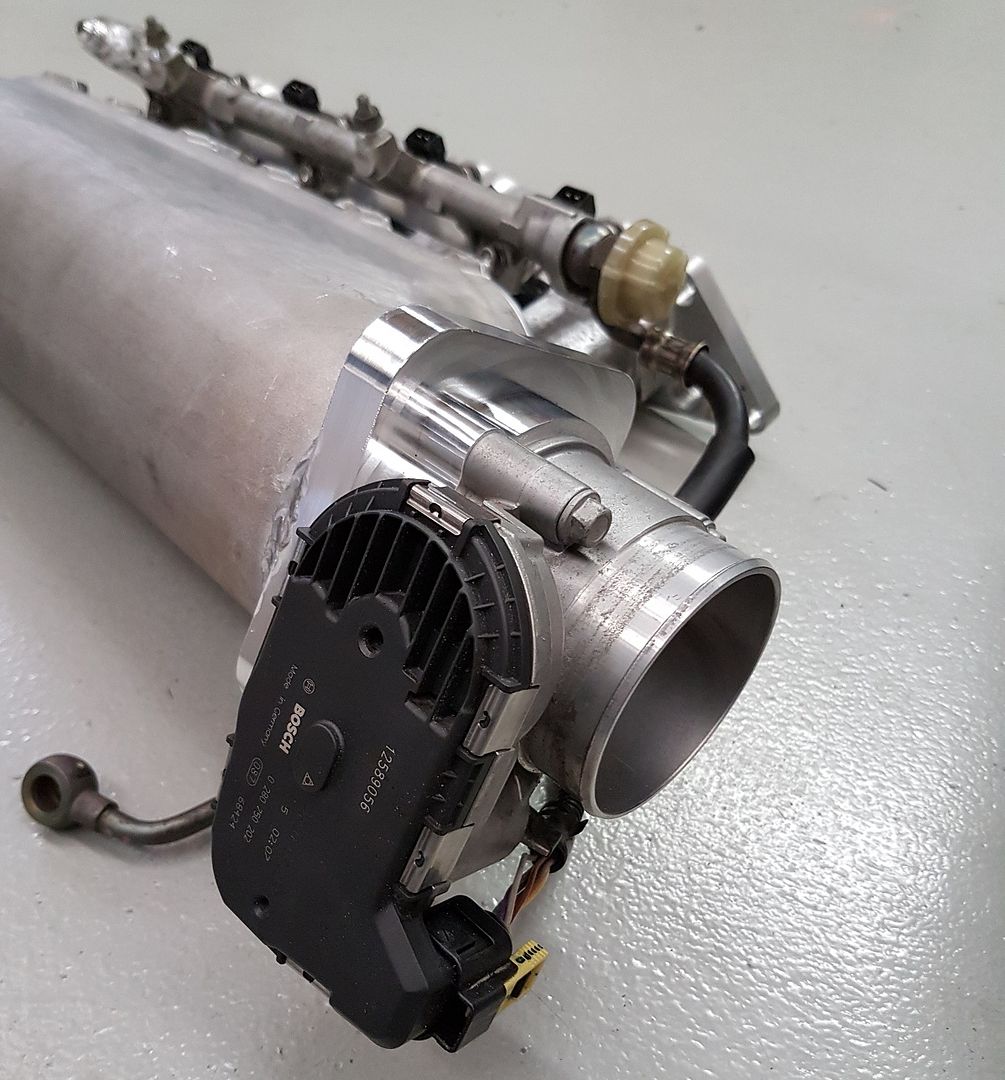
My initial impression is that the complete intake assembly is pretty big!
I have some concerns about how much clearance there will be to the firewall (and even the master cylinder )
 Last edited by Grant@Honed; 01-11-16, 07:09 PM.Honed - WEB: https://honeddevelopments.com/ FB: https://www.facebook.com/honeddevelopments
Comment
-
Awesome stuff !!
Sent from my iPhone using TapatalkComment
-
Awesome as always!!!Comment
-
Loved reading this whole build so far!
Subscribed!Comment
-
What's happened in the last couple of weeks?
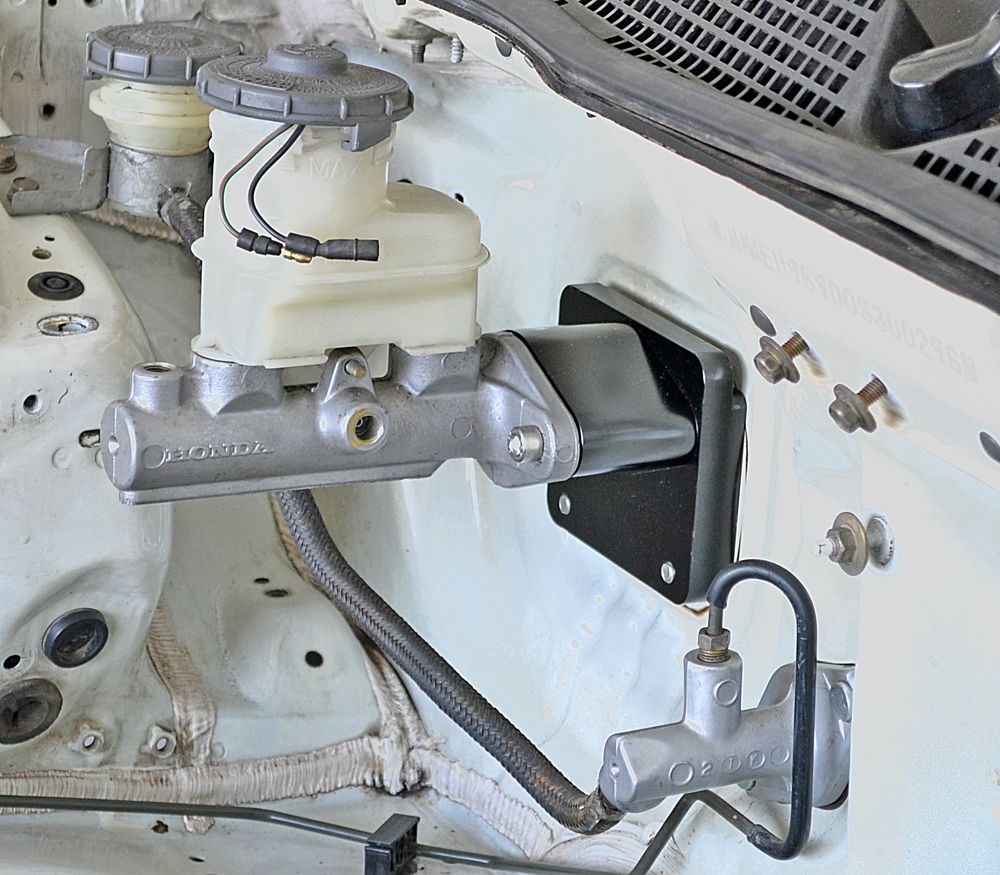
Tom and I have completed our new product the brake booster delete kit
Here you can see it installed in it's entirety in the Sedan
Last weekend we performed back to back testing with a friends EG hatch. We compared the factory boosted brake system to the Honed booster delete set up.
We data logged pedal force and brake line pressure and found an interesting result
Look for a full write up about that testing to be published on my website in the next few weeks!
The tow hooks I showed the CAD model for in the last update have been manufactured, painted and fitted
I think they look really good and capture the design style of the tow hooks from the JTCC cars
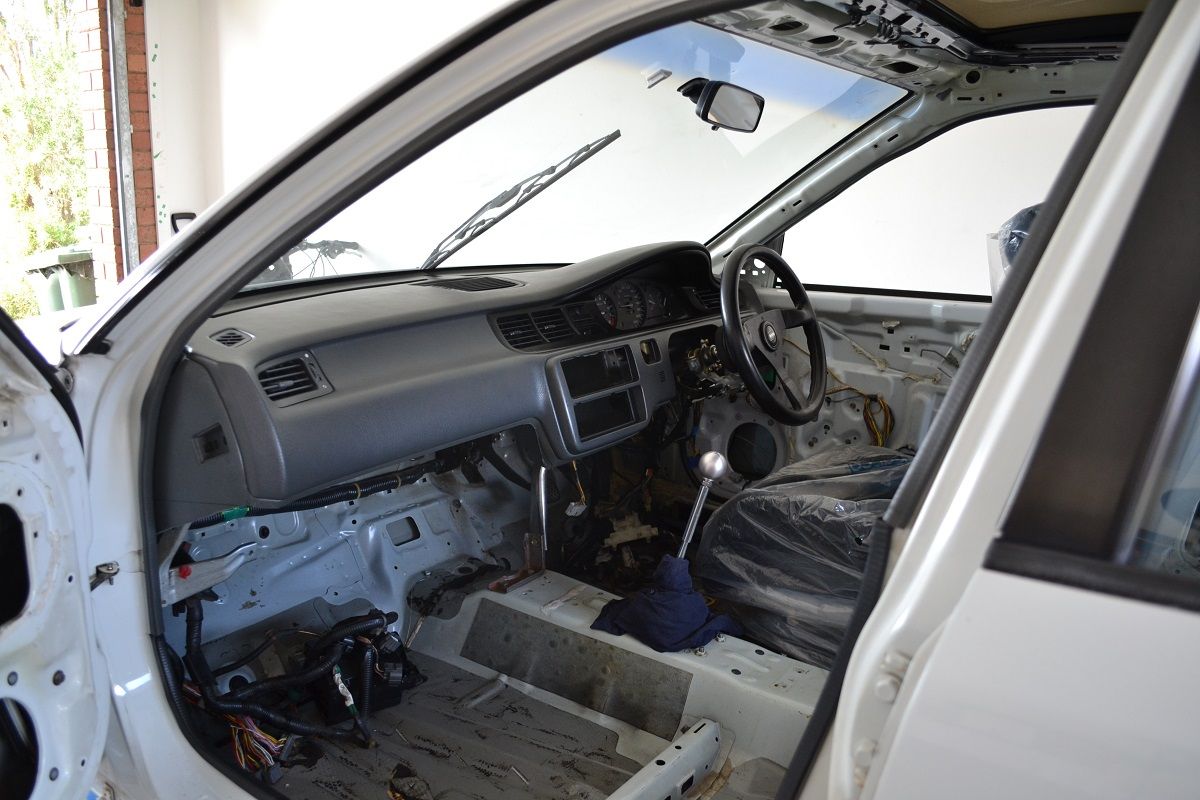
I've also trimmed the bottom of my dash. I intend on having a panel in the passenger foot well with the ECU, relays and fuse box mounted to it so I wanted to trim the dash back to have better access to that area
 Last edited by Grant@Honed; 18-11-16, 05:24 PM.Honed - WEB: https://honeddevelopments.com/ FB: https://www.facebook.com/honeddevelopments
Comment
-
Here's a run down on the work that I've been doing on the Sedan in the past few weeks
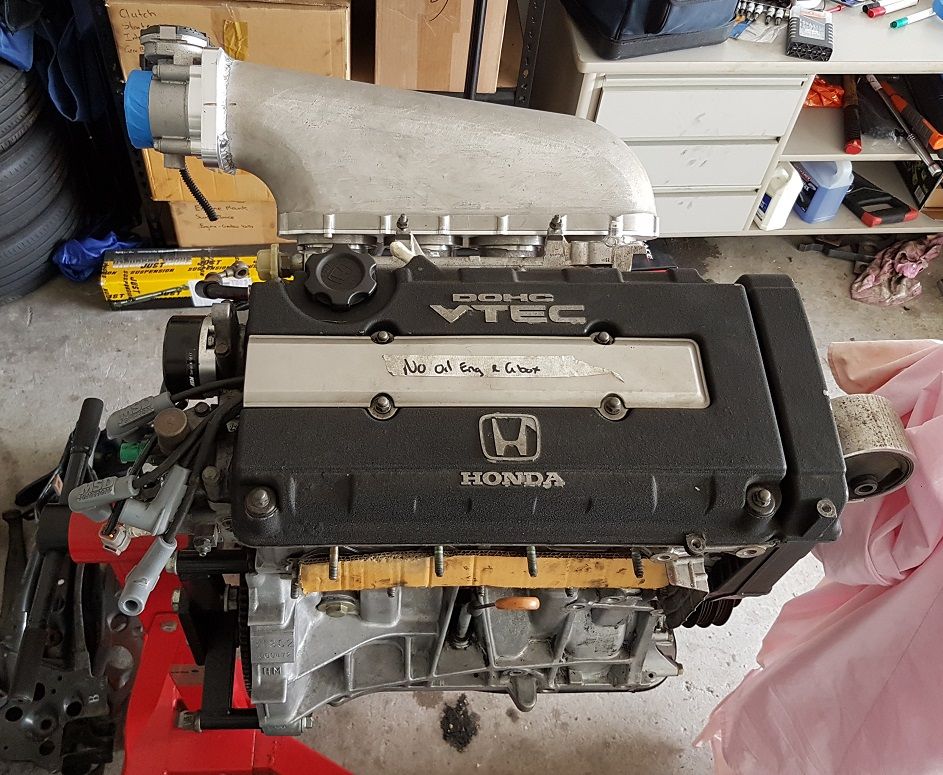
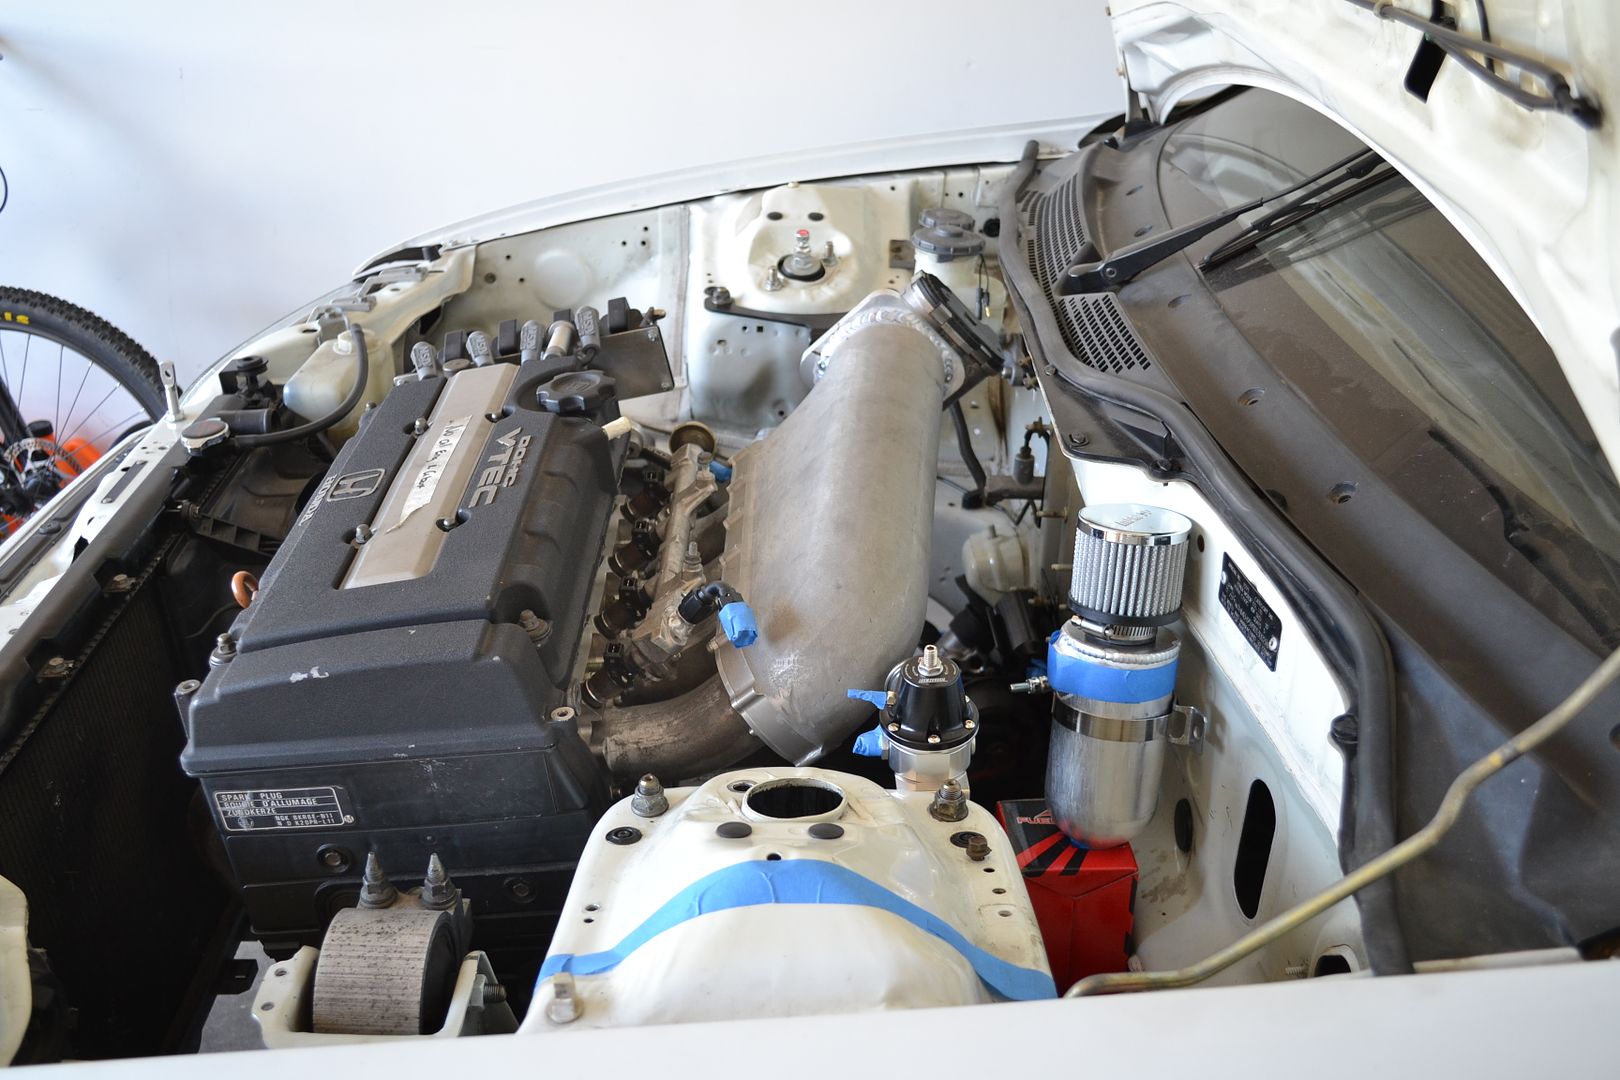
I re-installed the motor and gearbox so that I could check my driveshaft angles and work out the routing for the fuel line and engine oil cooler
I have a Turbosmart FPR and a Aeromotive inline filter and I intend to plumb the fuel line with -6an fittings and black nylon covered hose
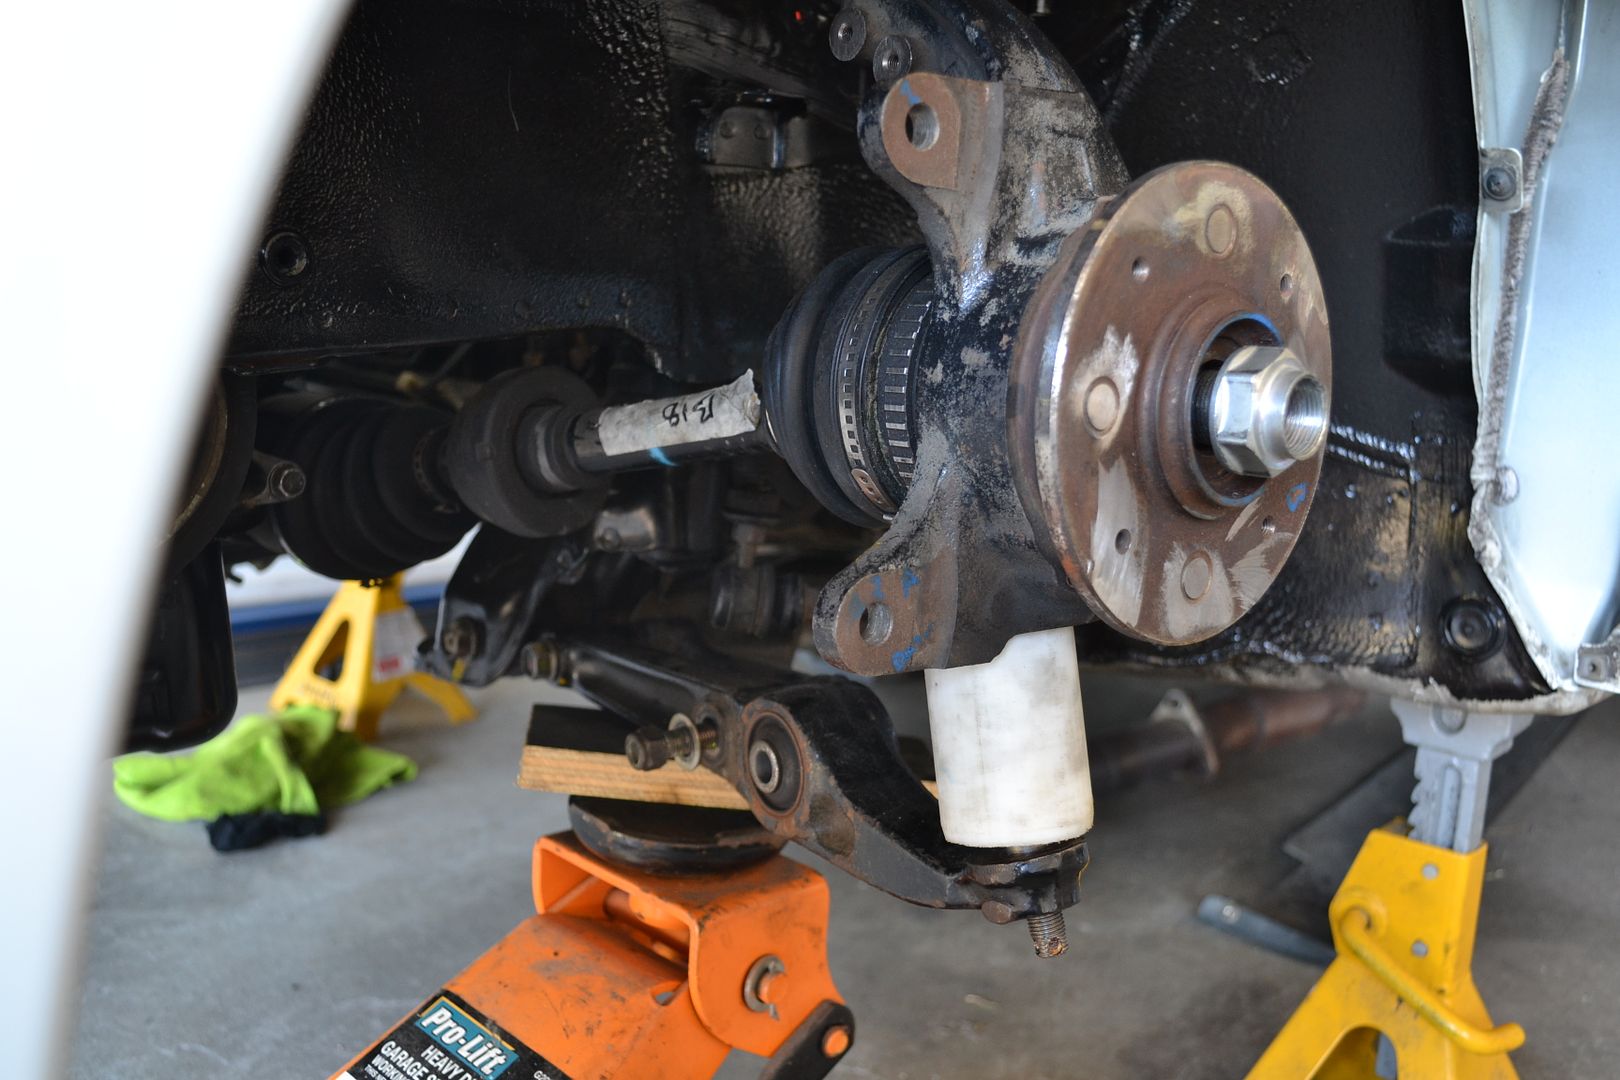
This is what the drive shaft angle looks like with the engine mounted in the standard position and the wheel hub ~250mm from the guard.
I cycled the suspension another 40mm up from here, checking that the driveshaft still rotated freely by turning it by hand every 10mm
To my surprise it didn't seem to bind however i think i'll relocate the engine upward by 15mm just to be safe.
Here's a shot of my mock up front knuckle and upper control arm. Note that my outboard suspension pick up points have been relocated by 50mm compared to a standard Honda and this is the only case when the steering arm needs to be mounted below the arm of the knuckle.
Super accurate visualization of my plans for the RHS engine mount
And the same for the left. This engine mount will interact with the tubs so i'll do the tubs first and then work out what the engine mount should look like

Speaking of tubs! I have received 4 off 28" x 10" mild steel trailer guards which look like so:

I probably should have realised this earlier but the fuel tank filler tube is going to be in the way of my rear tyre when it tries to move up
I don't want to go all out with a fuel cell at this stage so my current thought is to relocate the filler to the boot somehow.
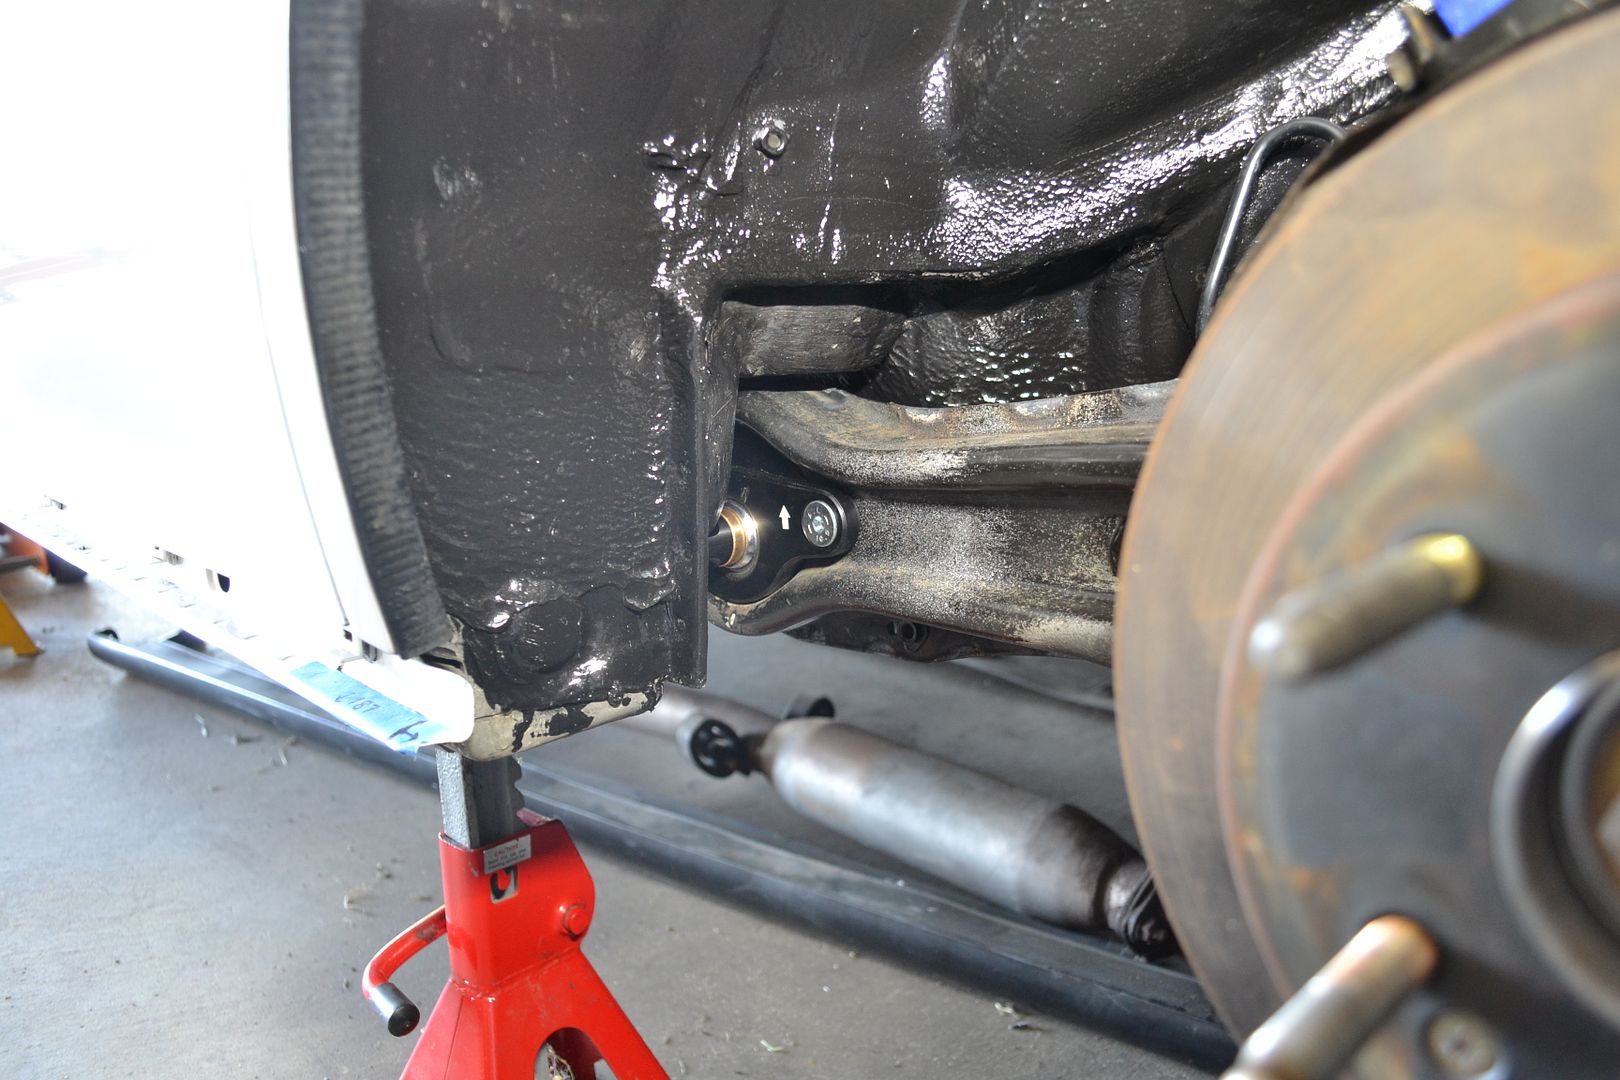
The trailing arms have been fitted with PCI's new spherical trailing arm bearing kit. I will pull the arms out next week and repaint them
I will need custom (shorter) toe compensation arms to work with the modified trailing arms. With any luck they will look like this:

I will still be able to use the factory rear sway bar at the rear which is nice
On Sunday Tom and I assembled special tool no. 293 (a fixture for holding a steering knuckle to the bed of a drill press) and then proceeded to drill out the taper in my knuckles
The knuckle was drilled out to 15.5mm and I will then reamed the holes to a 16mm H7 tolerance which will give me a nice press fit for my shouldered inserts
The inside face of the knuckle was ground down to give me every last bit of clearance for the "wrap around" style upper control arm
 Honed - WEB: https://honeddevelopments.com/ FB: https://www.facebook.com/honeddevelopments
Comment


Comment