Announcement

Collapse
No announcement yet.

[DIY] DC5 rear upper control arm install

Collapse
X
 
  • Filter
  • Time
  • Show
Clear All
new posts

    [DIY] DC5 rear upper control arm install

    DIY: DC5 rear upper control arm install

    I recently put a pair of Hardrace adjustable rear upper control arms in my DC5 and I thought I would share some pictures and short comments on the process I went through. Note that myself and clubITR take no responsibility for any misadventures that may befall you if you attempt this DIY. Please only proceed if you have adequate mechanical knowledge and the right tools.

    Things you will need:

    10mm socket
    17mm socket
    Breaker bar
    Torque wrench
    Various extensions
    17mm spanner
    10mm spanner
    Jack
    Jack stands

    Things that I used that might make your life easier or were unique to the Hardrace arms I was putting in:

    17mm ratcheting spanner
    10mm ratcheting spanner
    3/4" spanner
    3/4" socket
    Various cable ties
    Sidecutters
    Adjustable shifter
    Anti-seize


    Figure 1: All the tools I used for the install.


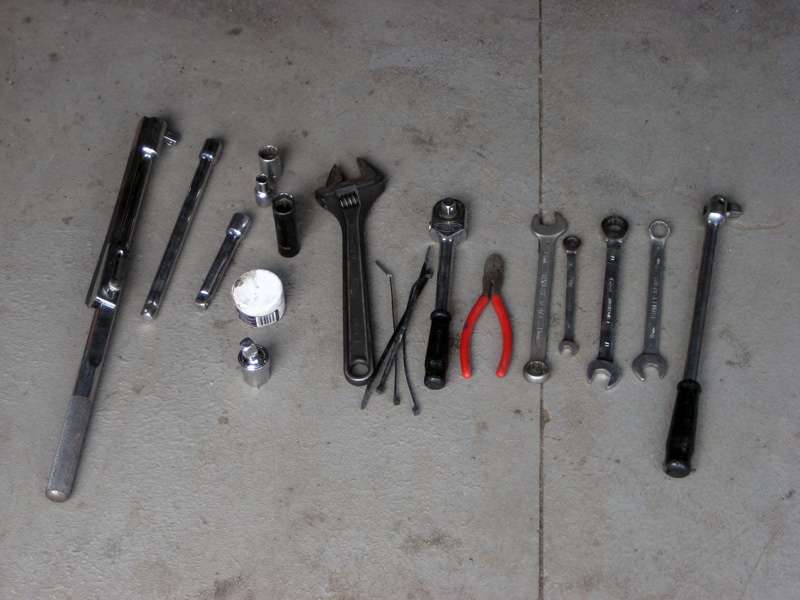
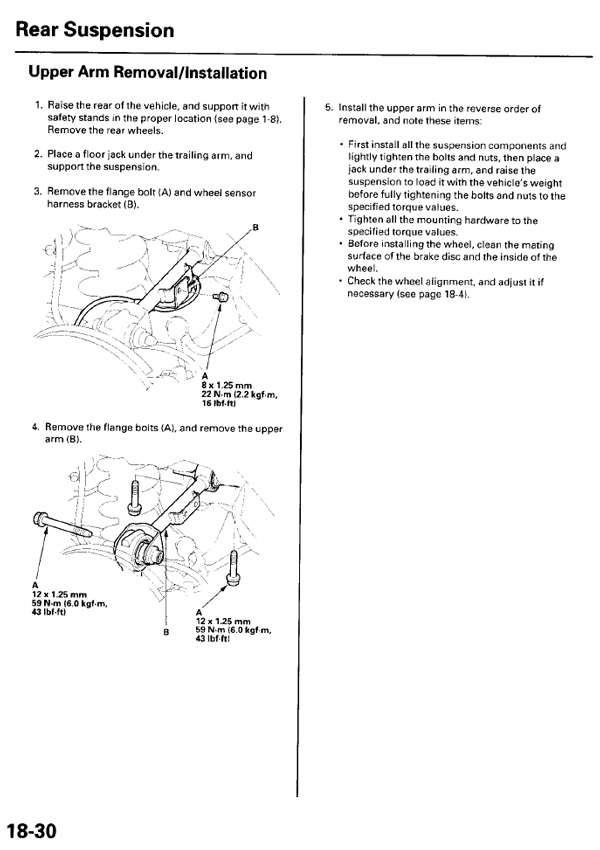
    Figure 2: The relevant page from the workshop manual


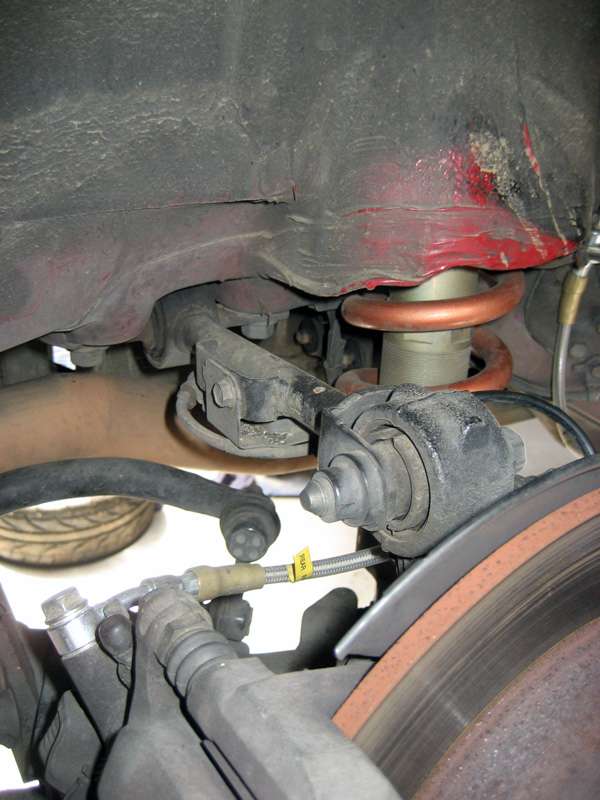
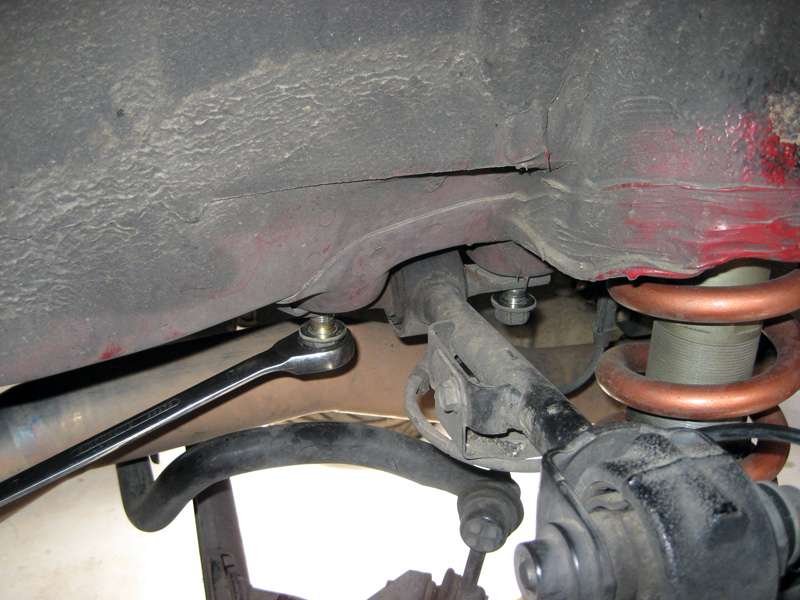
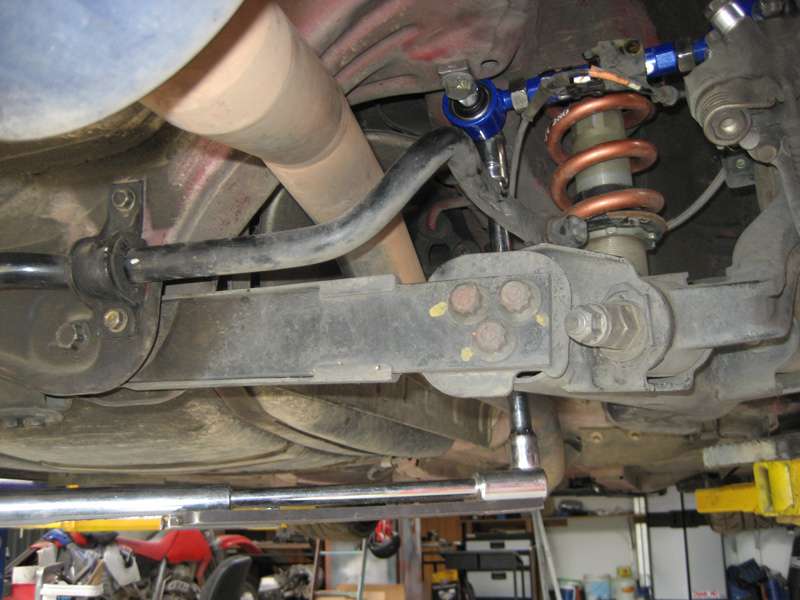
    Step 1: Place the car on a solid level surface with the handbrake on. Loosen all the rear wheel nuts, refer Figure 3. Raise the car using the jack to as high as practicable. Place jack stands under the two rear jack points. Lower the car onto the stands and give the car a shove to make sure that it is stable. Remove the rear wheels and you should be faced with something like what is shown in Figure 4. The upper control arm that we are replacing is shown in Figure 5.


    Figure 3: Loosening the wheel nuts


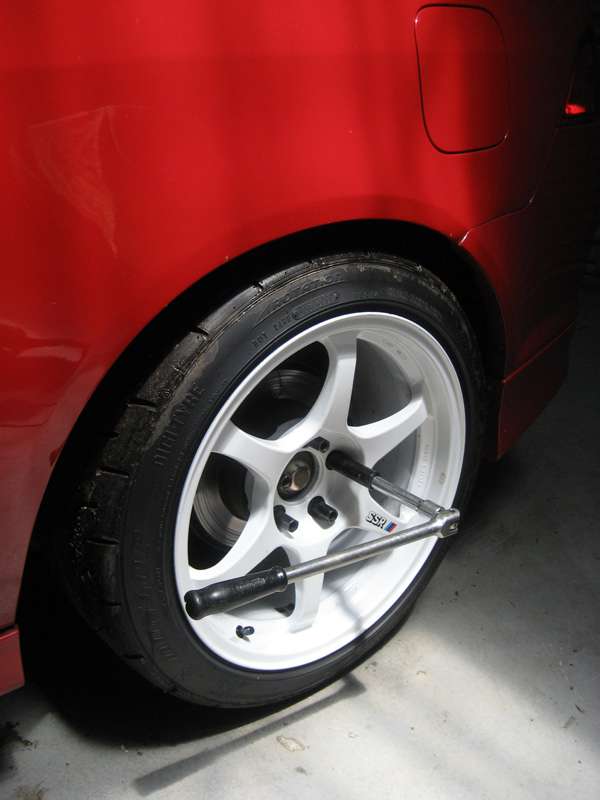
    Figure 4: Wheel removed


    Figure 5: OEM upper control arm


    #2
    Step 2: Loosen and remove the outer bolt holding the upper control arm to the knuckle using a 17mm socket and breaker bar, refer to Figure 6. Loosen and remove the bolt holding the ABS line bracket to the control arm using a 10mm spanner or socket, put the ABS line to the side. Loosen and remove the two inner bolts holding the control arm to the chassis using a 17mm spanner or socket. Refer to Figure 7. You should now have in your hand the OEM control arm pictured in Figure 8. Repeat for the other side.


    Figure 6: Loosening the outer bolt


    Figure 7: Loosening the two inner bolts


    Figure 8: OEM upper control arm removed


    Step 3: If you are installing aftermarket length adjustable control arms like I was, set the desired length. I set mine a little longer than the OEM arms because I wanted slightly less camber, ensure that approximately equal amounts of thread are showing on both the inner and outer ends of the control arm. Tighten the lock nuts on the control arm only hand tight at this point. Refer to Figure 9.

    Install the control arm in the reverse order of removal ignoring the ABS line at this point if your aftermarket arm doesn't have provision for it like my Hardrace arms. Install the three main bolts holding the arm in only loosely at this point. Figure 10 shows the arm installed. Tighten the lock nuts on the control arm at this point with a spanner if you have the right size, or an adjustable shifter like I did.


    Figure 9: OEM control arm compared to aftermarket arm


    Figure 10: Aftermarket arm installed


    Step 4: Cable tie the ABS line bracket to the arm as shown in Figure 11. This step is only needed if your arms don't come with provision for the OEM bracket, if they do then install the bracket and torque the small bolt holding it in place to 22Nm. The next step is to torque the two inner bolts on the upper control arm to 59Nm as shown in Figure 12. Normal practice is to tighten all suspension bolts with the suspension loaded and the car on the ground but the design of the inner bush on the DC5 upper control arm makes this unnecessary.


    Figure 11: Brake line bracket cable tied


    Figure 12: Torqueing inner bolts


    Step 5: Replace the wheels and moderately tighten the wheel nuts. Lower the car onto ramps or some other similar raised surface to allow you to access the outer bolt of the rear upper control arm. Torque both outer bolts to 59Nm. This can be difficult to do from under the car so the easier way to do it is to place a jack underneath the hub with the wheel off and jack the suspension up to load it and then tighten the outer bolt up to the specified 59Nm.

    Step 6: Lower the car, torque up the wheel nuts to 110Nm or so. Drive cautiously to get a wheel alignment and you are done. Enjoy the freedom to adjust your rear camber at will.

    Feel free to make comment if anything isn't clear or ask any questions.

    Comment


      #3
      Hey i just installed the same camber kit just then. I was wondering by the looks from your pictures did you adjust the length by adjusting which hex bolt? I adjusted the outer bolt?

      Comment


        #4
        nice writeup dude, I am sure even I could do this now thanks to your detailed guide
        sigpicCurrent holder of the Win folder.

        Comment


          #5
          Originally posted by OMGRX7 View Post
          Hey i just installed the same camber kit just then. I was wondering by the looks from your pictures did you adjust the length by adjusting which hex bolt? I adjusted the outer bolt?
          I adjusted the arm with by turning both ends so that the amount of thread exposed at each end was about the same. Did you get the rubber bushed version or the one with spherical bearings like mine?

          Originally posted by Didz View Post
          nice writeup dude, I am sure even I could do this now thanks to your detailed guide
          I think that anyone could do this, my guide actually makes it look much more complex than it is .

          Comment


            #6
            Great write up mate

            Comment


              #7
              great write up mate.. Driven the car yet?? How they feel?? (i know your not totally gonna know what there like till u track it, just a rough thought mate)
              FOR SALE 2005 DC5 TYPE S with 156k km's log books $11.3k

              Comment


                #8
                Originally posted by maracer View Post
                Great write up mate
                Thanks Mario, I should have taken a few more pictures though.

                Originally posted by mrntegra View Post
                great write up mate.. Driven the car yet?? How they feel?? (i know your not totally gonna know what there like till u track it, just a rough thought mate)
                Drove it back to the house from the shed, but that is only a couple of kms. It felt slightly more responsive due to replacing the rubber bush with a spherical I guess but as you say I am hoping the difference on track will be more pronounced .

                Comment

                Working...
                X