Howdy,
Yes I know, there are plenty of DIY's around for this but just shoosh up and read!
Tools :
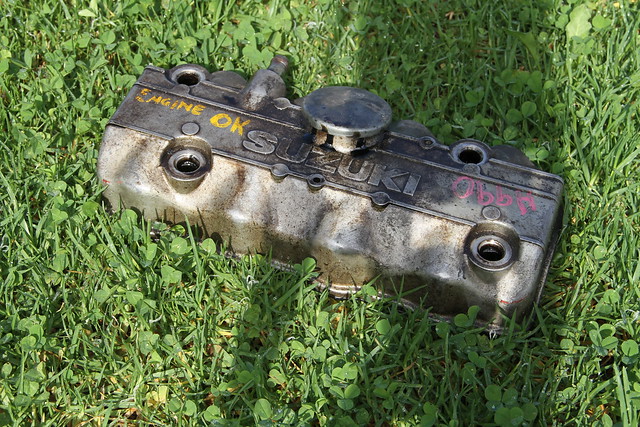
For my DIY i chose this perfect example, filthy old 1L Suzuki Sierra cover.
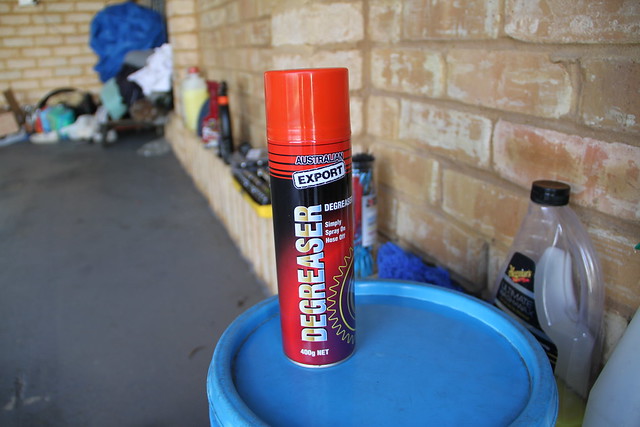
This stuff is cheap and works really well, Found at your local supercheap
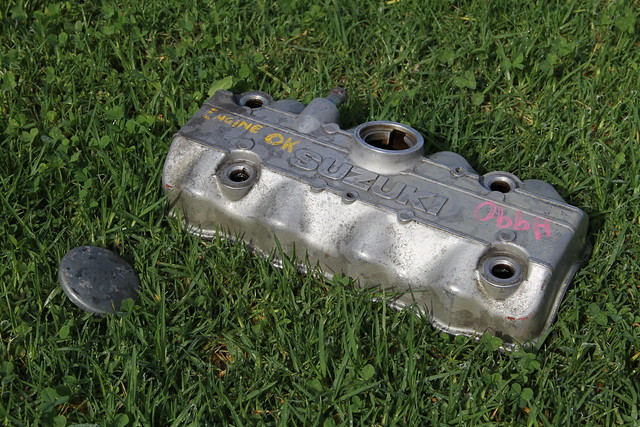
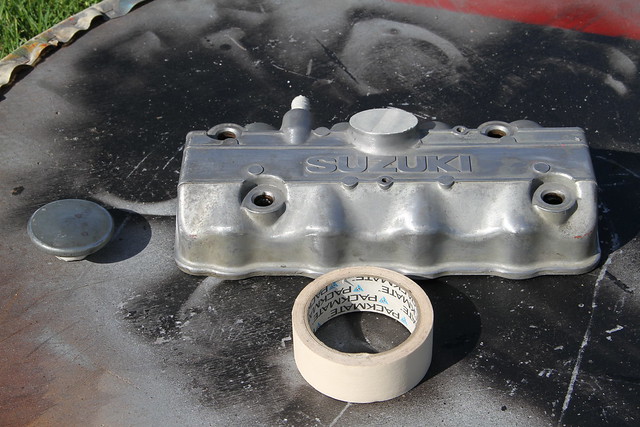
Clean and now ready for a sand.
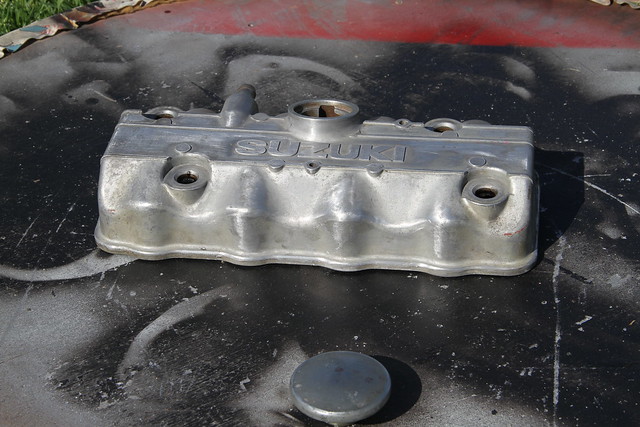
Sand back the cover using 200-400 grit sandpaper. You wan't a finer sand paper so your finished product will be smooth, anything less will be to rough and not give it a nice smooth finish.
Once you have done that you will want to wipe down the entire thing with wax and grease remover, this will leave the surface ready for paint to stick.
Mask up what ever you don't want painted
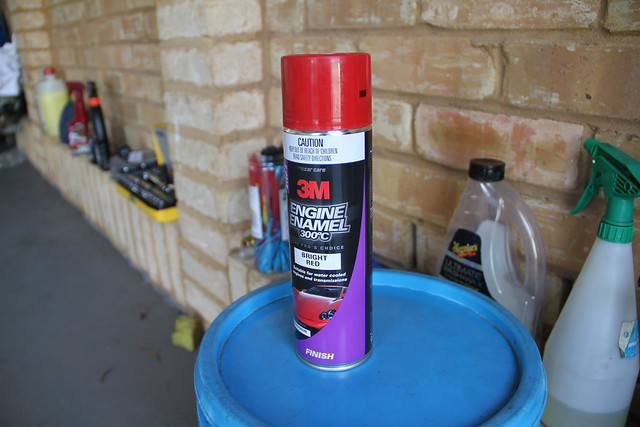
Paint - Now some DIY's and people say that you need to primer this and lalal. Well personally I've never primered rocker covers or other metal objects and have been fine but if you are one of those people then I'd suggest using an etch primer. So long is the surface is scuffed up and clean the paint will stick fine.
My weapon of choice is 3M Engine enamel.
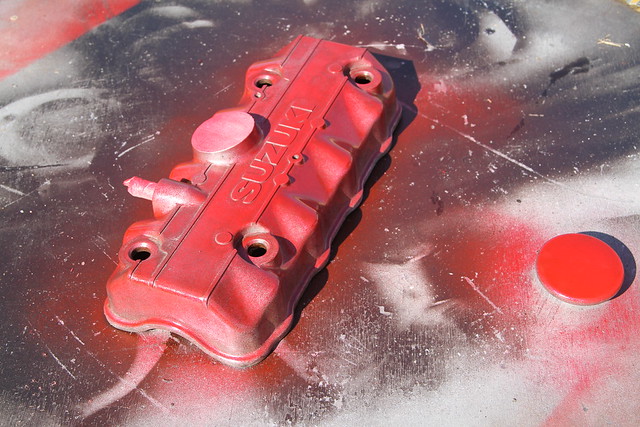
First coat
Your first coat you want to be very thin, and very little. Most people attack it with a thick layer of paint straight up. WRONG First coat should be as pictured, not completely covered and very thin, this allows the paint to stick and assuring your next coat will stick also.
Allow 5-10mins for drying pending on ambient temperature.
2nd coat, you can apply a thicker coat covering all metal surface, not too thick as you don't want runs.
Allow 10-20 mins to dry pending on ambient temperature.
3rd coat, same as the 2nd, this should be your last coat but a 4th won't do any harm either.
OPTIONAL :
Clear coat : Generally if you want to keep the paint finish glossy you should apply a clear coat, If not over time it will dull and become a satin/matte finish.
In this case I would use a ENAMEL clear coat. If you are using acrylic paint then use and ACRYLIC clear coat. The 2 can NOT mix. Be sure to use a well branded clear coat and not cheap $hit. The cheap clear coats tend to turn yellow over time. (true story)
in this case, this is for a $hitty farm car so I really don't care if it turns matte so no clear coat for mine.
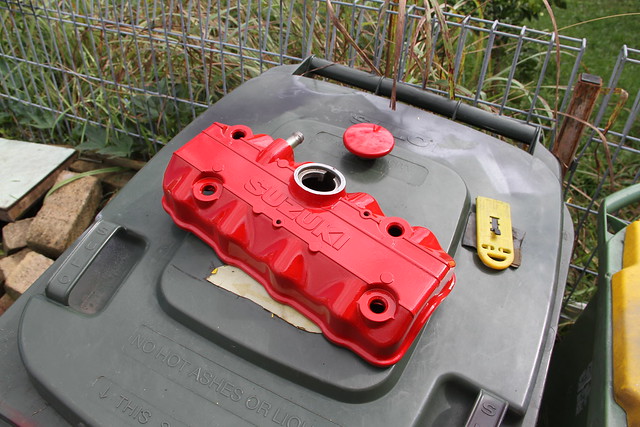
What you're finished project should look like, no runs, no smudges no imperfections.
OPTIONAL STEP :
Finishing touches like this really make the job stand out.
There are many ways to get the letters/numbers back to metal. Some sand, some file, some scrape.
The easiest way I have found is :
Whilst the paint is still curing and is touch dry get a blade and scrape off layers of paint, this will leave you with a thin layer of paint and will look like the picture of the first coat.
Get a rag and tip some paint thinner/white spirits, nail polish remover onto the rag.
With your finger in the rag run over and scrubb the letter/numbers carefully without touching anything else, this will remove that thin layer and take it back to metal.
You can also just steal your mums nail polish remover and cotton buds and use that.
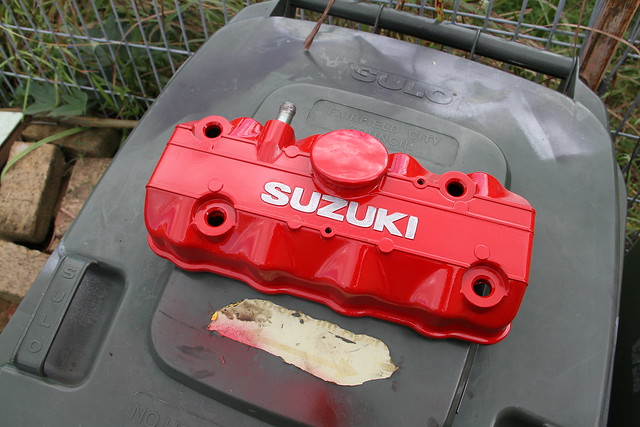
It should look like this.
Job done
Yes I know, there are plenty of DIY's around for this but just shoosh up and read!
Tools :
- Sand paper 400 grit
- Degreaser
- Engine Paint/Heat Proof Paint
- masking tape
- clean rags
- wax and grease remover
For my DIY i chose this perfect example, filthy old 1L Suzuki Sierra cover.
This stuff is cheap and works really well, Found at your local supercheap
Clean and now ready for a sand.
Sand back the cover using 200-400 grit sandpaper. You wan't a finer sand paper so your finished product will be smooth, anything less will be to rough and not give it a nice smooth finish.
Once you have done that you will want to wipe down the entire thing with wax and grease remover, this will leave the surface ready for paint to stick.
Mask up what ever you don't want painted
Paint - Now some DIY's and people say that you need to primer this and lalal. Well personally I've never primered rocker covers or other metal objects and have been fine but if you are one of those people then I'd suggest using an etch primer. So long is the surface is scuffed up and clean the paint will stick fine.
My weapon of choice is 3M Engine enamel.
First coat
Your first coat you want to be very thin, and very little. Most people attack it with a thick layer of paint straight up. WRONG First coat should be as pictured, not completely covered and very thin, this allows the paint to stick and assuring your next coat will stick also.
Allow 5-10mins for drying pending on ambient temperature.
2nd coat, you can apply a thicker coat covering all metal surface, not too thick as you don't want runs.
Allow 10-20 mins to dry pending on ambient temperature.
3rd coat, same as the 2nd, this should be your last coat but a 4th won't do any harm either.
OPTIONAL :
Clear coat : Generally if you want to keep the paint finish glossy you should apply a clear coat, If not over time it will dull and become a satin/matte finish.
In this case I would use a ENAMEL clear coat. If you are using acrylic paint then use and ACRYLIC clear coat. The 2 can NOT mix. Be sure to use a well branded clear coat and not cheap $hit. The cheap clear coats tend to turn yellow over time. (true story)
in this case, this is for a $hitty farm car so I really don't care if it turns matte so no clear coat for mine.
What you're finished project should look like, no runs, no smudges no imperfections.
OPTIONAL STEP :
Finishing touches like this really make the job stand out.
There are many ways to get the letters/numbers back to metal. Some sand, some file, some scrape.
The easiest way I have found is :
Whilst the paint is still curing and is touch dry get a blade and scrape off layers of paint, this will leave you with a thin layer of paint and will look like the picture of the first coat.
Get a rag and tip some paint thinner/white spirits, nail polish remover onto the rag.
With your finger in the rag run over and scrubb the letter/numbers carefully without touching anything else, this will remove that thin layer and take it back to metal.
You can also just steal your mums nail polish remover and cotton buds and use that.
It should look like this.
Job done
Comment