-
Honed - WEB: https://honeddevelopments.com/ FB: https://www.facebook.com/honeddevelopments -
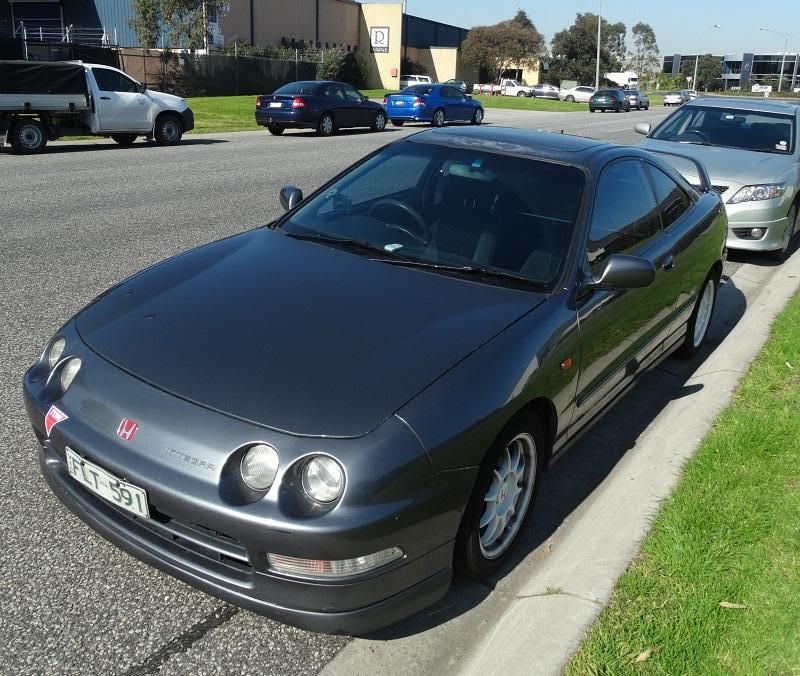
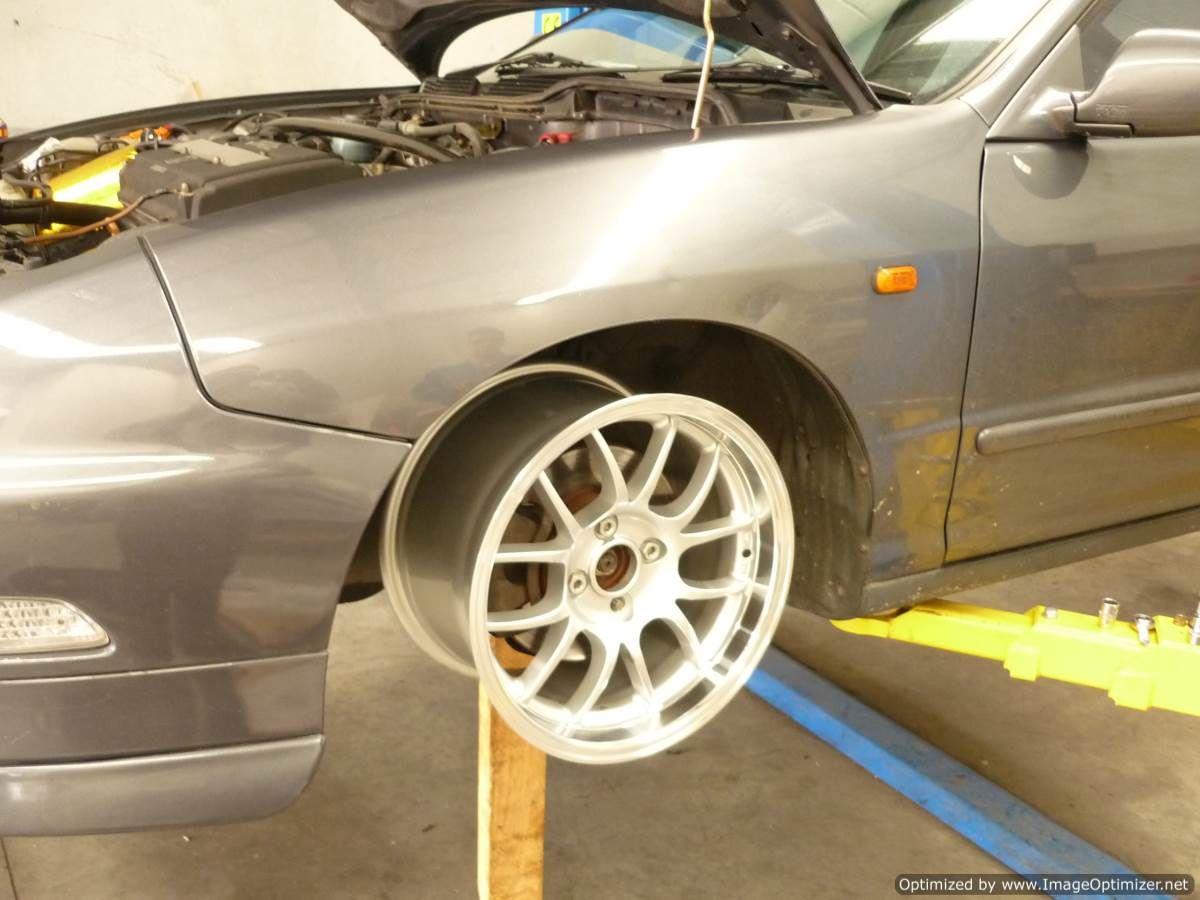
One of the biggest draw back to the Vti-r shell is that it has a sunroof. I have read that the sunroof components weigh about 15 kg, obviously this weight is concentrated at the highest part of the car.
I'm trying to get the weight of the car down as much as possible, lowering the COG height is a big priority as well.
The weight is one issue, another is the stiffness of the roof panel. The steel bracketry that supports the sunroof probably supports the roof skin a little but it's not ideal.
I did some research on Sunroof delete kits and failed to find anything that was simple yet didn't look like a total hack job.
I came across a company in the US that made a carbon panel which would be perfect except you can't actually buy them at the moment.
That company also required the installer to weld to the roof panel and fix flimsy looking brackets to hold the panel in place.
Sure you would have a carbon panel sitting there but it would do little to support the roof skin
I decided that I could come up with something better myself.
I wanted a panel that:
1) Followed the original contour of the roof
2) Was easy to install
3) Increased the stiffness of the roof panel
4) Looked tidy
I made contact with a composites expert and arranged for a plug and mold to be made. He seemed confident we could come up with a panel that could be bonded into place.
This weekend it's all coming together so I started preparing the car
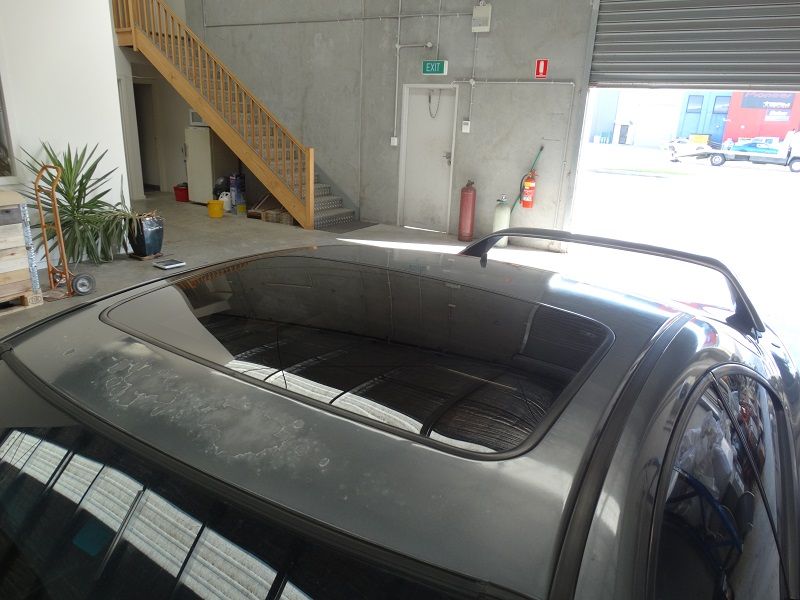
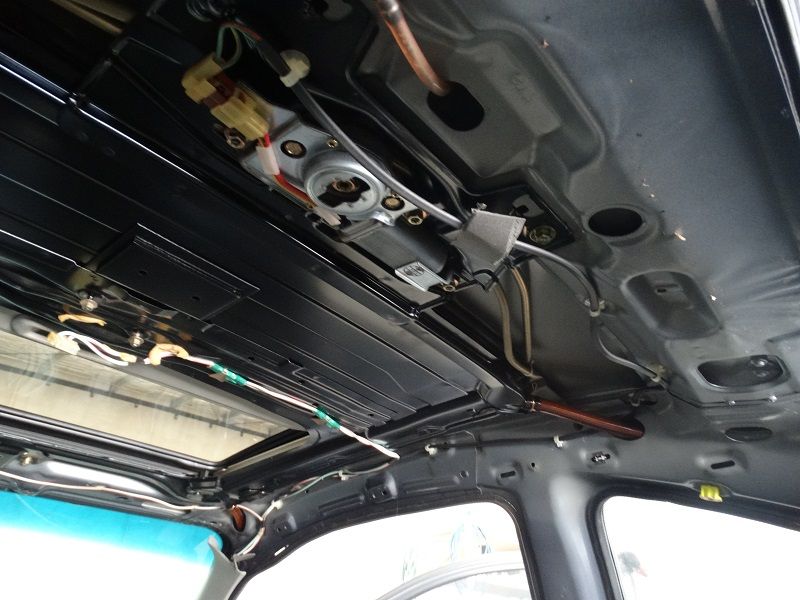
Head liner removed; I've had the interior of this car apart so many times now I've got removing the panels down to an art form. I thought removing the headlining would be a time consuming task but I was pleasantly surprised I had the whole lot out in a hour.
This is what you are left with
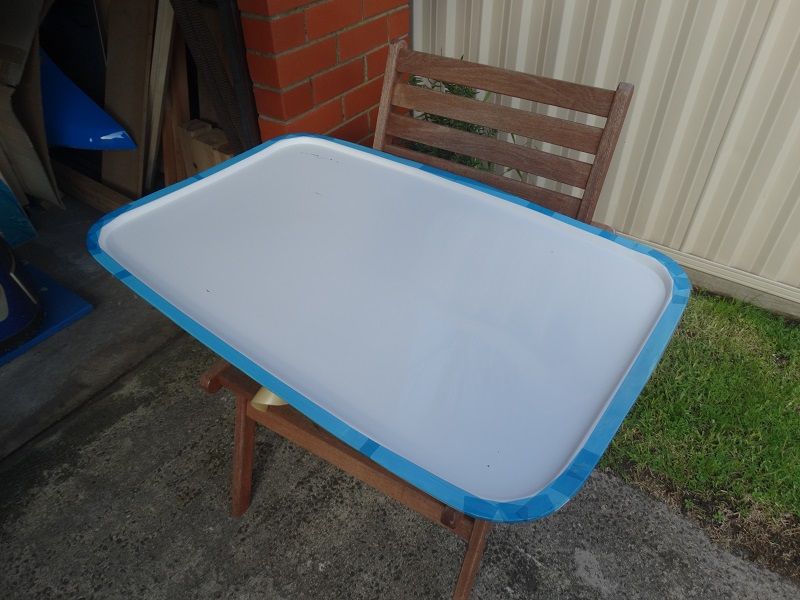
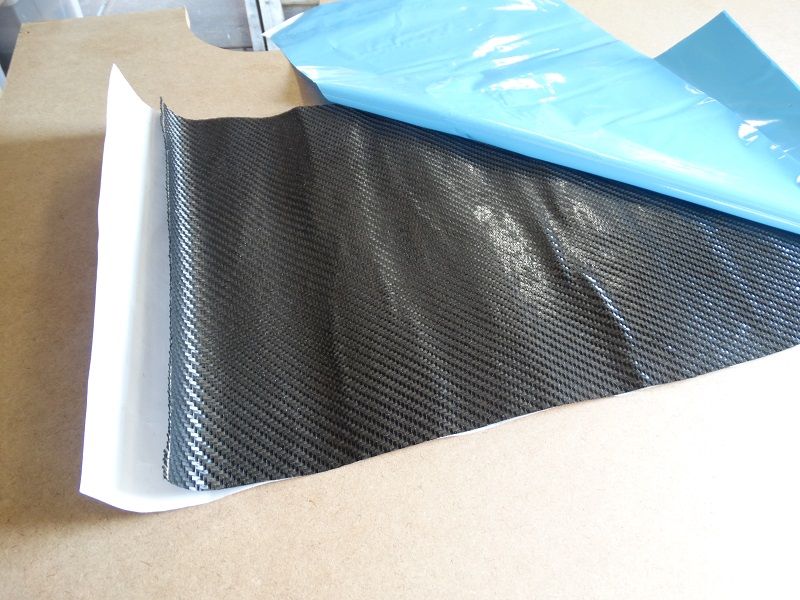
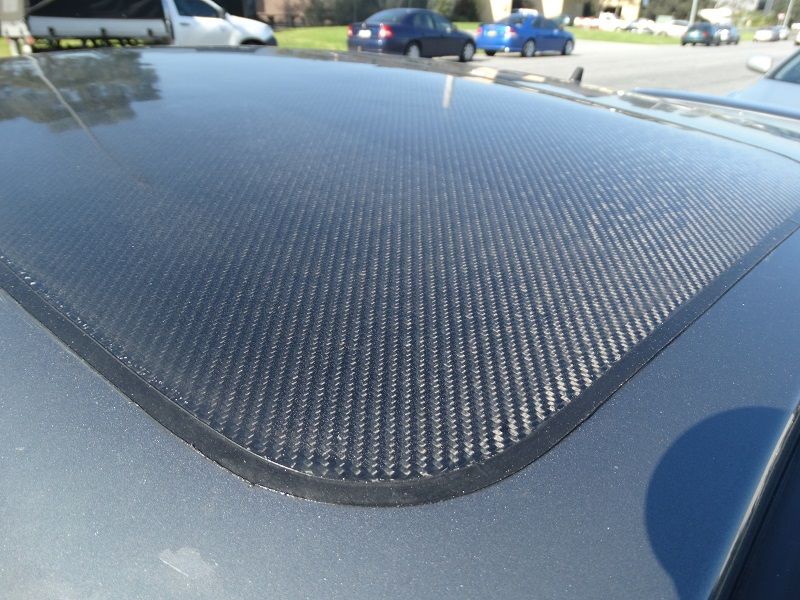
Here is the Sunroof panel mold receiving it's final preparation before the carbon is laid down. We are doing a lay up tonight and if it comes out alright we will be bonding it into the roof tomorrow.
The material we are using is from Advanced composites, it's prepreg material; 200g/sm, 3k, 2x2 twill for those carbon aficionados
 Honed - WEB: https://honeddevelopments.com/ FB: https://www.facebook.com/honeddevelopments
Comment
-
U have access to an autoclave! Lucky boy!!!!!!!Street Circuit Lifestyle - Official distributor for PasswordJDM sales@streetcircuitlifestyle.com.au
teamGROUNDzero
http://www.teamgroundzero.org

Comment
-
Today I removed the air conditioning components from the car
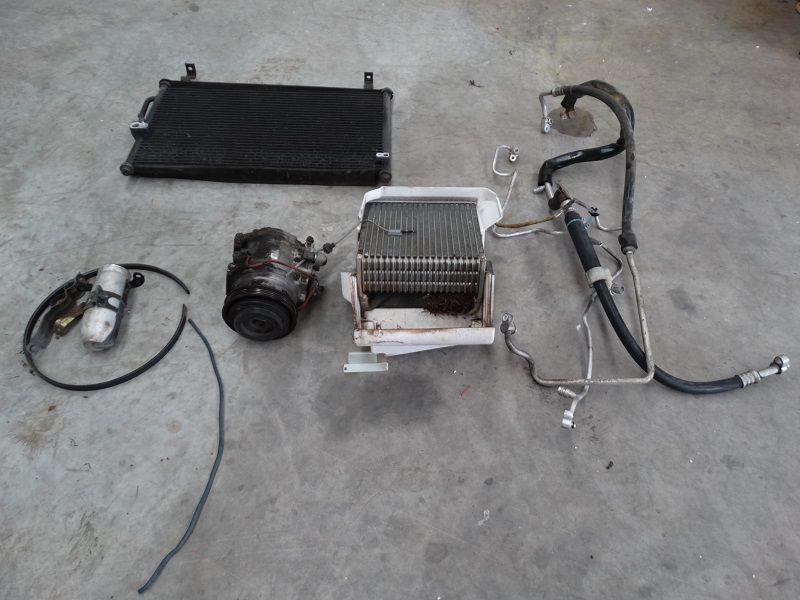
Although the weight loss is significant, i'm also grateful for the reduction in components from the engine bay.
When I removed the battery to access the last of the AC lines I found the area under the battery tray had accumulated leaves and dirt, I gave the area a bit of a clean out.
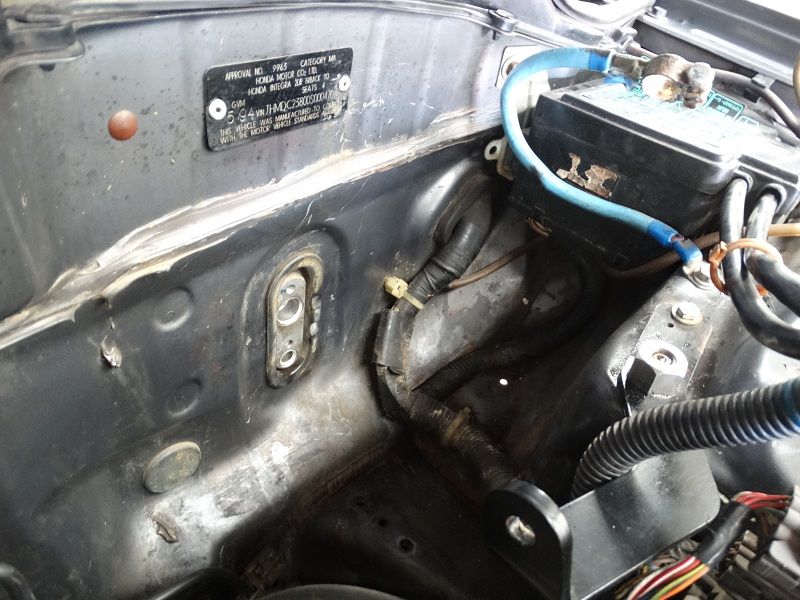
The battery tray was pretty corroded. I didn't have rust killer or metal primer organised today so I will treat this rust another time.
I replaced the shifter plastic cage/bush. IMO this has a greater impact on the feel of the shifter than the hardrace urethane shifter bushes.
The carbon sunroof panel has been cured and if all goes well I should be posting some pictures of it's installation tomorrow!Honed - WEB: https://honeddevelopments.com/ FB: https://www.facebook.com/honeddevelopmentsComment
-
Although the sunroof install was planned for last Sunday the weather in Melbourne took a turn for the worst delaying our progress, however the panel is now installed
and I couldn't be happier with the result!
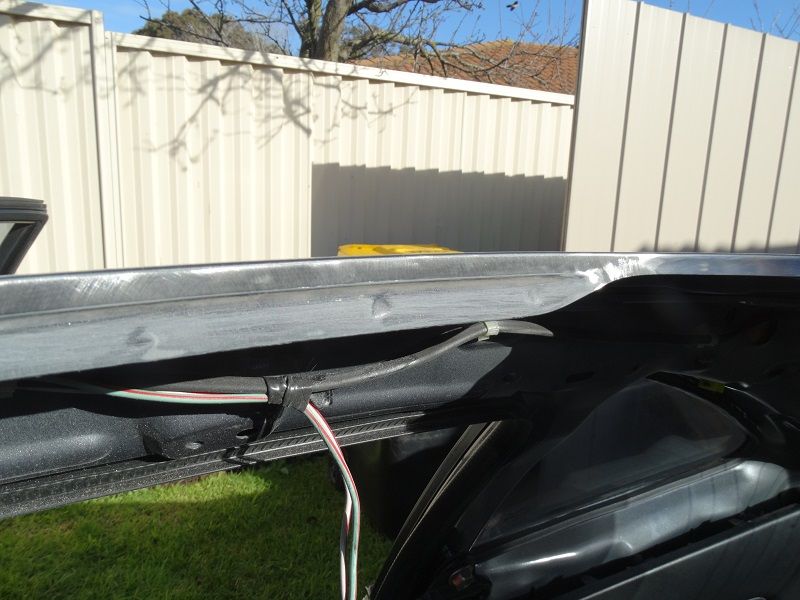
Once the headlining is out, the sunroof can be removed easily
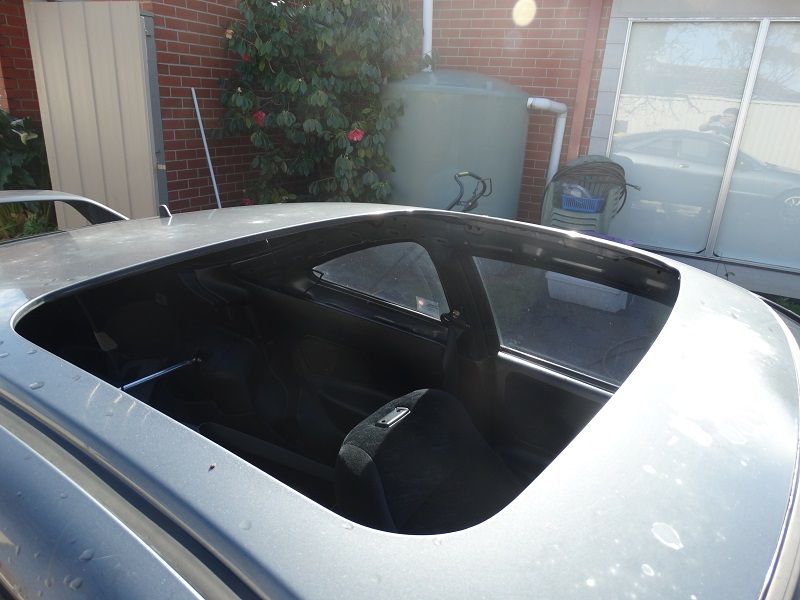
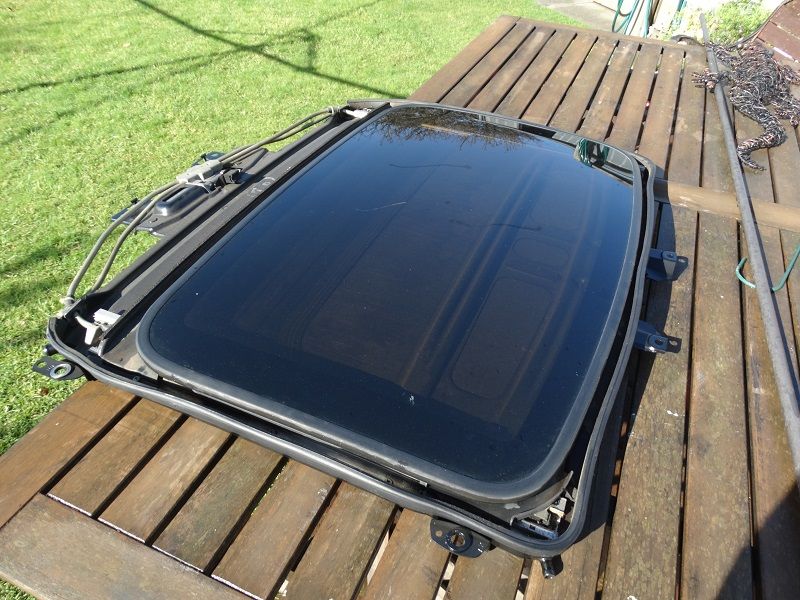
This is what you remove, the sunroof assembly including the motor and rails weighs around 15kg so removing it gives a significant weight saving.
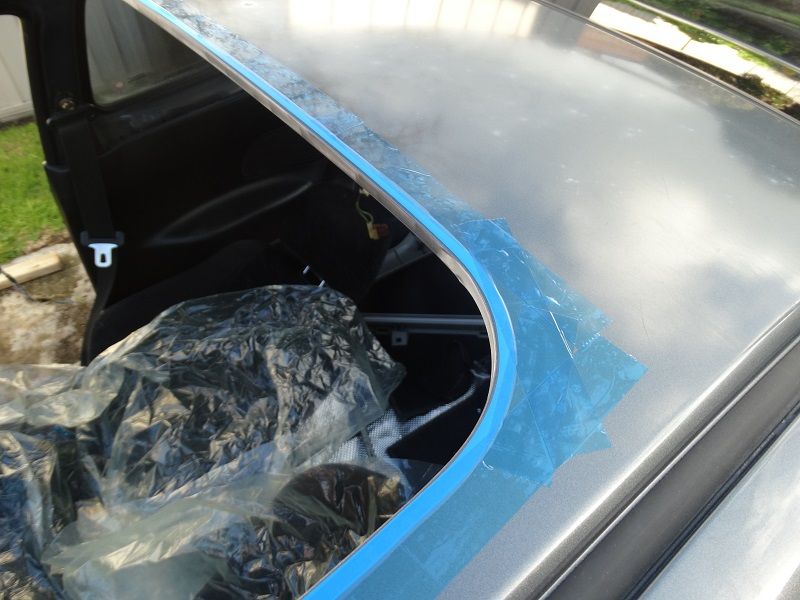
Then we masked the roof around the sunroof cavity
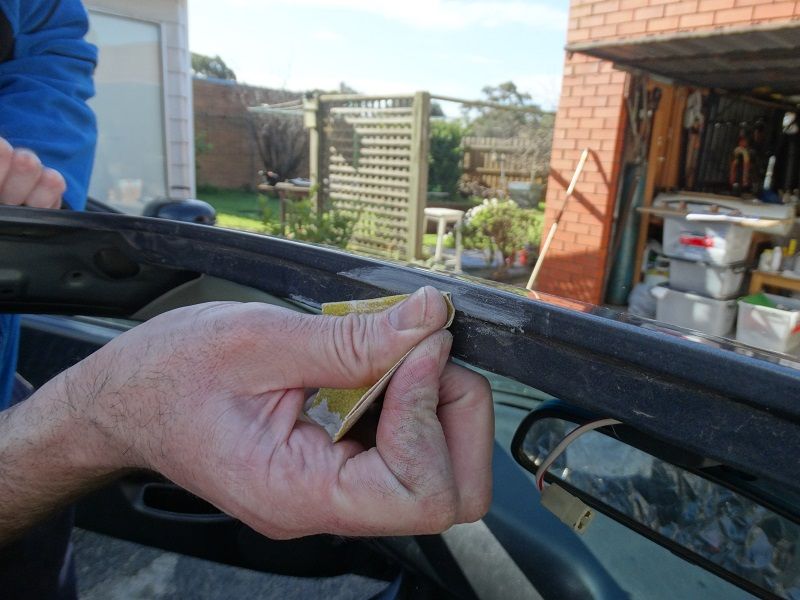
Next step was to sand the return on the roof back to bare metal. This gives the adhesive a good surface to bond to
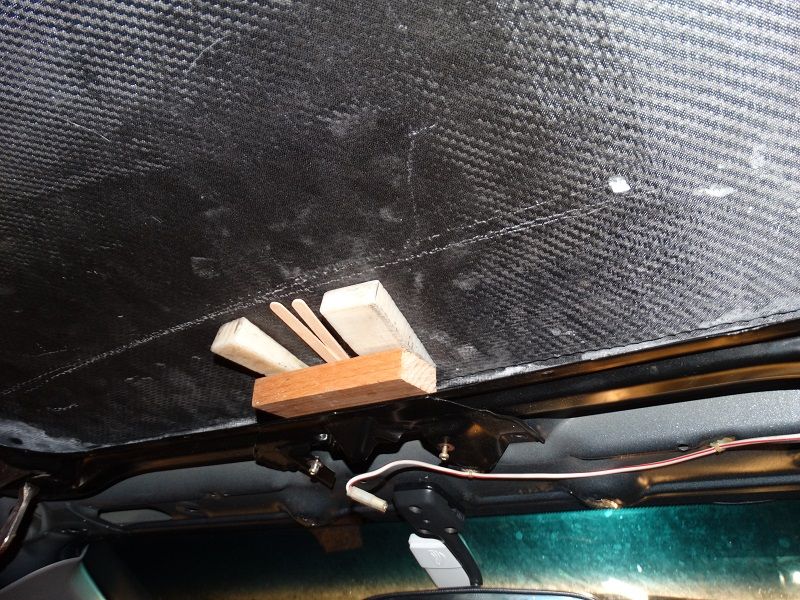
Now we drop the new carbon panel into place, we used large clamps to hold the panel securely
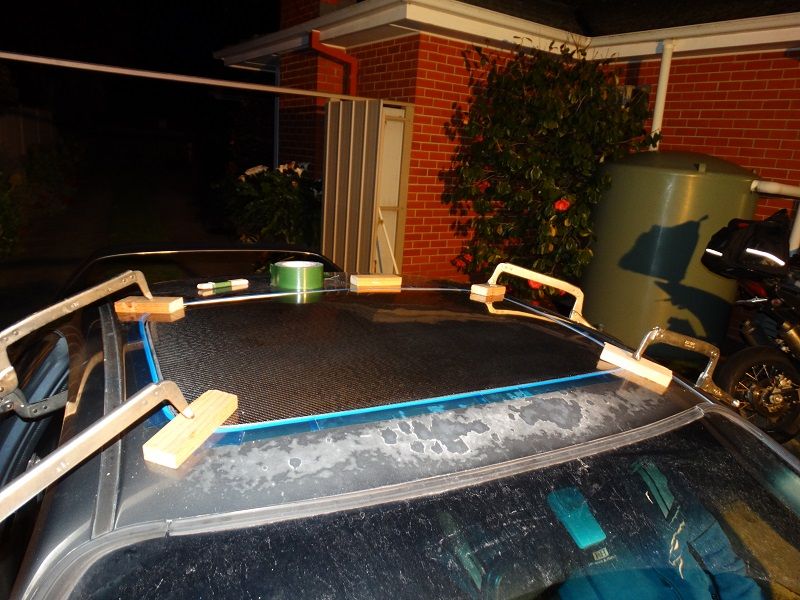
I re-installed the sheetmetal base of the sunroof and used that as a ledge to shim the panel level with the roof
Once the panel was sitting correct we used sikaflex to bond it to the roof. We kept the clamps in place until the sikaflex cured to full strength.
The finished result
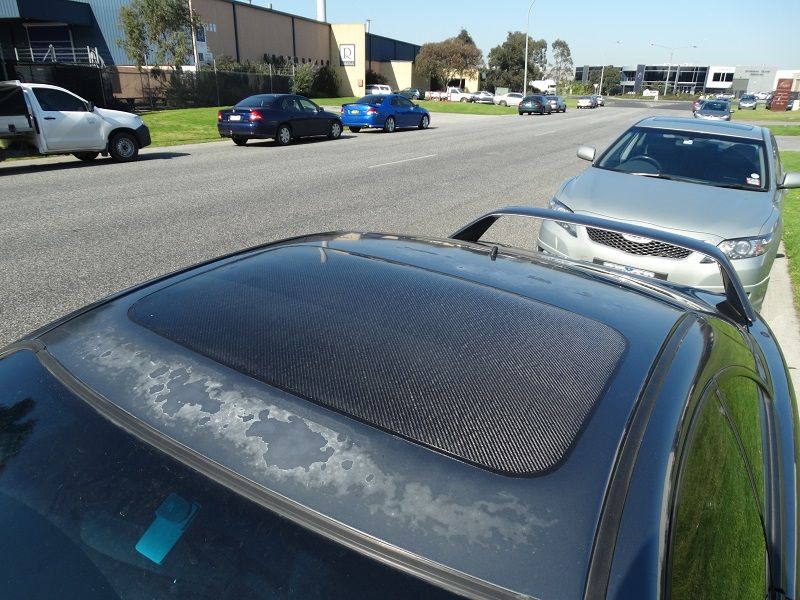
Even just driving the car around the streets the improvement in chassis stiffness is noticeable! The feel of the car has improved and this modification has affirmed my love for the Dc2 chassis. It seems that with every kg that
I remove I'm rewarded with improved feel and better response to driver inputs.Last edited by Grant@Honed; 15-08-14, 07:25 PM.Honed - WEB: https://honeddevelopments.com/ FB: https://www.facebook.com/honeddevelopmentsComment
-
Loving the sunroof delete! Wonder if its possible to make a version where you can still open the sunroof but replace the glass with carbon? Would be interesting
Comment
-
Thanks man,
I sure it would be possible but you'd need to bond mounts for the sliding mechanism to the carbon. Another problem would be getting the panel to seal with the roof.Honed - WEB: https://honeddevelopments.com/ FB: https://www.facebook.com/honeddevelopmentsComment
-
oh awesome! hopefully one day i can get to the stage where i convince myself to go ahead with it ahahaComment
-
I love the quality in your modification path!
Haven't seen many builds go this extensive for a while (enter chargeR)1995 Honda Civic EG (K20)
1998 Nissan 180SX Type X (SR20)
2010 Volkswagen Golf GTI (Emission Monster)
RHCP
F1 Nut
Comment
-
Thanks a lot man, I hope the extra effort pays off!
Also still waiting for pictures of your project!Honed - WEB: https://honeddevelopments.com/ FB: https://www.facebook.com/honeddevelopmentsComment
-
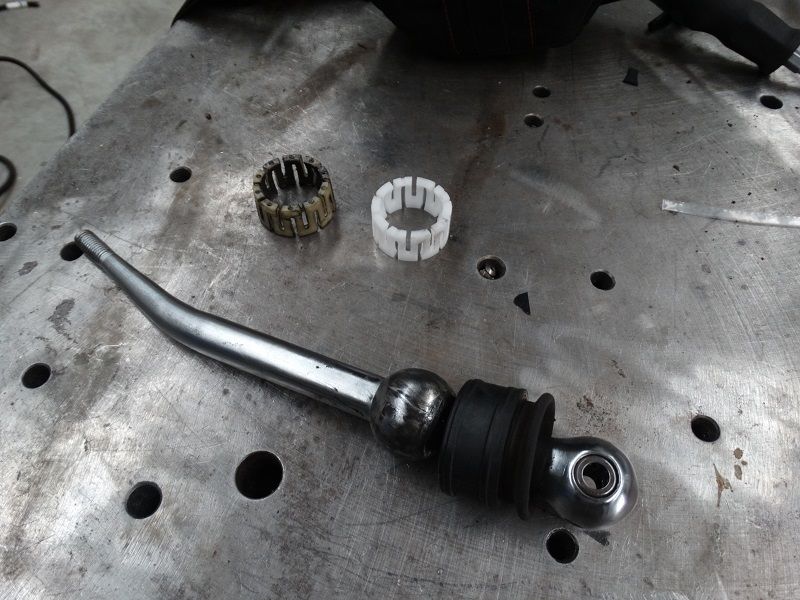
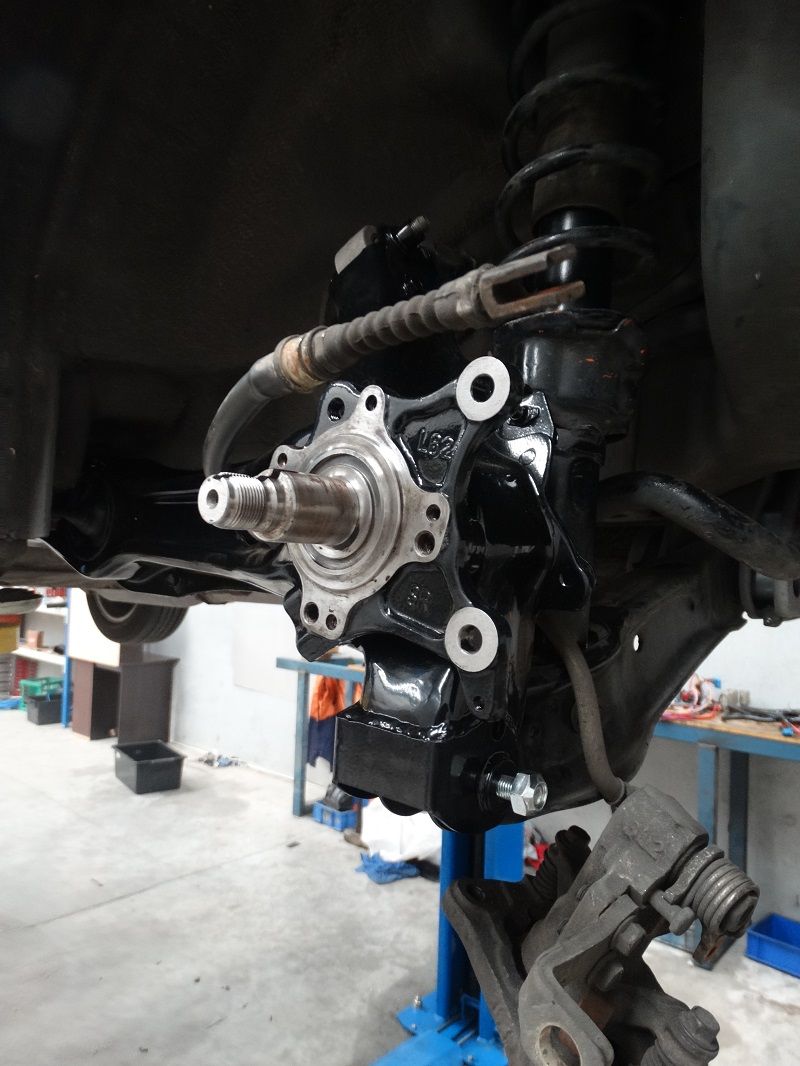
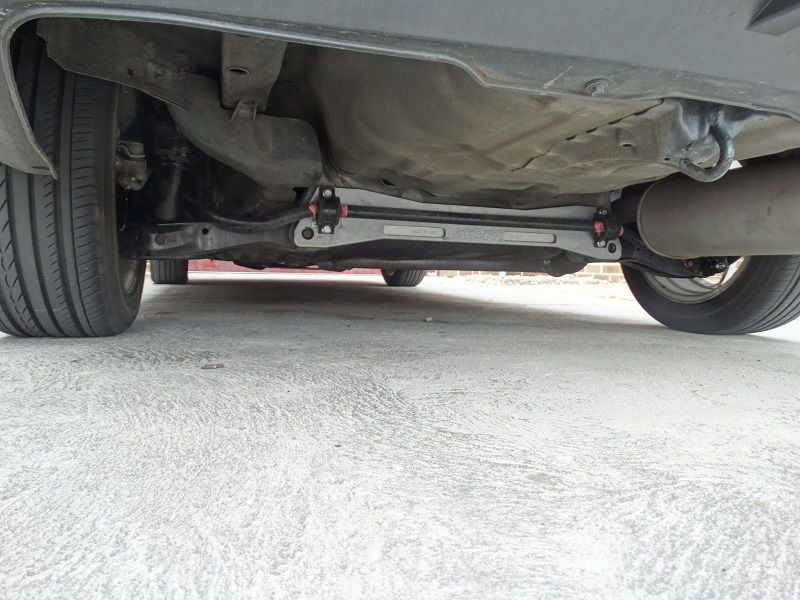
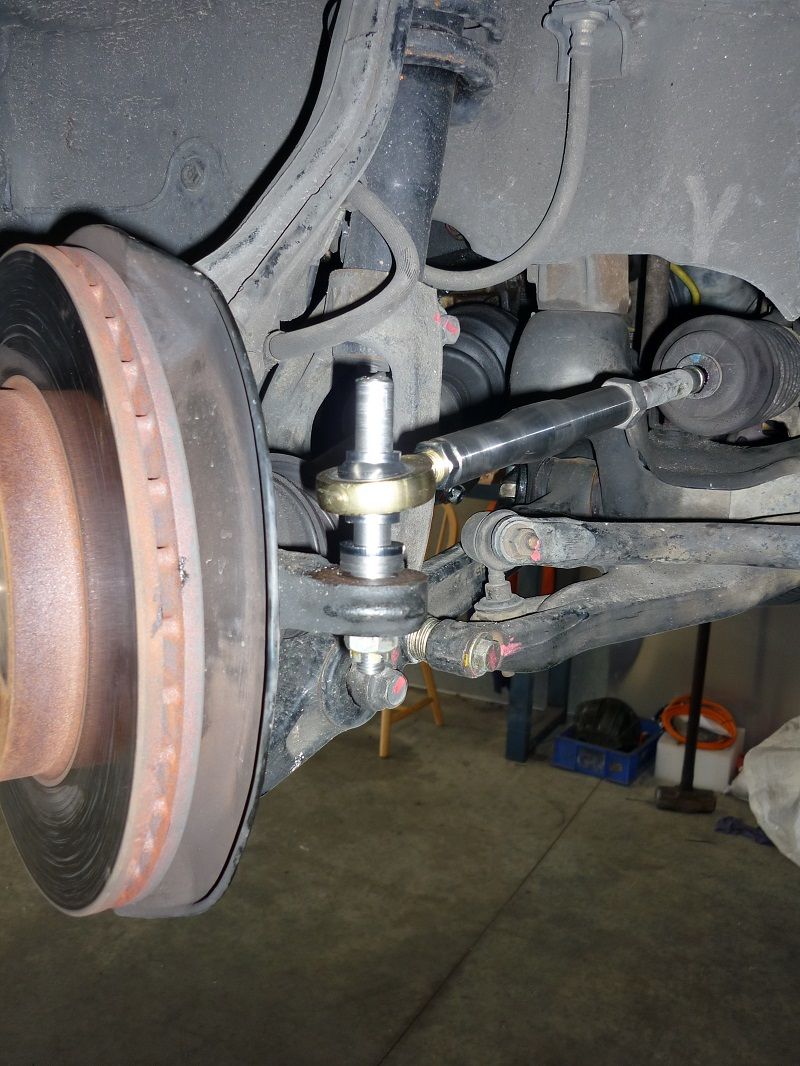
With ChargeR's help I installed the modified RTAs yesterday.
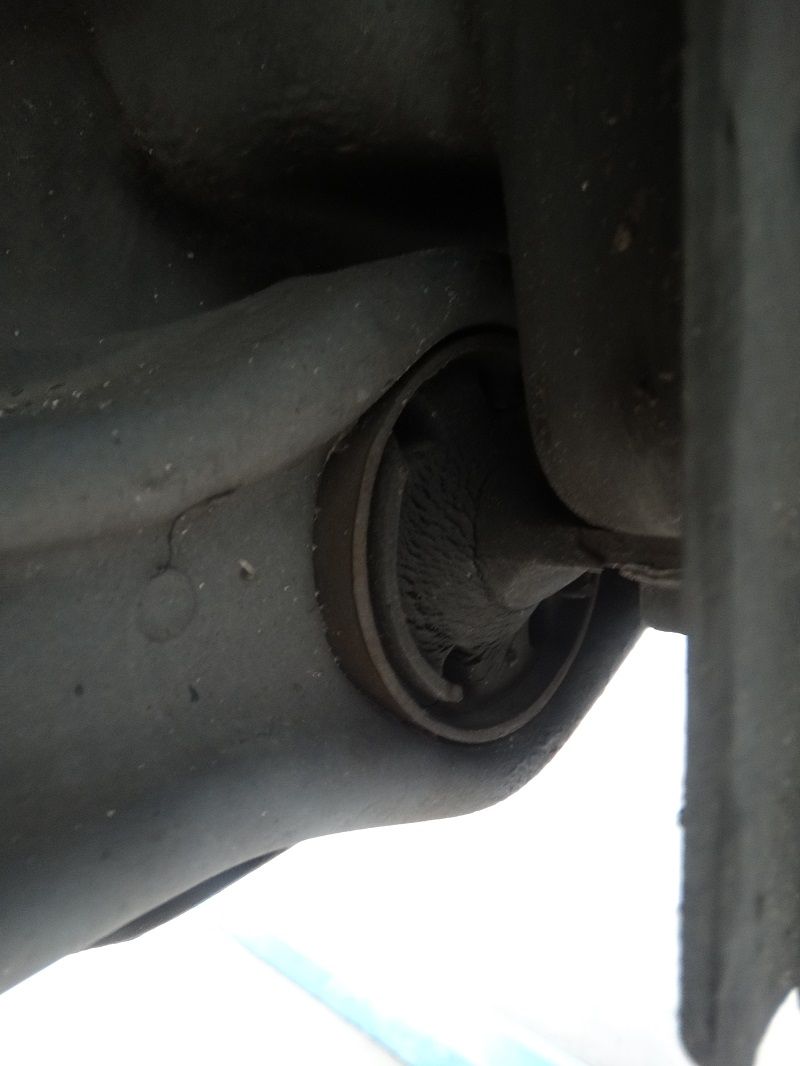
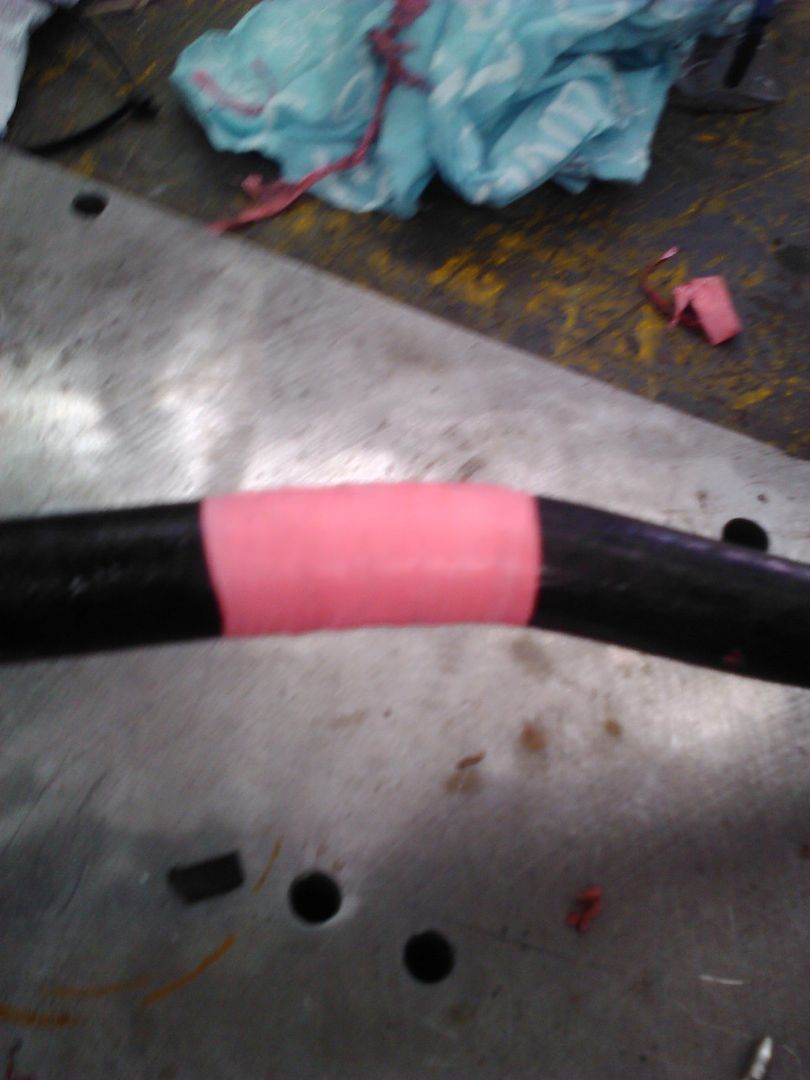
My old RTA bushes have seen better days
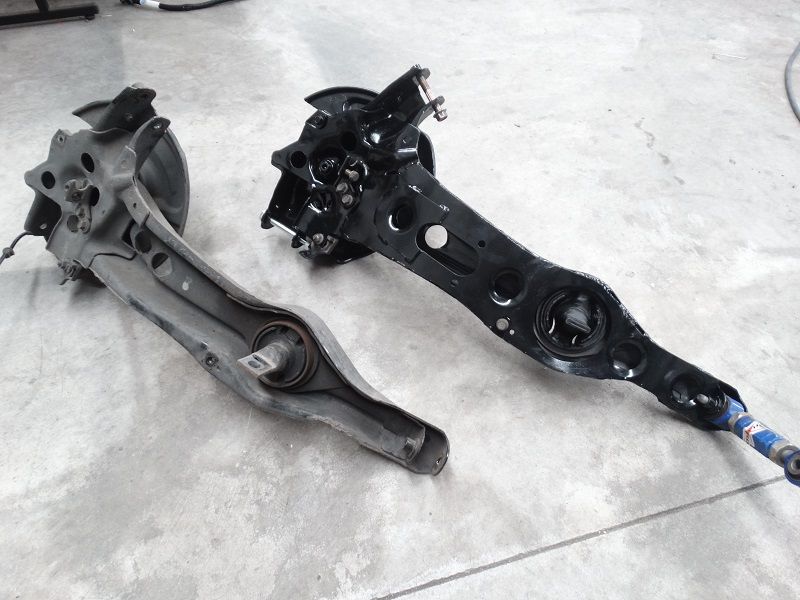
Here is a side by side of the standard RTA and the modified version
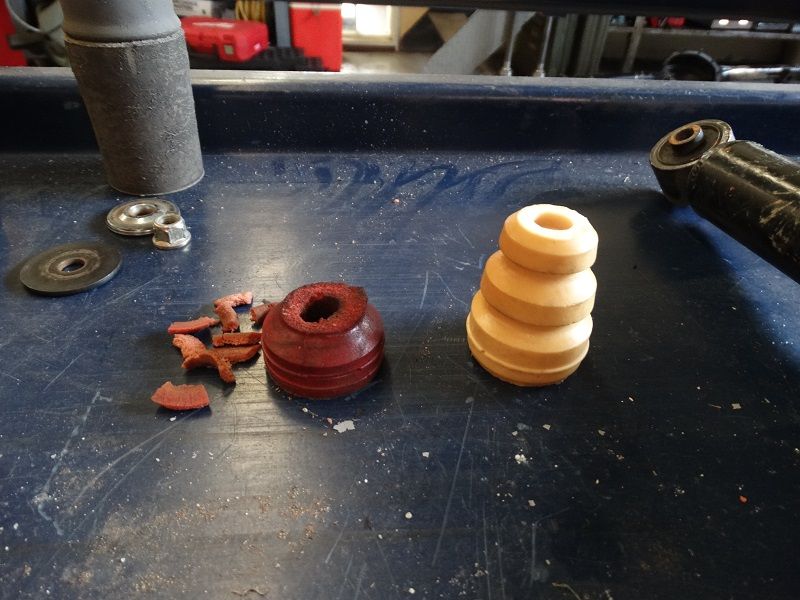
While I had the shocks out I took the time to swap in the new rear bumpstops. As you can see there wasn't much left of the old bumpstop. I think i ended up cutting another division of the bumpstop off after this picture was taken
There was no dramas installing the new trailing arms and the handbrake cable routing through the gusset plates work out well (I did test this before making the plates).
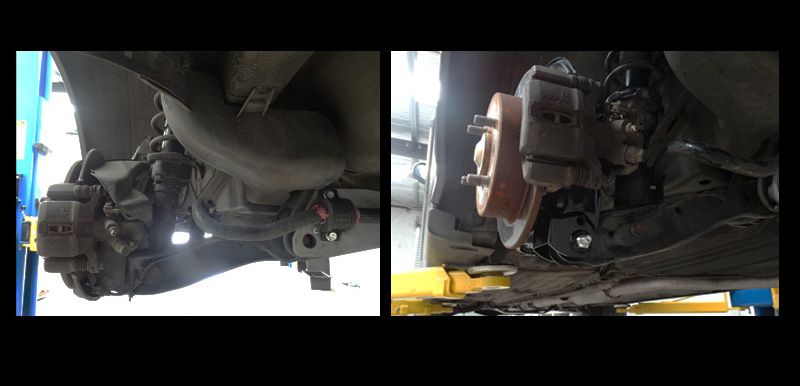
Here is a direct comparison showing the angle of the LCA before and after
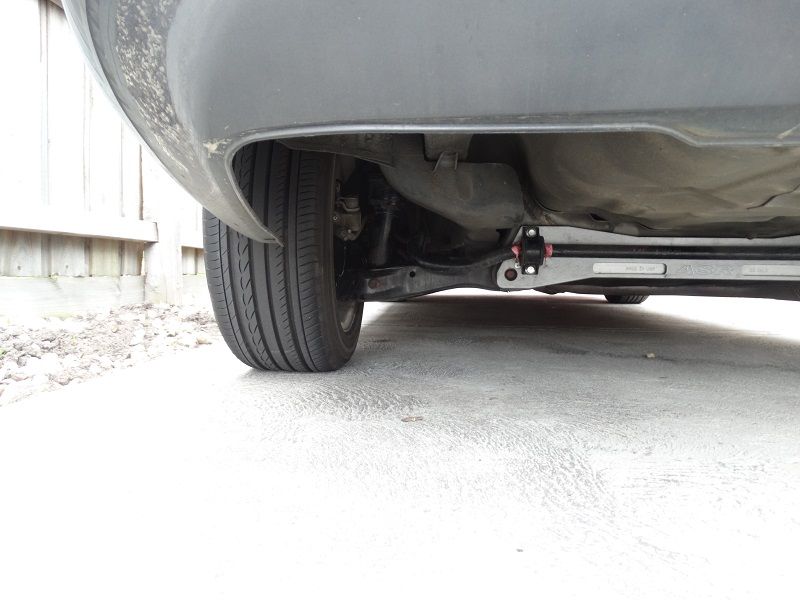
The money shot
I'm going to hold off giving a full review until I take the car out on track again but I will say that I am very happy with the results and If I had to give an analogy to describe the change I would say
it is a similar feeling to changing from the 14mm anti-roll bar to the 23mm anti-roll bar.
This is pretty much what you would expect as I have effectively increased the roll stiffness by ~22%
The difference between relocating the LCA mount and going to say a 30mm anti-roll bar is that the two wheels retain the ability to track independently
By modifying the roll centre position I can have the roll stiffness I want without having to do something like this:
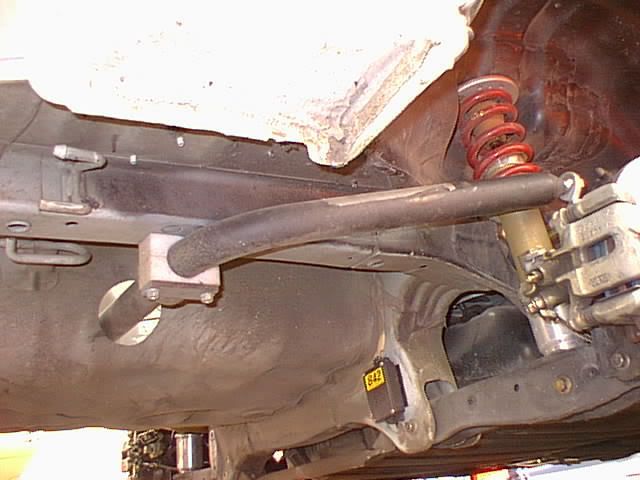
Which is effectively a De Dion Tube conversion haha!Last edited by Grant@Honed; 17-08-14, 06:15 PM.Honed - WEB: https://honeddevelopments.com/ FB: https://www.facebook.com/honeddevelopmentsComment
-
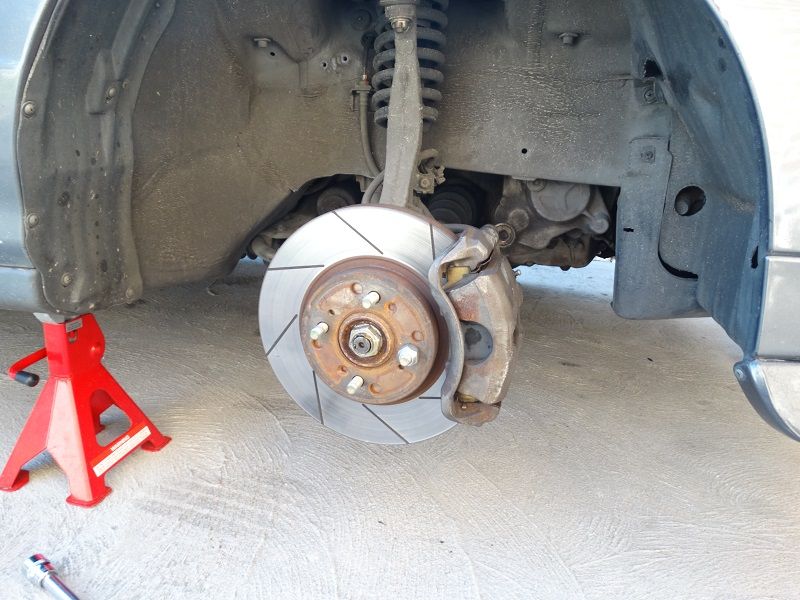
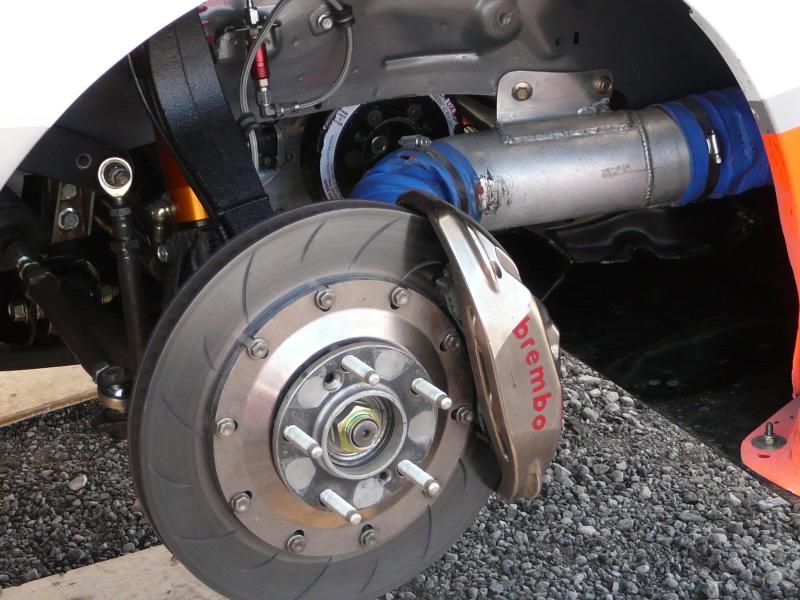
Quite by chance I came across a 4 x 100 brake upgrade for sale and decided it made sense to buy that rather than get new pads and rotors for the 262mm set up.
The calipers are DC2R and thats a 1" master cylinder
The rotors are 282mm slotted but I'm not sure what brand?
The kit came with EBC yellow pads with about 50% material left
The plan is to fit the big brakes when the new uprights go in.
 Honed - WEB: https://honeddevelopments.com/ FB: https://www.facebook.com/honeddevelopments
Comment
-
The rear sway bar started squeaking again at the end of last week so I dropped the bar on Saturday and re-applied thread tape to the areas that run inside the rubber bushes.
This gets rid of the squeaks for a few weeks.
You can see where the bar has been rotating in the bush

2-3 layers of thread tape around the offending area
With no sound deadening left, these little jobs make the car easier to live with day to day.
I also installed the bigger brakes on Sunday.
 Honed - WEB: https://honeddevelopments.com/ FB: https://www.facebook.com/honeddevelopments
Comment
-
Ok, this is mostly a follow up to my previous post on bump steer but also may be of interest to those who were posting in Bazda's thread about bumpsteer.
The first you need to understand what we are trying to achieve. Our Honda's have a double wishbone front suspension and rack and pinion steering.
If you look at the image below, i have pulled a screen shot from Susprog 3d and overlayed some lines and annotations.
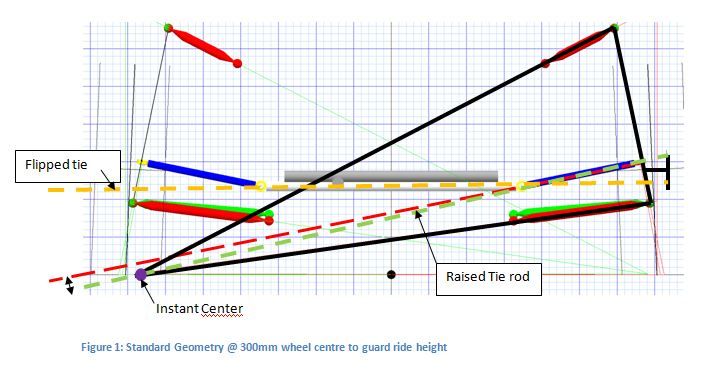
The way I visualize what is going on is to imagine that for this instance in time the thick black lines form a rigid member and the wheel pivots about the purple dot.
The purple dot indicates the instant centre, for every position of the wheel through its travel, this point is in a slightly different place
In theory, if the tie rod pointed at the instant centre, for all instant centre positions we would have no bumpsteer.
In the real world, the inner tie rod pivot is fixed relative to the chassis and the outer tie rod end point is fixed relative to the upright.
I'm not going to get into toe in vs toe out, slip angle etc in this post, rather just present the geometric implications of tie rod height on the upright.
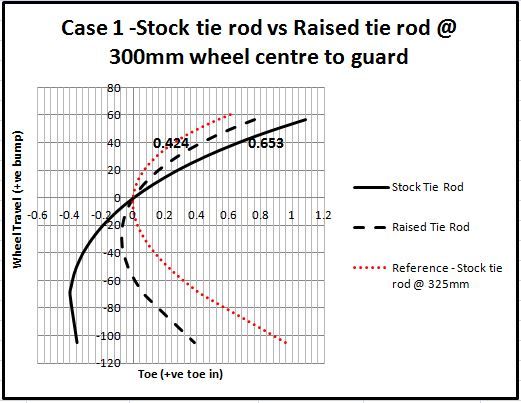
In the figure below I have plotted two toe curves for a Dc2 with a ride height equivalent of a car with 300mm distance from the centre of the wheel to the guard (CW2G).
The red dotted line is the toe curve with a ride height 325mm (WC2G) and is intended to show what a stock (slightly lowered) toe curve would look like.
The black dotted line is the toe curve for a tie rod end higher than stock and you can see raising the tie rod end has reduced the toe in with bump.
In these plots 0.2 deg roughly translates to 1mm of toe measured at the edge of the tyre for a 15" wheel.
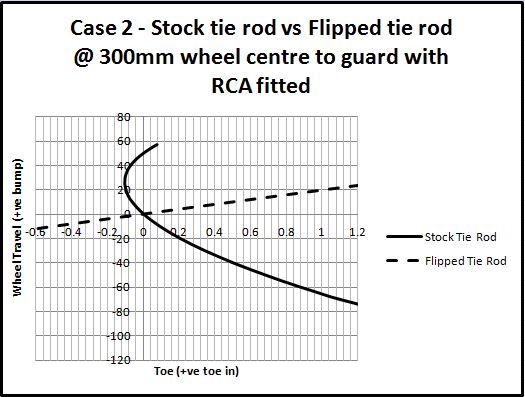
Case 2 is a dc2 with front roll centre adjusters fitted and with a ride height of 300mm (WC2G)
What is interesting in this case is that the wheel is toeing OUT with bump but the magnitude of toe change is rather small. This is why I suggest guys running RCA and stock tie rods arn't having any issues with bumpsteer.
The dotted line on this plot is the result of fitting a flipped tie rod (one that mounts underneath the steer arm). Oh dear, significant toe change with wheel position. This seems really extreme to me and I suspected something was wrong with the
model. I went over it a few times and always got a similar result. I'd be interested to see the results of someone running this set up measuring their bumpsteer with DTIs.
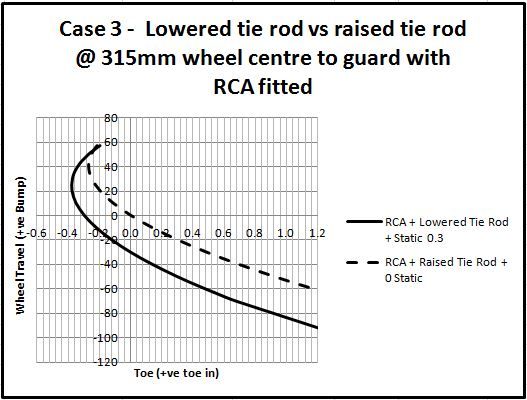
So if a car is running an RCA is their any benefit to modifying the tie rod height? I believe so.
Case 3 shows the two scenarios that I intend to test on track.
The sold line shows the toe curve that i believe is going to net the best laptimes, a lowered tie rod with static toe out.
The dotted line is an alternate set up where you run 0 toe out but raise the height of the tie rod.
Just to ground this discussion in the real world here is a picture of a height adjustable tie rod set up as used by the Real Time Racing Dc2
this car...
RTR images do not belong to me. Sourced from descartesfool on Honda-tech
Having worked out what I needed I did a bit of research and found no one makes such a thing.
I discussed the Tie Rod idea with another Honda owning engineer (ChargeR) at the Winton track day and he mentioned he had been planning to make something up himself so we decided to develop the tie rod kit together.
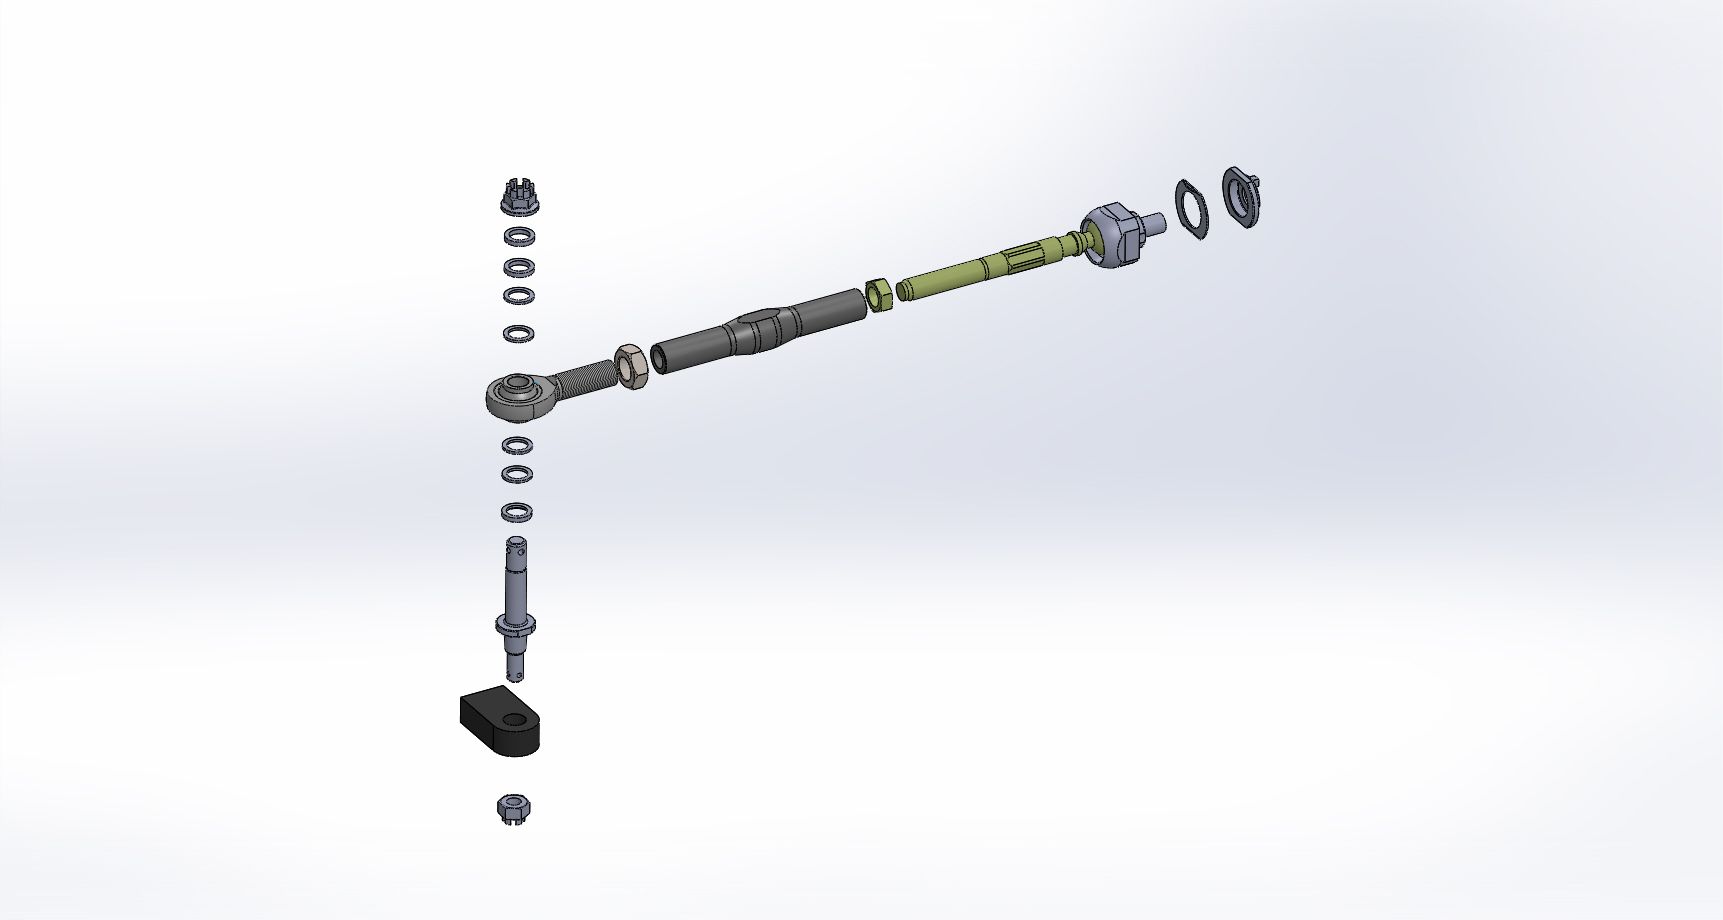
Those of you familiar with the stock tie rod will know it is curved to miss the back side of the wheel.
We didn't want to make our link curved but also wanted to prevent the possibility of the wheel rubbing on the tie rod.
We test fit a 15 x 9 +36 and took measurements to work out what kind of spacer would be required to reduce the rack travel and prevent wheel on tie rod contact.
We came up with a design for the spacer and organised to get the tie rod kit components produced.
The last of the components are due back from heat treat this week and I plan to get my set of tie rods installed at the same time I install the powdercoated uprights.
My apologies if any of the above is hard to read, I'm struggling with a severe case of man flu but wanted to get this posted as I said I wouldHoned - WEB: https://honeddevelopments.com/ FB: https://www.facebook.com/honeddevelopmentsComment


Comment