Nice photo!
-
Comment
-
-
Update on a few parts which came through
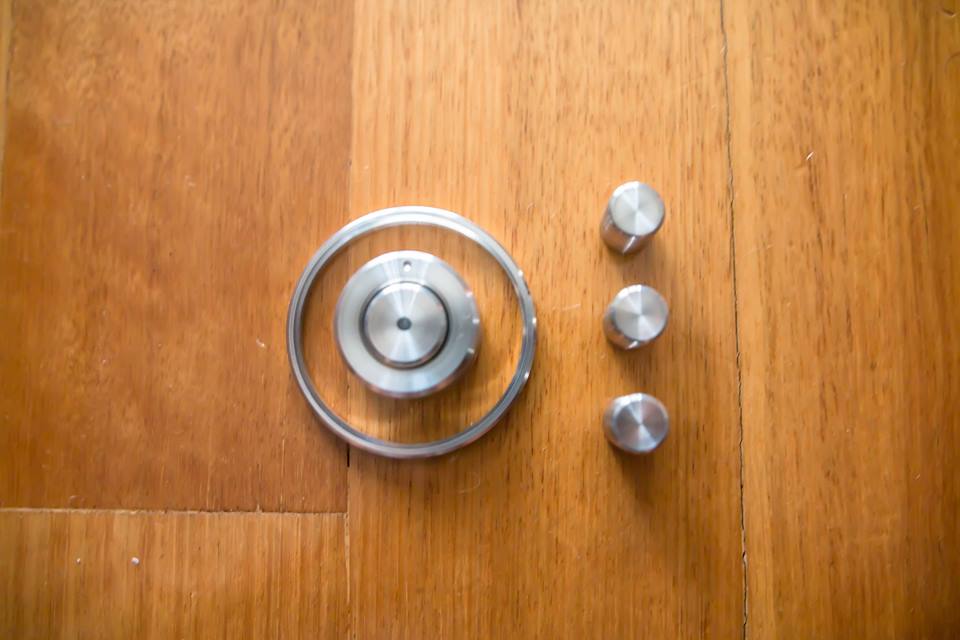
Received a set of billet aluminium HVAC A/C button, knob dial, trim ring and selector covers made by RS-Products Japan. I bought these because it compliments the interior with other parts the car currently has at the moment, such as the rings on my KG Works cluster, the Garage5 vent rings and it will also tie in when I fit the Nakamae door cards and fit the polished LE speaker panels as well as the Nakamae door handles. These pieces will go nicely with the custom HVAC panels I will be ordering soon from Adam from Revlimiter.net. I haven't yet decided on a HVAC panel design but I do know that I want the font for the numbers on the fan speed dial to be matching my gauge faces and the illumination on the panel to be green, thus keeping everything consistent.
I also received my Mazdaspeed competition diff mounts. These provide about 40% stiffness over the OEM rubber mounts. I'm planning on upgrading my diff to a Torsen 4.1 unit as well as refreshing all suspension bushings to Mazdaspeed, therefore I also wanted to refresh the diff mounts. I didn't go with polyurethane or delrin mounts for fears of increased NVH so hopefully this will be a good happy medium.

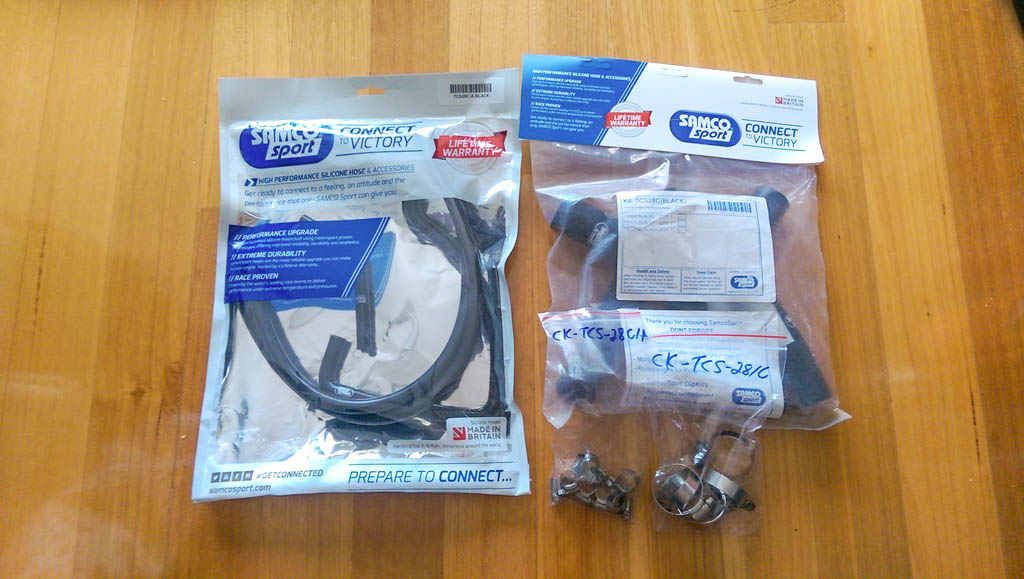
After backlogs, christmas and new years holiday periods and waiting for about 4 months, I finally received my order of Samco Silicone hoses from Williams Race Services (WRS) who are the official Australian distributors for Samco Sport. These are my cooling hoses which will replace my failing hoses that I purchased from Carbon Miata. Never again.
 Last edited by stephen8512; 09-07-17, 01:25 AM.
Comment
-
The OEM speakers and sound system in the MX-5 aren't the best. The sound isn't as crisp or as clear as other factory systems I've heard. Not only that, Mazda decided it was a good idea to remove the speakers from the headrests and instead substitute it with tweeters on the door cards instead.
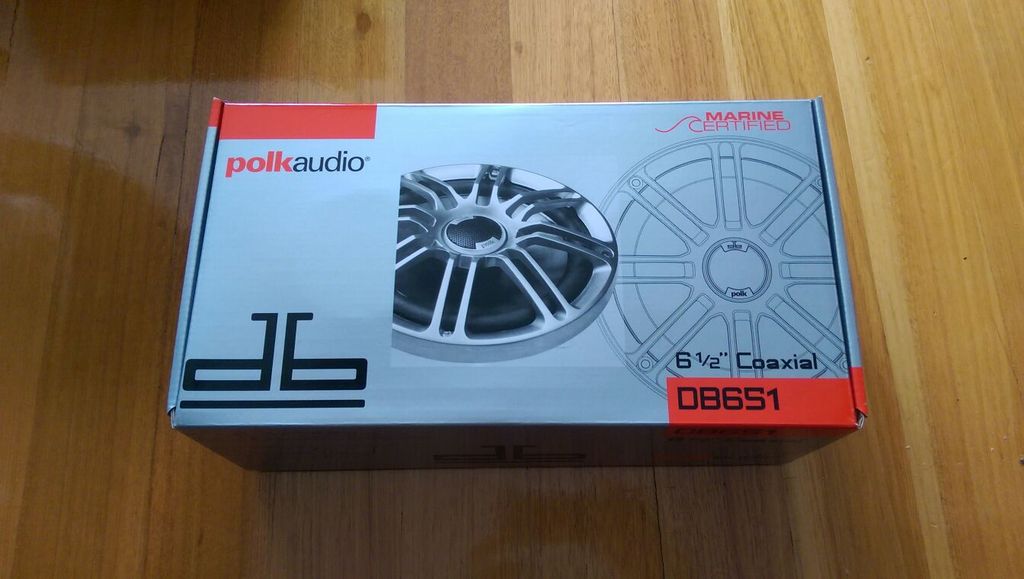
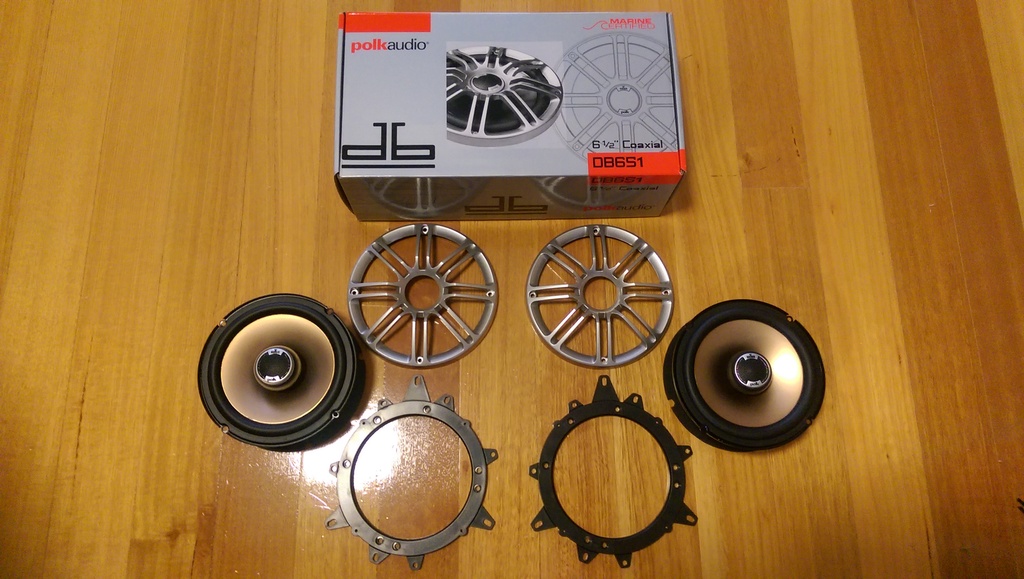
I'm not a huge audio guy but I do like listening to music on drives so I wanted to upgrade the factory speakers to something which was quality and that would give me the crisp sound I was after but wasn't overly expensive. After a bit of research, I opted for these Polk Audio DB651 6.5" 2-way coaxial speakers. This should be a pretty decent upgrade over the factory units and should pair nicely with the Nakamichi headunit. I should mention that I do not plan on using those speaker covers that came with the speakers. They're beyond hideous!
The later model NA8 did not come factory with headrest speakers like the NA6 but from what I'm told, the cutouts for the speakers are there. It's just that there's nothing in them except foam, so the option of putting aftermarket speakers in is definitely a viable option. I'm planning to install speakers in there and keeping with the same brand, I've decided to get the Polk Audio DB351 3.5" coaxial speakers. Since the sound will have to travel out from the headrests once installed, the Nakamae seat covers I plan on getting will also need headrest speaker perforations.
Hopefully these upgrades will make driving even more of an experience, listening to my favourite tunes while tackling the twisty stuff on the blacktop.
 Last edited by stephen8512; 09-07-17, 01:25 AM.
Comment
-
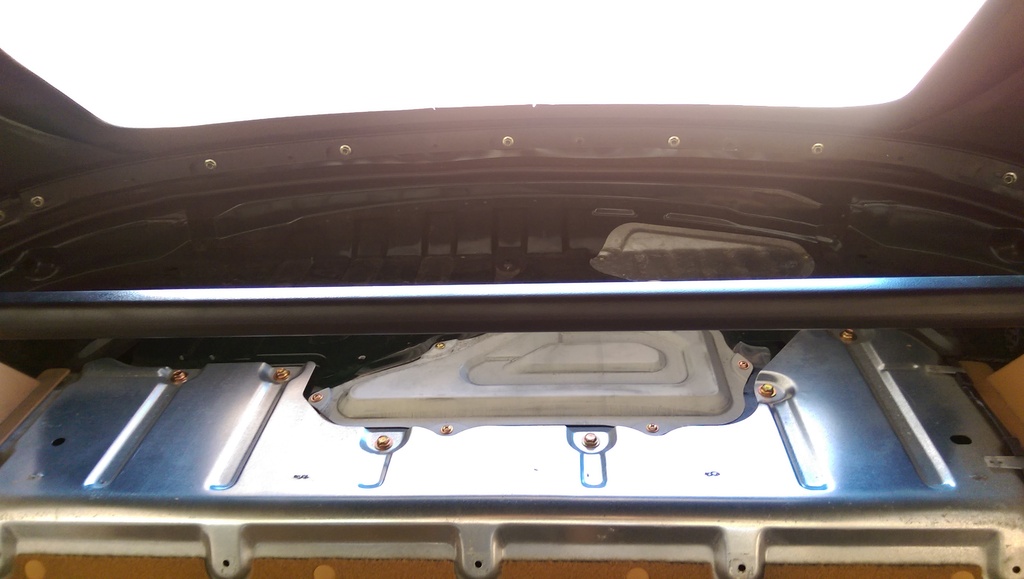
Absolutely glorious day today in Sydney which was rare because for the past few weeks it's been miserable with rain and thunderstorms, so seeing the sun was a welcome change indeed. Perfect day to go for a bit of a drive but instead I decided to do some DIY, namely replacing the fuel pump and fuel line cover as well as the metal lower bulkhead parcel shelf.
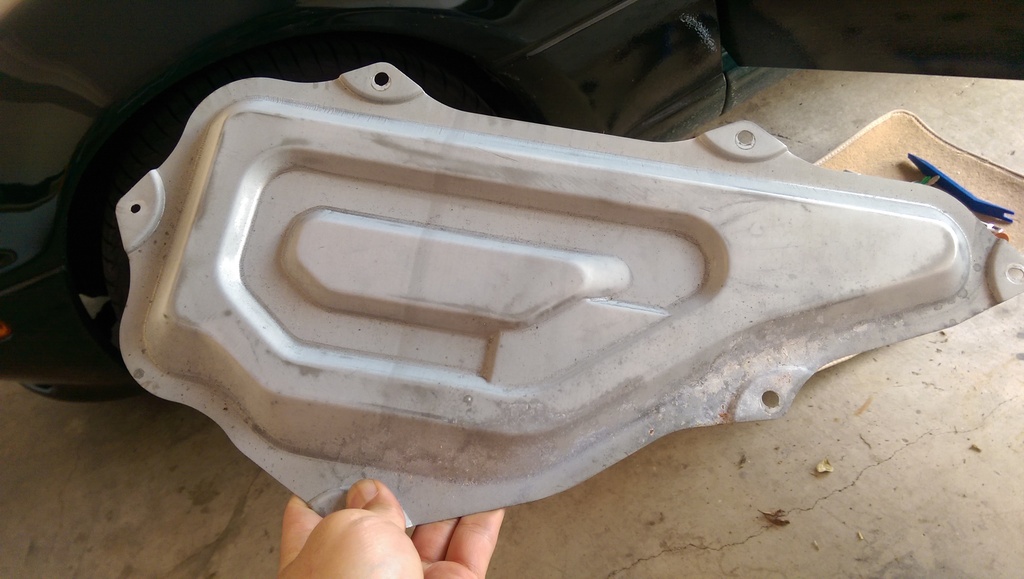
In a previous post, I mentioned that this year I was going to focus on refreshing and restoring the things on the car you can't see with the naked eye. First step towards accomplishing that goal was to replace these covers. Now a bit of a recap: I ordered these parts from Amayama and since these covers were metal, I gave it a few coats of VHT silver flameproof enamel paint to prevent any possible rusting in future. They were ready to be installed.
Much to my surprise and amazement, when I took the rear parcel shelf carpet off to access the covers, they were still in excellent condition. Slightly oxidised but zero rust! Not bad for a 21 year old car! I had seen other peoples covers which had rusted to bits and gone very bad but mine were still minty fresh. Even the bolts were still shiny! I could have left the covers as they were to be totally honest with you but I had the parts out ready to install so I decided to go ahead with it anyway. It was also a great opportunity to inspect the soft top rain rails as well as cleaning the grime/dirt/dust which had accumulated on the parcel throughout its lifetime. There's something therapeutic about cleaning that I enjoy and it's a great feeling knowing that after a good clean, given the proper treatment and maintenance it should last for at least another 21 years.
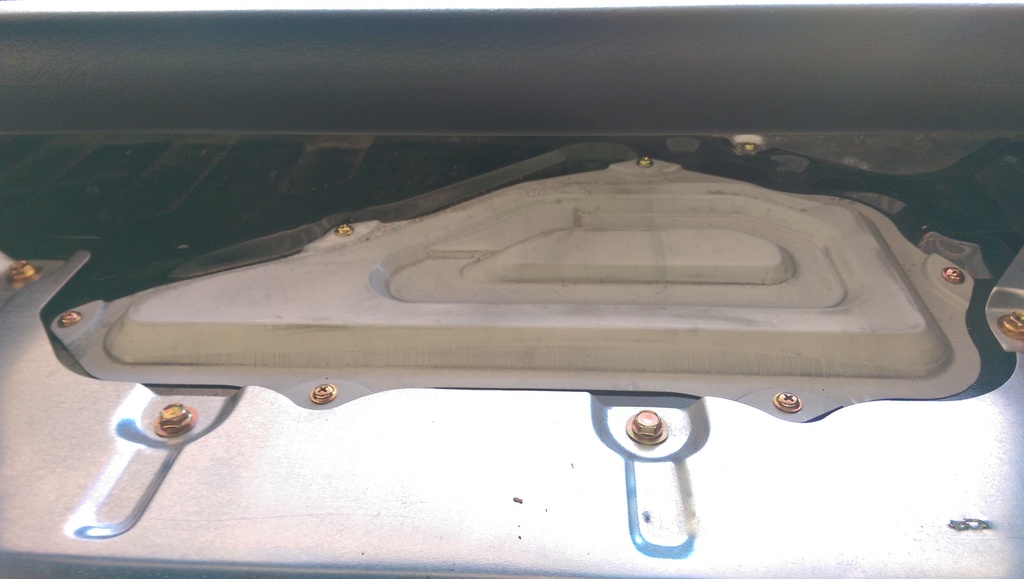
Original covers. Still in amazing condition! Zero rust!
Fuel pump cover.
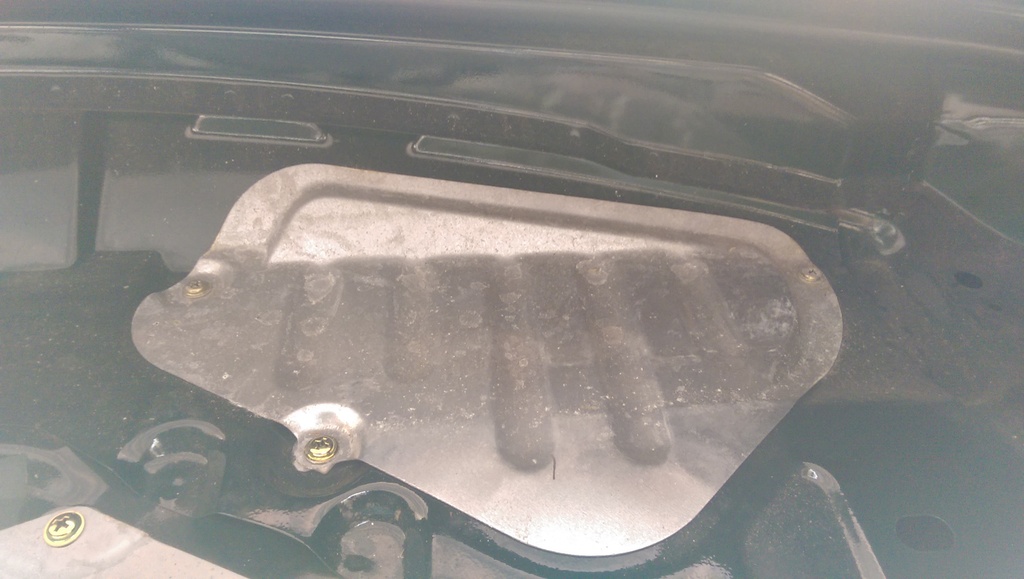
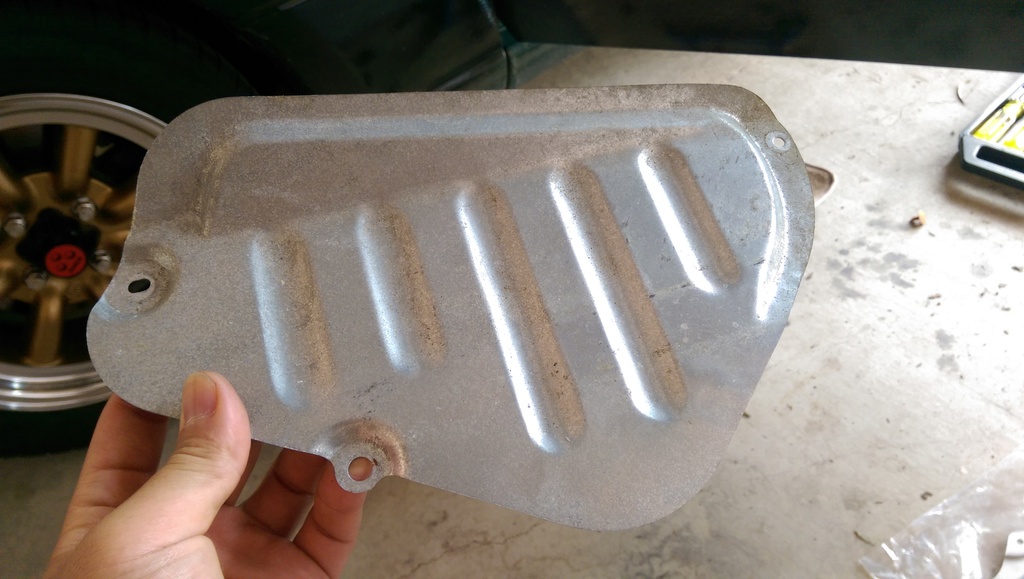
Fuel lines cover.
Closeup of fuel pump cover. Slightly oxidised and very tiny bit of rust but nothing too crazy.
Closeup of the fuel lines cover. Oxidised but otherwise in excellent condition.
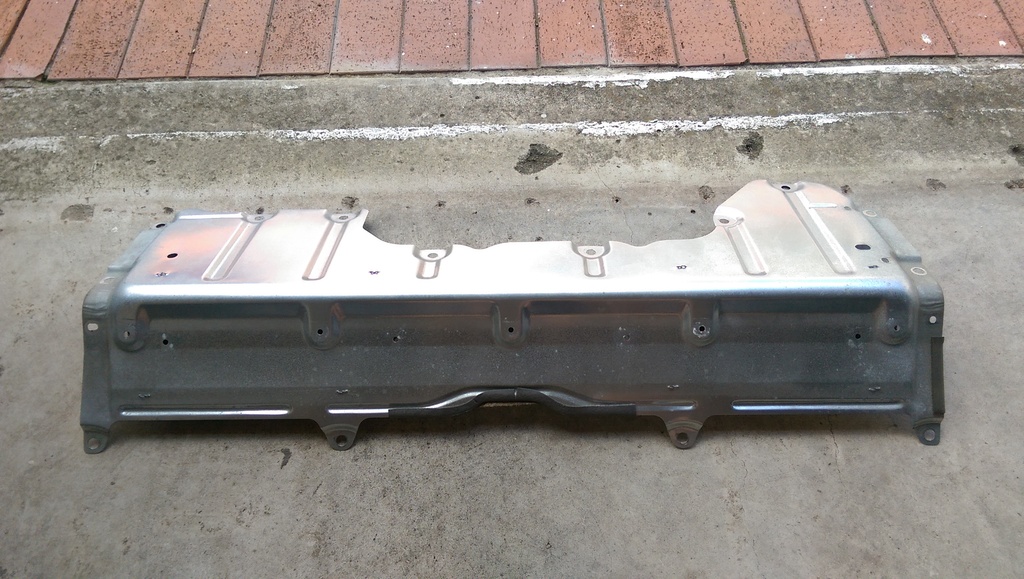
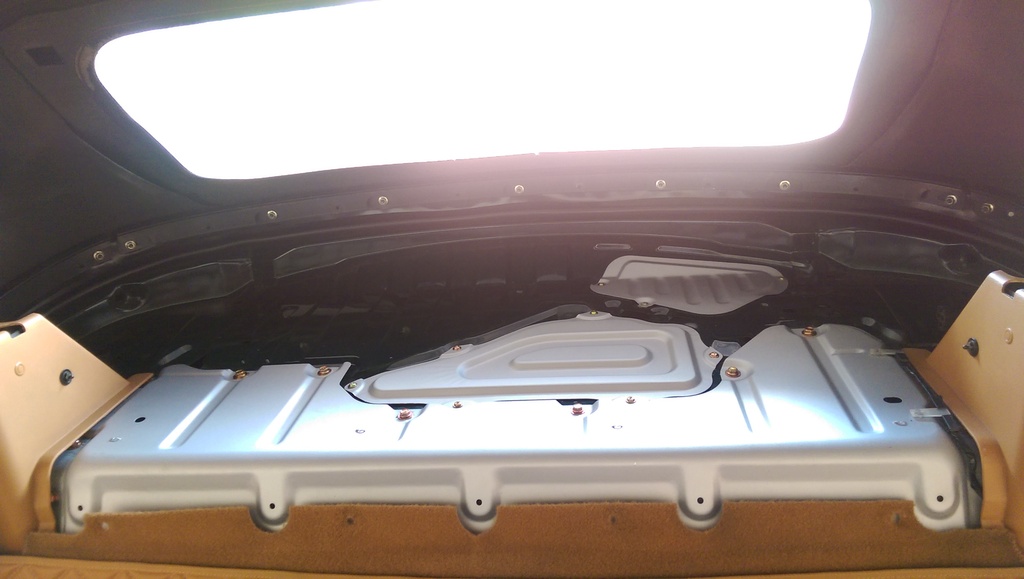
Rear bulkhead parcel shelf. Looks brand new!
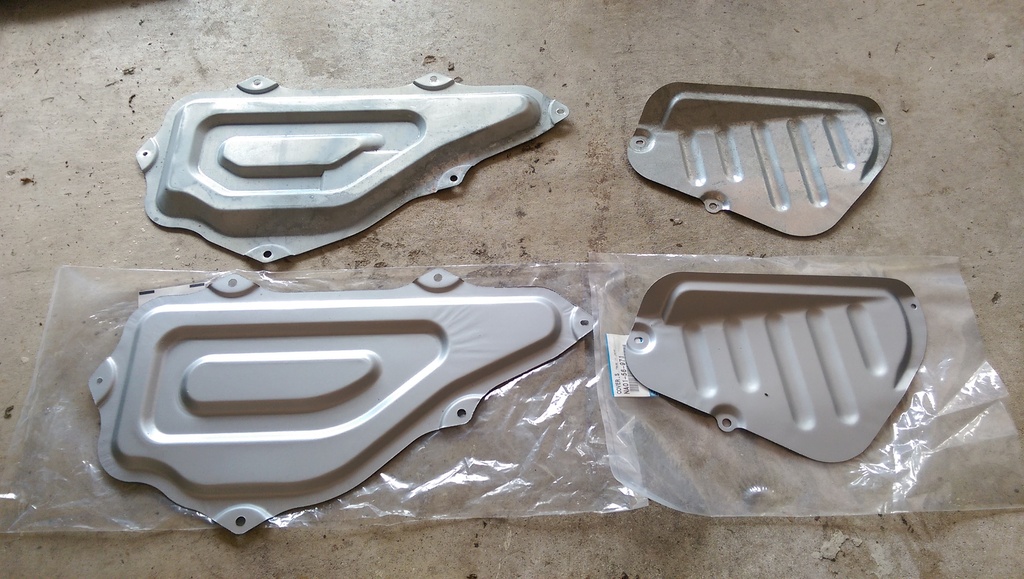
Old covers at the top, new covers on the bottom.

Always use a trim removal tool to get to the plastic clips.

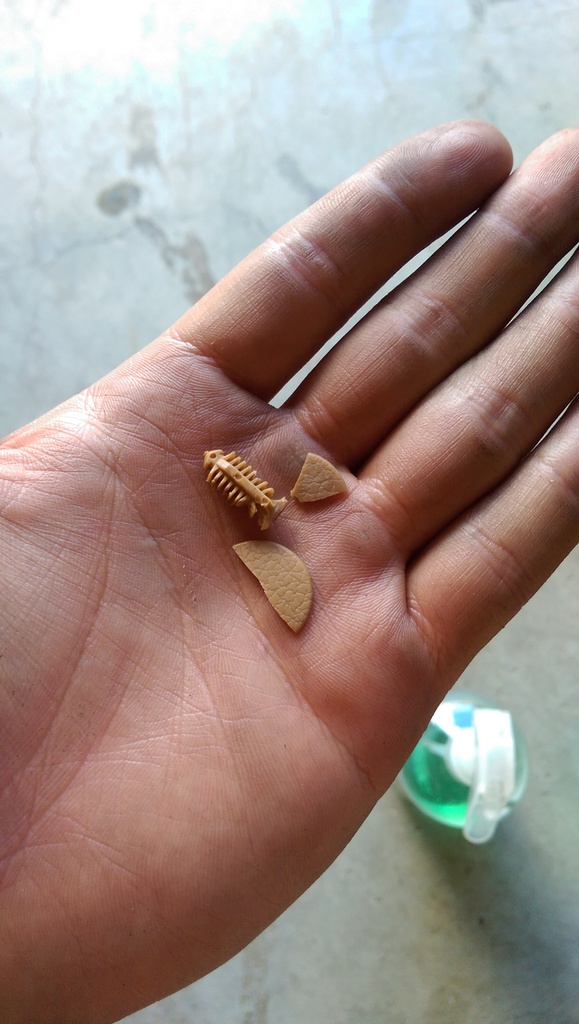
Out of the 20+ plastic clips, only one broke. It was already half broken when I pried with the trim removal tool.
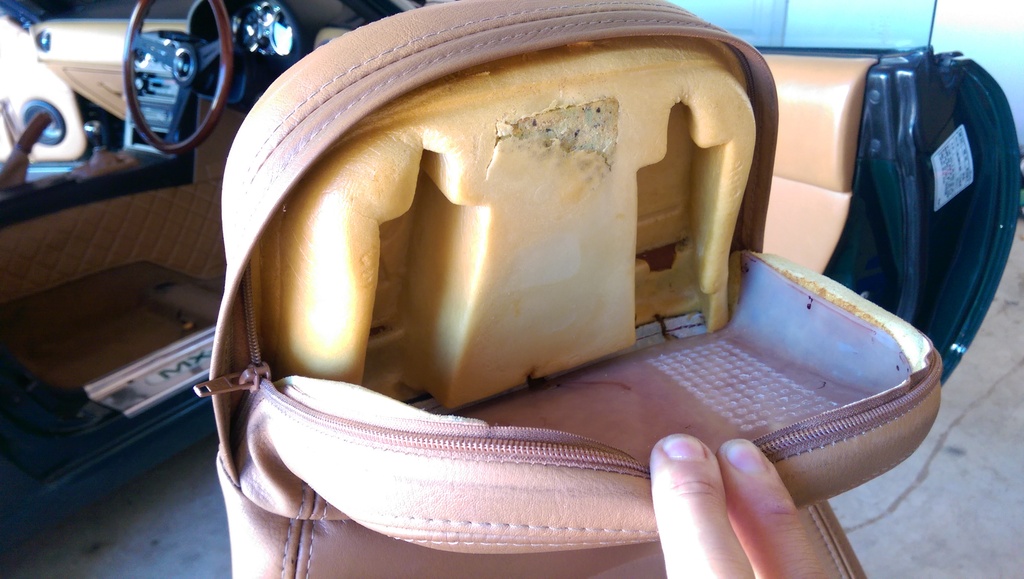
NA8 seat with holes in the foam for headrest speakers. I will be putting some speakers in there and doing a DIY but thats for another day...
New covers installed and rear parcel shelf cleaned. No more grime/dirt/muck.
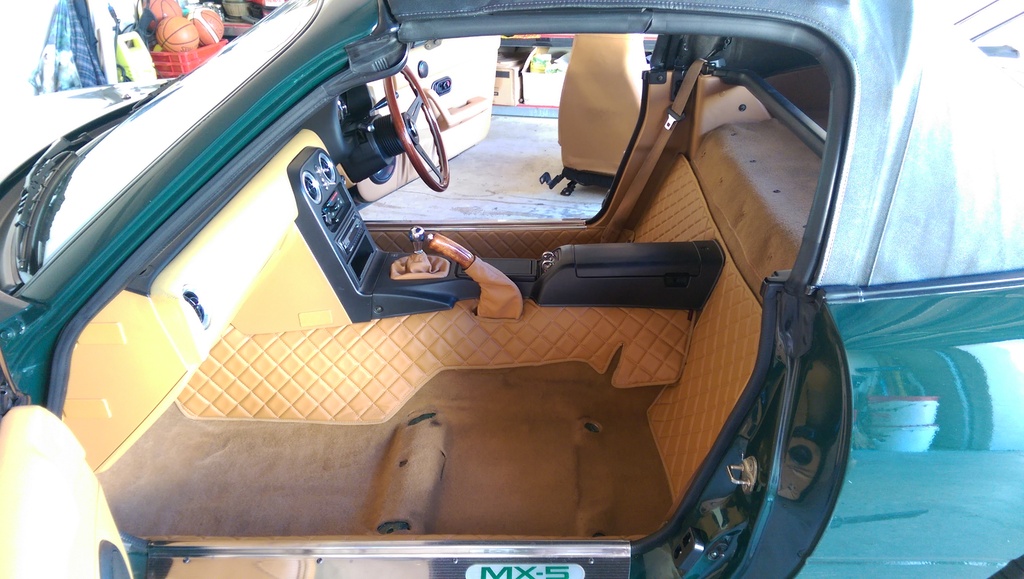
Carpet vacuumed and cleaned before putting the seats back in.
Overall, this wasn't really a hard DIY to do as all it involves are to remove some plastic clips, remove the rear parcel shelf carpet, unbolt the old covers from the car, pop the new one on, bolt them back down and you're done. Just need to take your time and be patient with it, especially with the rear bulkhead parcel.
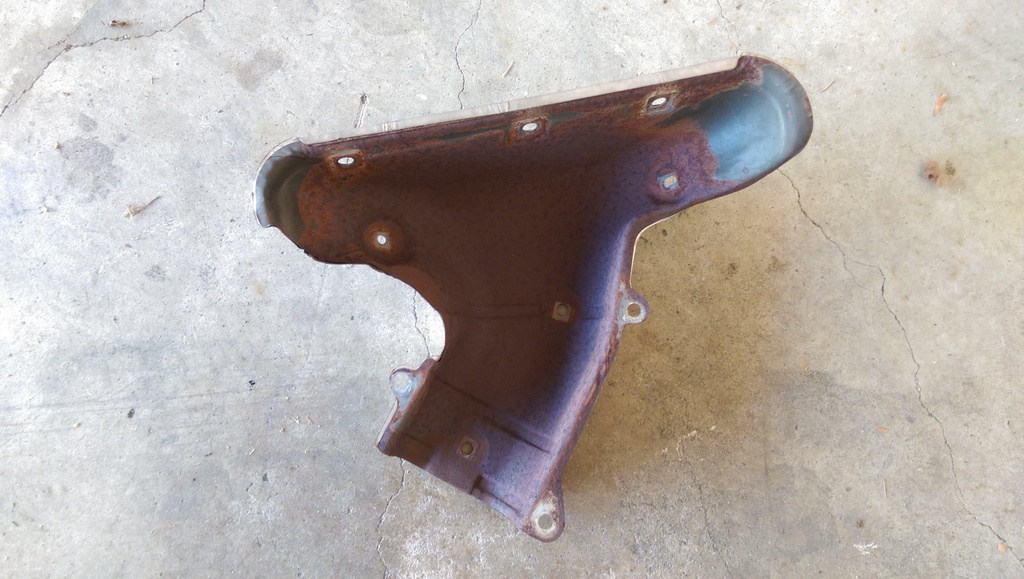
Also went ahead and decided to spray the exhaust manifold heatshield in high temp flat black. I will be changing the headers over later on but for the time being, I decided to clean it up a little bit and make it more presentable in the engine bay.
OEM exhaust manifold. Has definitely seen better days...
OEM Heatshield.

The inside of the heatshield had a lot of surface rust. Got the dremel out and coarse sandpaper and sanded it back down before wiping it all away with wax and grease remover before spraying.
A few coats of VHT flame proof high temp enamel paint.
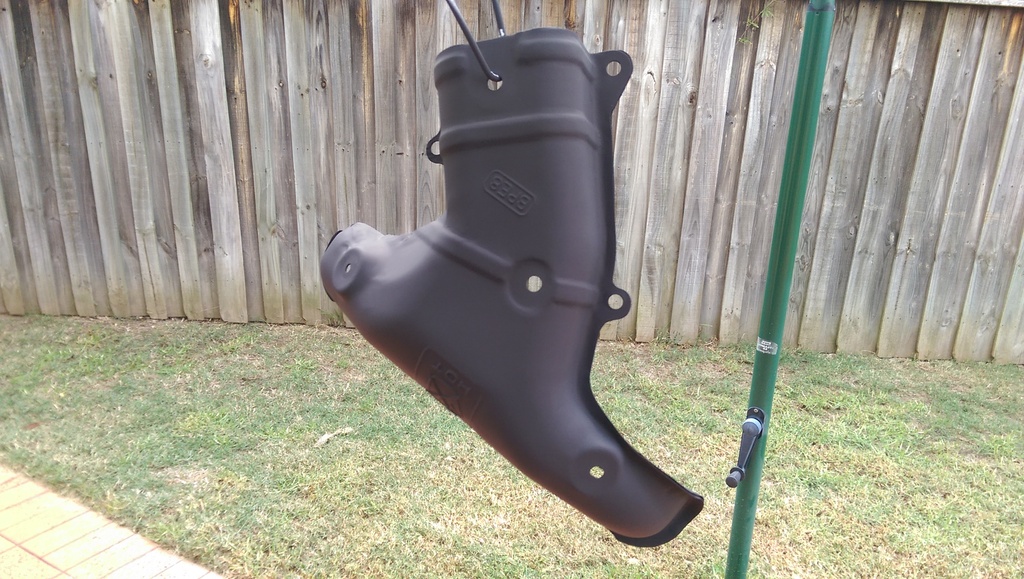

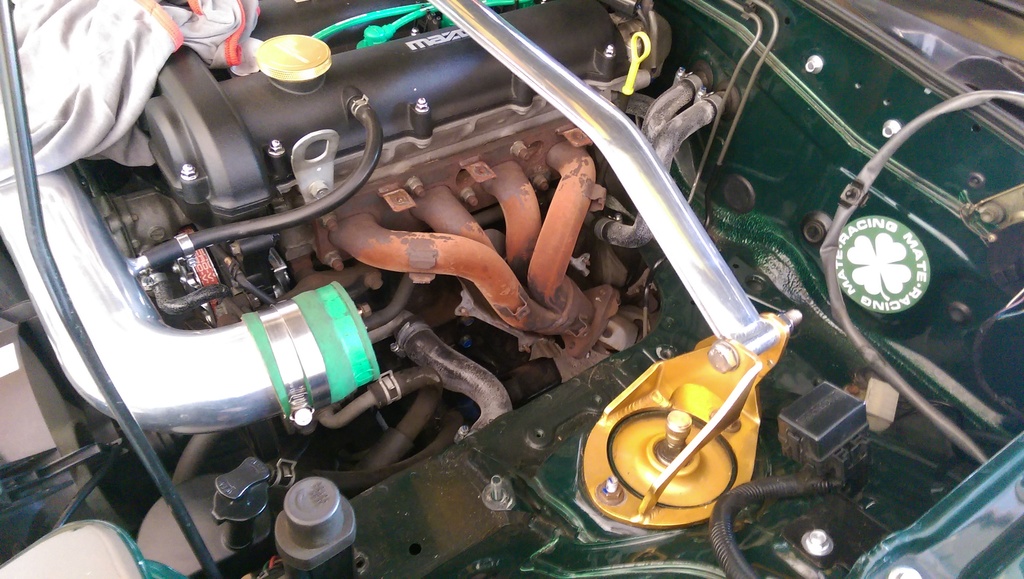
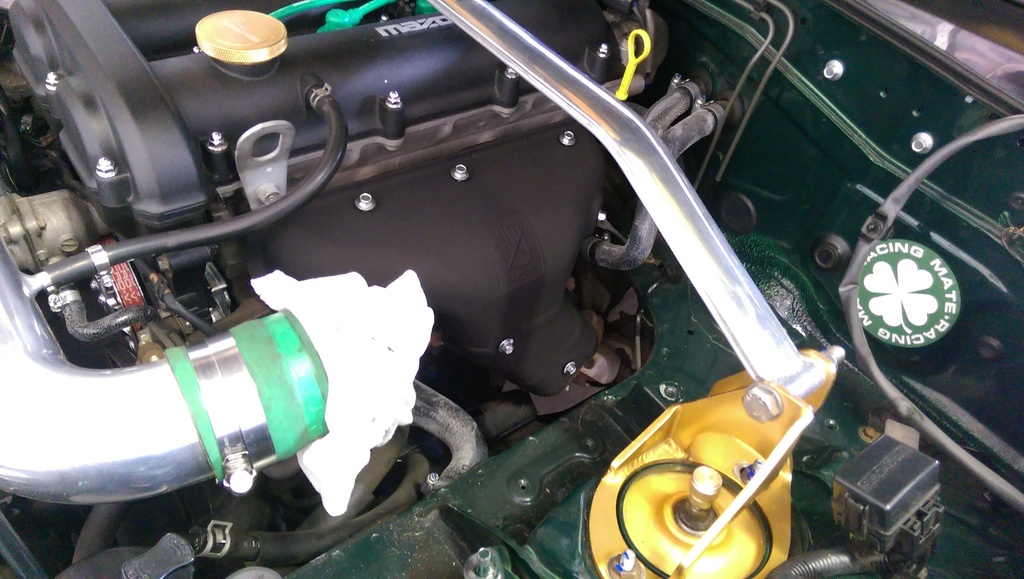
Installed back in the engine bay.
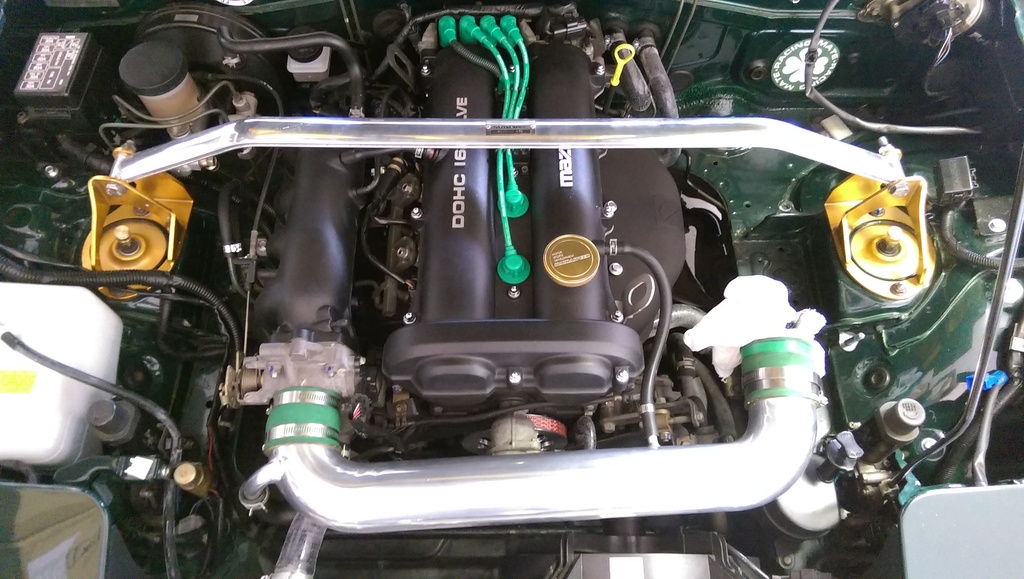
New bolts to keep the heatshield in check.
 Last edited by stephen8512; 09-07-17, 01:25 AM.
Comment
-
-
When I took delivery of my MX-5, I considered myself extremely lucky to have purchased one which was straight, unmodified, original and very clean. In fact, it was probably the cleanest one I had seen in person. However, given that the car is now 21 years old, things will naturally start to wear and will eventually need replacing no matter how clean the car may seem. One of these things would be the HVAC system.
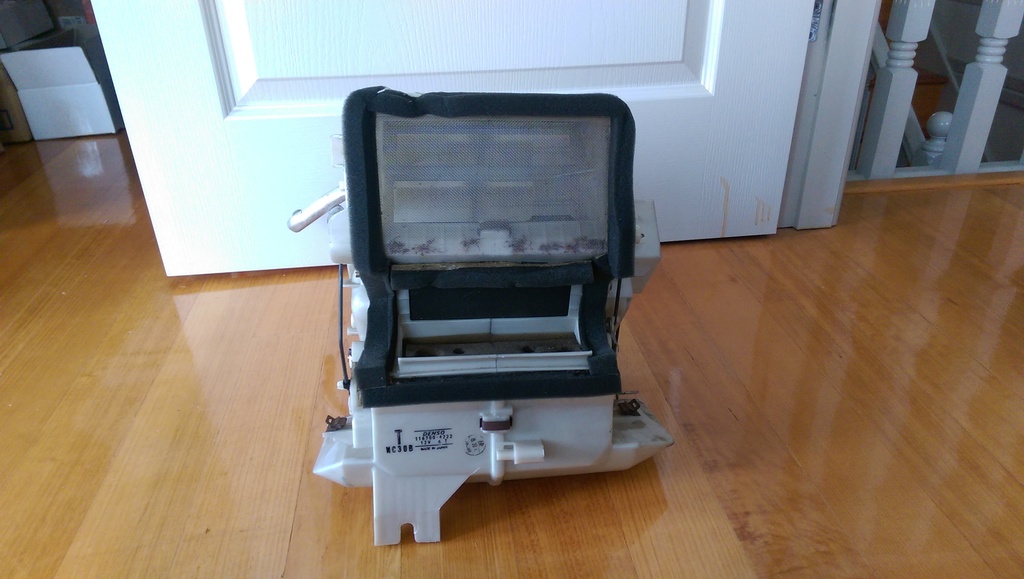
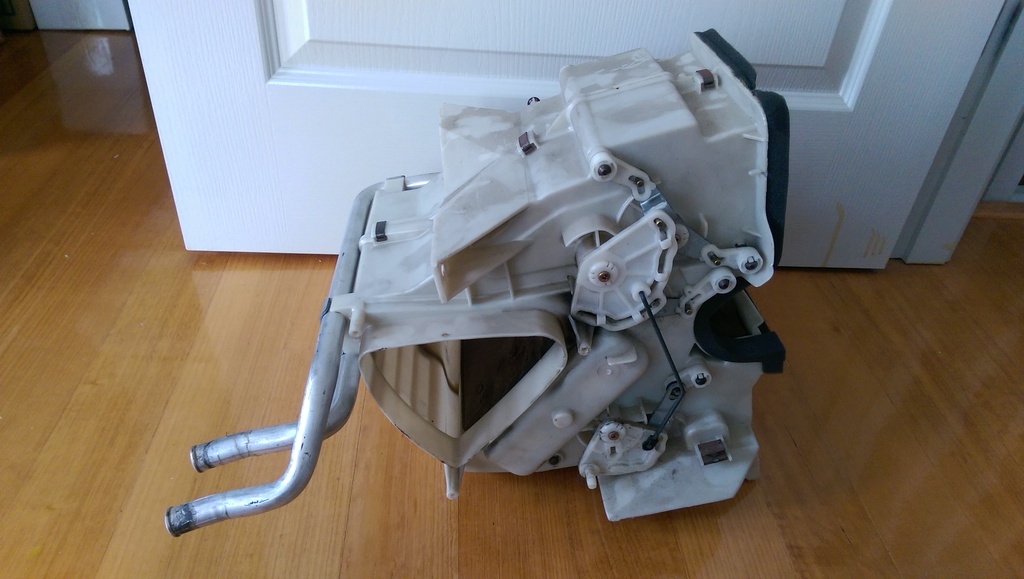
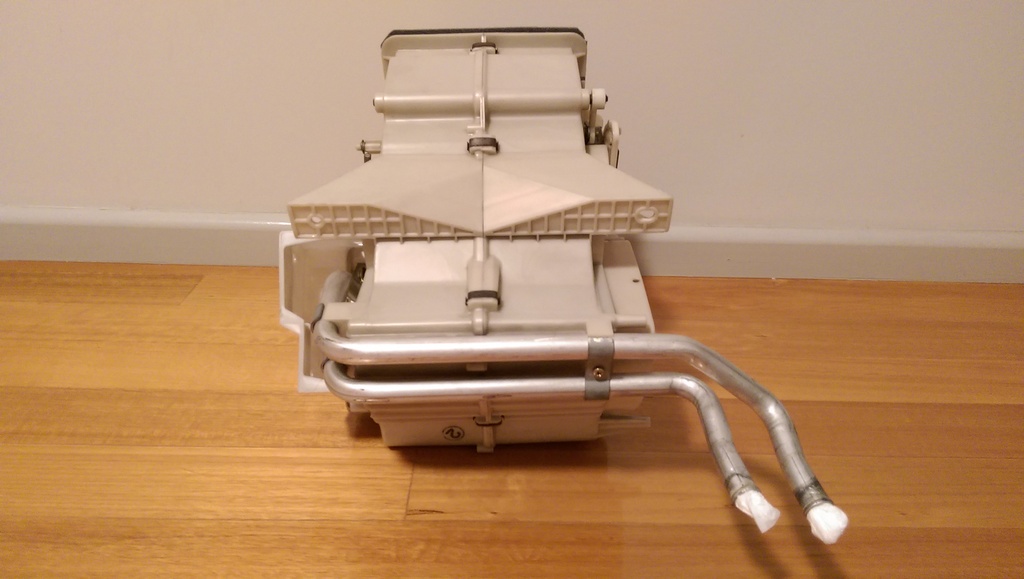
Recently purchased a good second hand NB heater core and the heater core housing assembly from MX-5 Mania. It was a little dusty and dirty but overall in great condition. The housing assembly is the same for both the NA and NB and is a direct bolt on affair but the NB MX-5's had the aluminium heater cores compared to the copper ones that the NA's received. A few benefits of the NB aluminium heater core are that they have removable, stronger metal hoses as they detach at the base of the heater core itself whereas the NA's copper heater cores were one unit, pipes and all. This means that theoretically you wouldn't need to remove your dash to change the heater core should it fail later on as you can just take the core out from the housing assembly, replace it with a new aluminium core and just re-use the pipes (however, I'd still probably take it all out just to be sure even if it may be a pain in the ass to do. Good opportunity for a clean). Also, the ends of the NA heater core pipes are copper and are quite soft, which means they can bend easily and get damaged which may result in coolant leaks.
I took this opportunity to give the housing assembly a good clean, wiping off all the dust, dirt and bits of nature it had accumulated during its time. I also got rid of the brittle old foam from the flaps and the assembly surround, cleaned the adhesive residue it left behind and replaced it with brand new foam. It came up very nicely if I do say so myself. Looking at how dirty this was, I can only imagine just how filthy the current one is. Although it's currently working fine and nothing is leaking, for the time being I might circulate some water through my existing heater core to flush out any grime and gunk.
The dash will have to come out for me to install this full assembly with the new NB heater core but I will be installing it together with my A/C retrofit when the time comes. Since the dash is going to come out, it will also give rise to other things which I will be doing at the same time such as thermal insulation/sound deadening in the chassis, giving the carpets some treatment, fixing and cleaning up any loose wiring and sanding and painting the metal dash bar as it will most likely have surface rust.
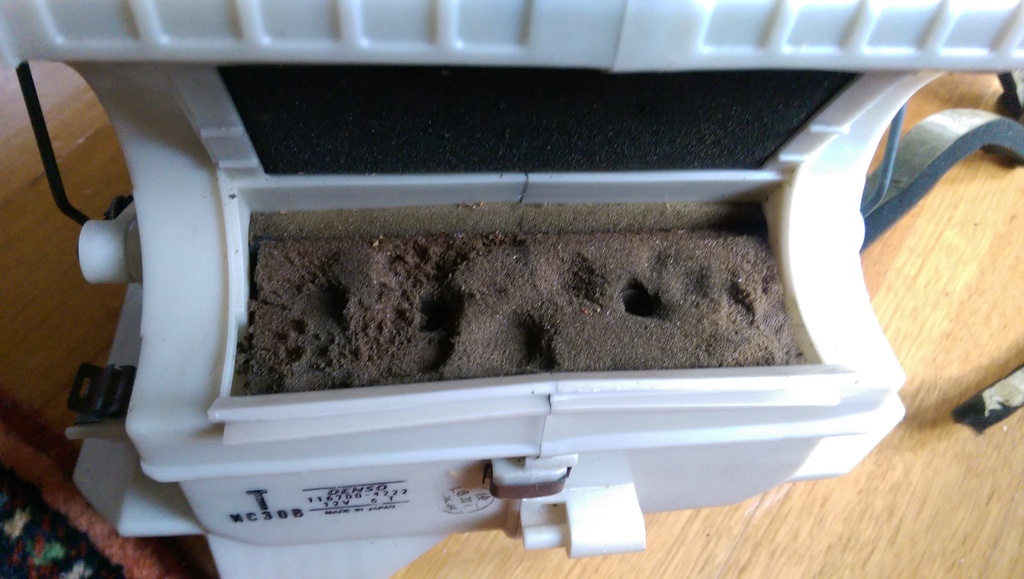
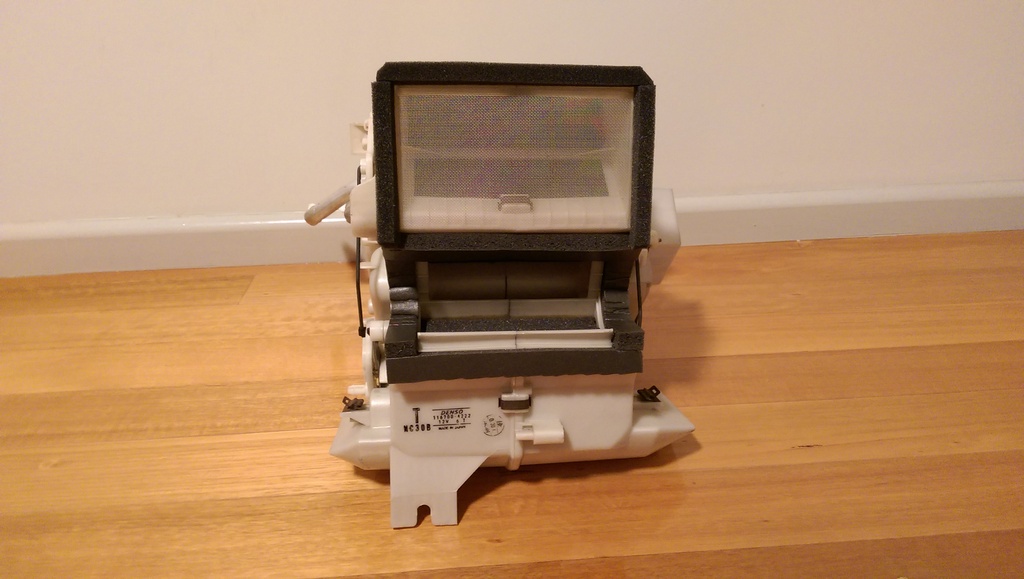
NB Heater core and housing assembly. Notice the amount of crap accumulated behind the mesh.
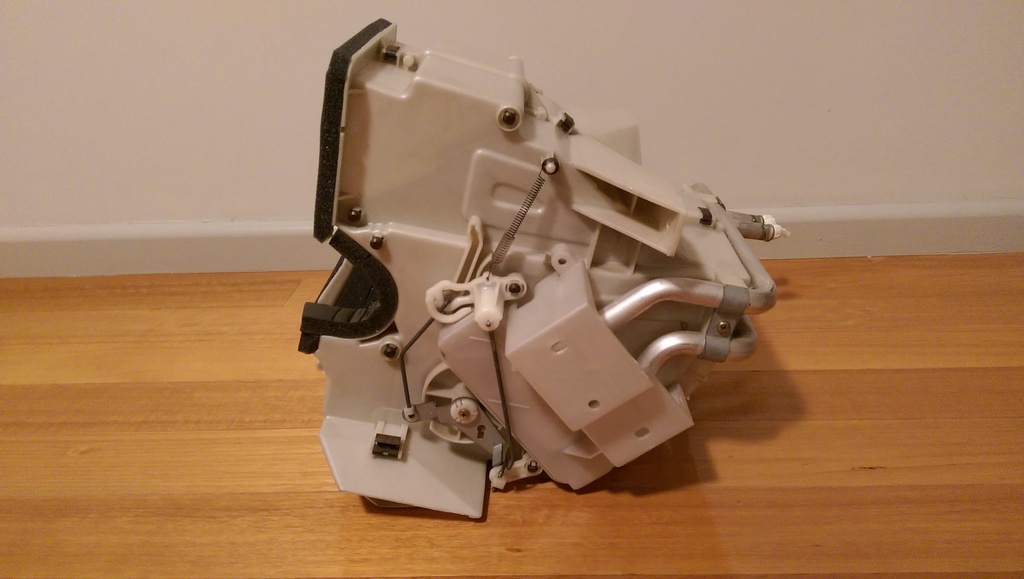
NB heater core metal pipes.

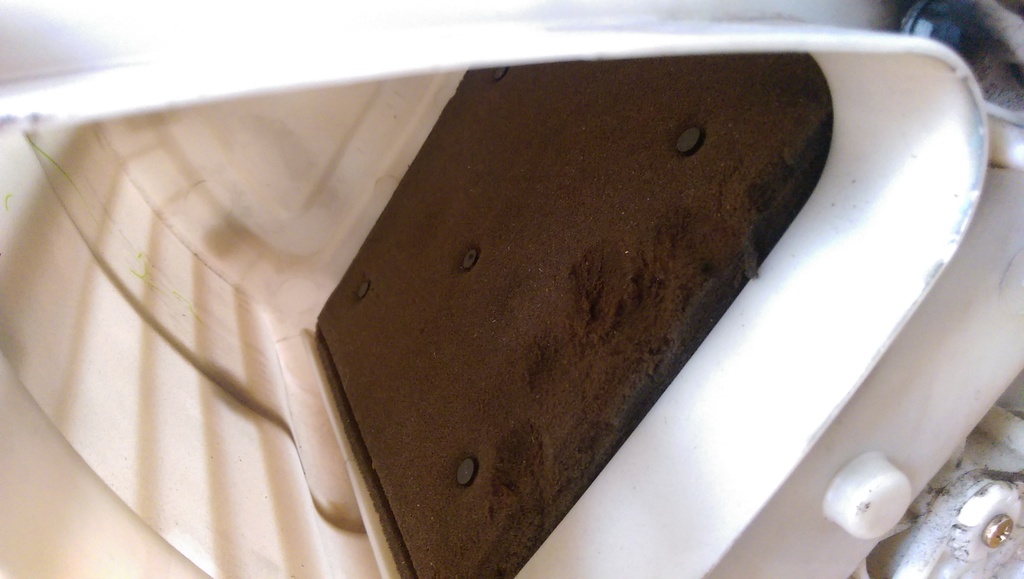
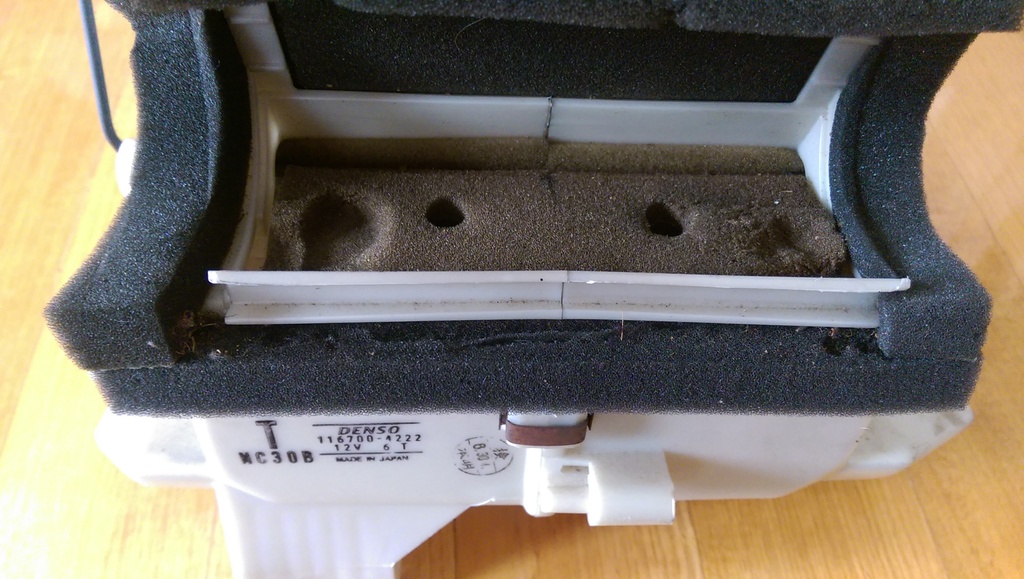
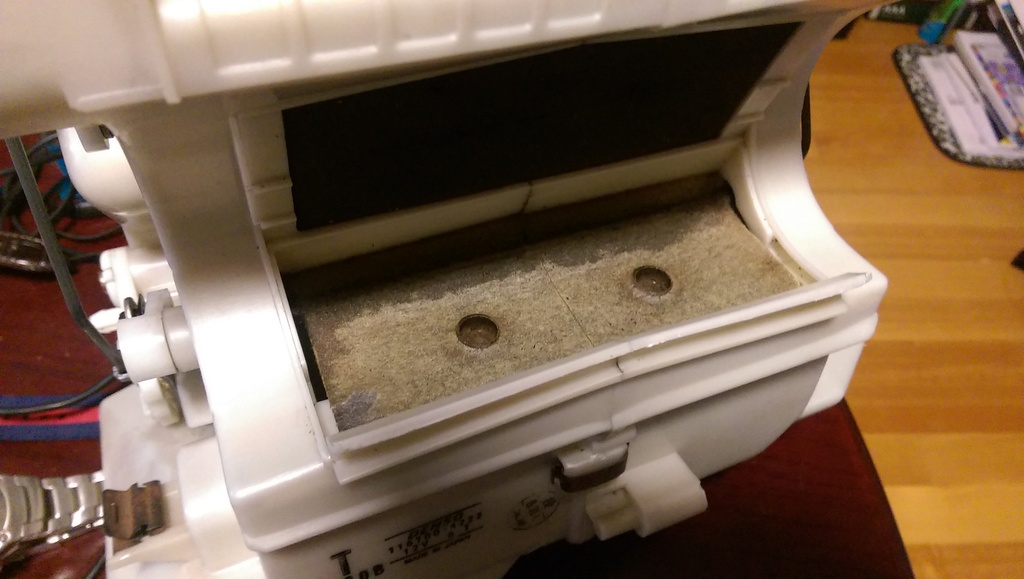
Foam inside the assembly. You can see that it has started to deteriorate. When you run your fingers through the foam it flakes off. Time to replace it!
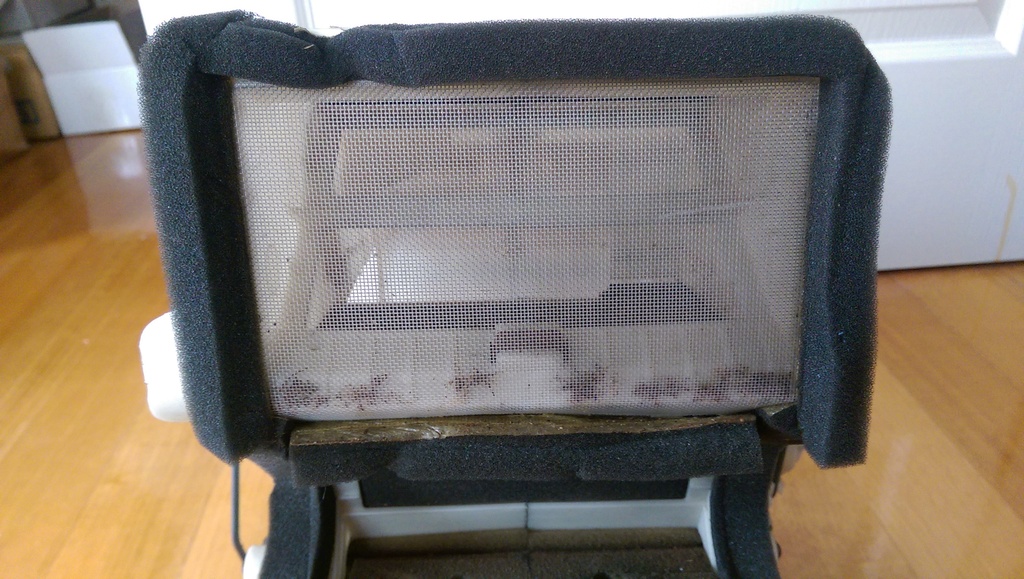
Closeup of the mesh and the bits of leaves and other crap.
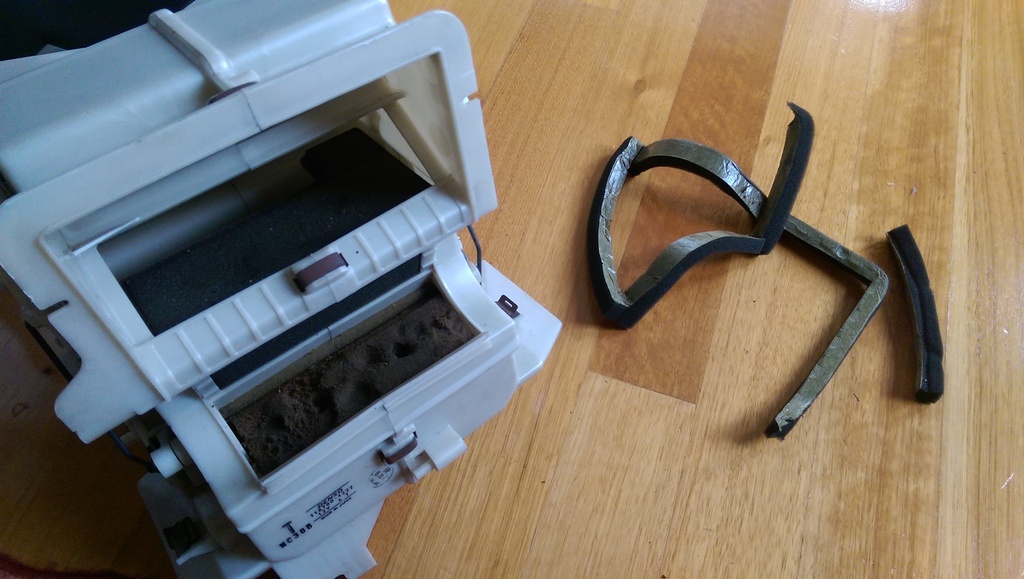
The brown foam needs replacing. The surrounding foam could also do with a refresh.
Surrounding foam removed.
Dirty mesh filter. Some hot soapy water was needed to clean this. Before...
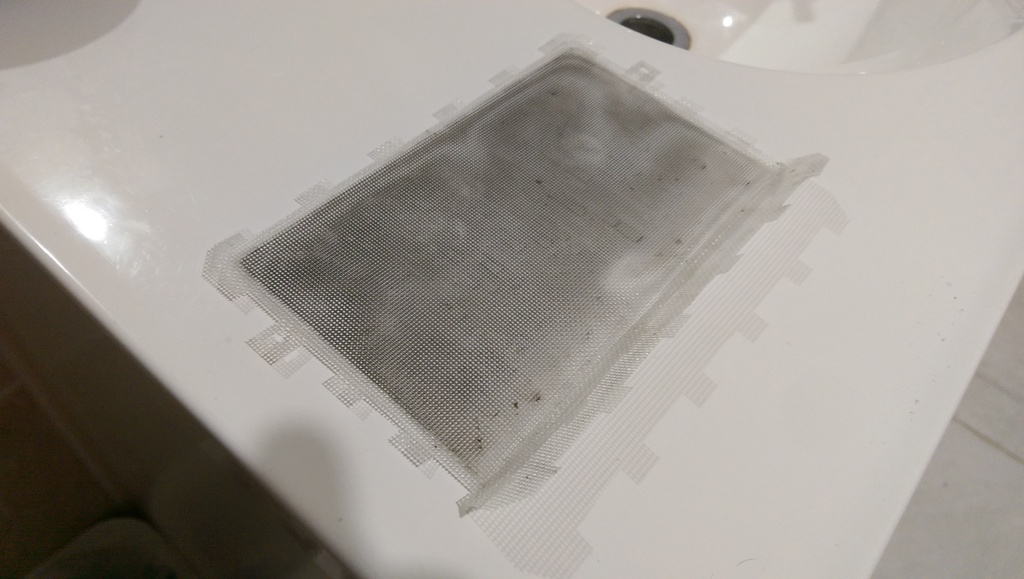
...and after. Much better!

Old foam removed and ready for the new foam.
Surrounds and flaps re-foamed. Mesh filter and housing assembly all cleaned.
Close up of new foam for the flaps and surrounds.
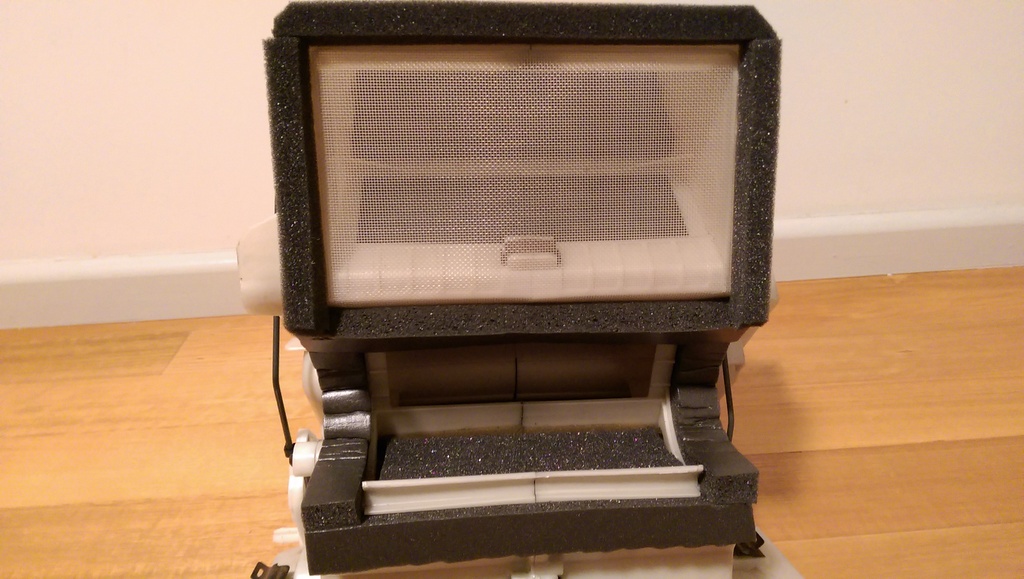


Ready to install.

 Last edited by stephen8512; 09-07-17, 01:26 AM.
Comment
-
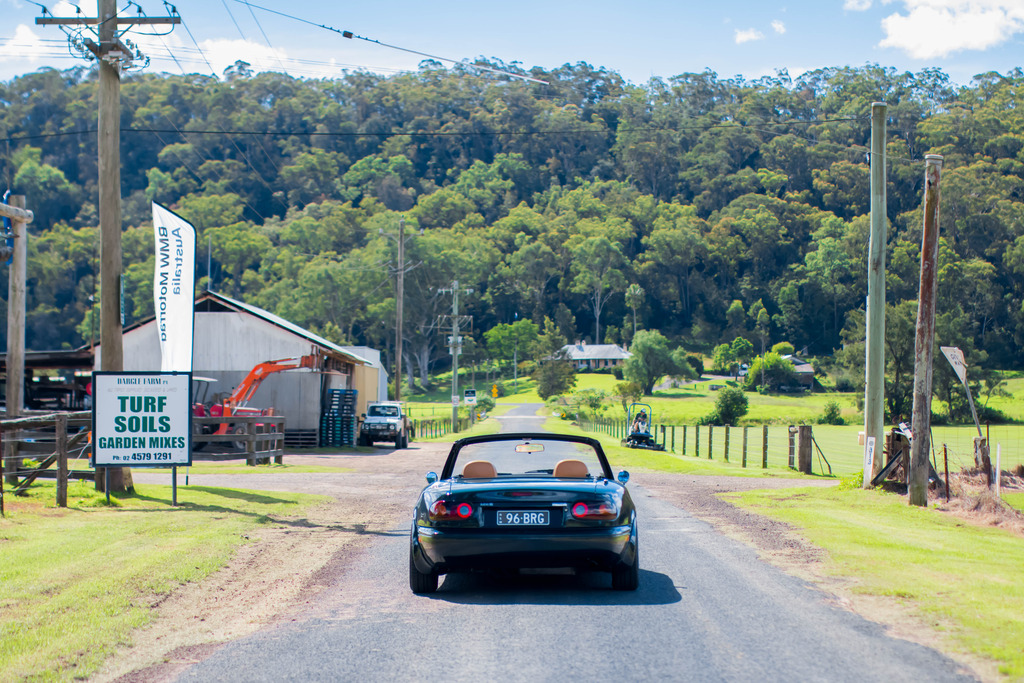
Recently, I was asked by "Club Torque" (a quarterly magazine of the Mazda MX-5 Club of NSW) if they could use the sunrise photo I took last month at Palm Beach as the cover for their 2017 summer edition. I happily obliged and I think it came out great!
The magazine is both printed on high quality gloss paper and available online in PDF format and it has the latest reports on club events such as meets, drive days, social events, motorsports as well as media releases, tech tips, etc. The online version can be found here :
http://nsw.mx5.com.au/club-zone/magazine
Many thanks to Mel Keller, editor of the magazine.
 Last edited by stephen8512; 09-07-17, 01:26 AM.
Comment
-
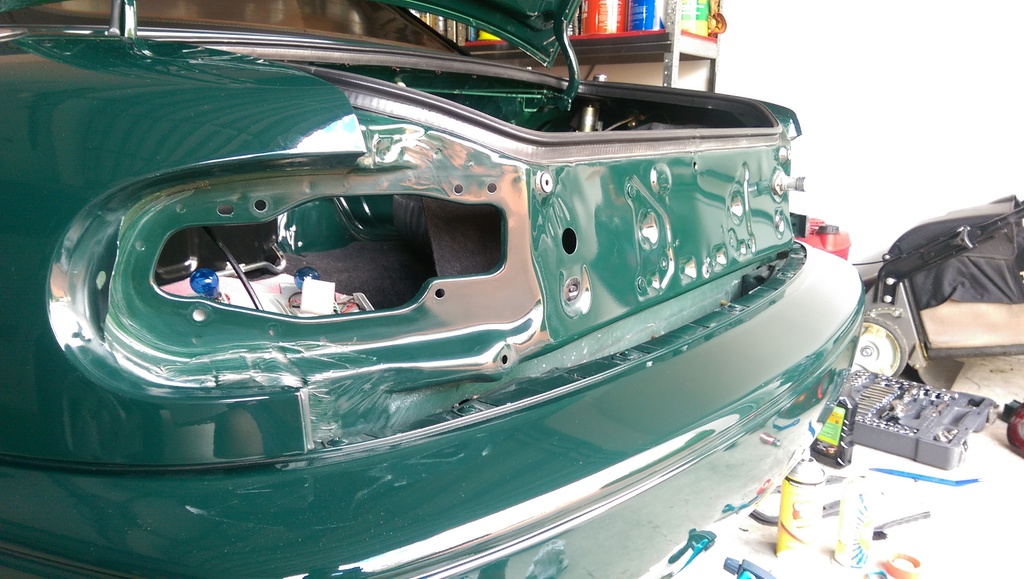
I decided to replace the rear tail lamp gaskets. The gaskets for these tail lamps become brittle and can fail over time simply due to age which would compromise the seal and a failed gasket which isn't sealed properly can mean that water could make its way into the boot, which would then be a breeding ground for rust. Sure enough, the gaskets were old and crusty but it didn't look all that bad. They held up quite well as I've seen far worse. I replaced with OEM parts and it's now good as new for at least the next 20 years.
Decided to remove the centre number plate garnish as well and give everything a good clean behind there as there would have been a lot of dirt and dust accumulated behind the garnish over time. Removing it was pretty straight forward. Just a couple of 10mm nuts to unscrew and a couple of plastic clips holding the garnish in place. Some warm soapy water, all purpose cleaner and degreaser along with some elbow grease and it came up looking awesome.
Old OEM gaskets VS new OEM gaskets.
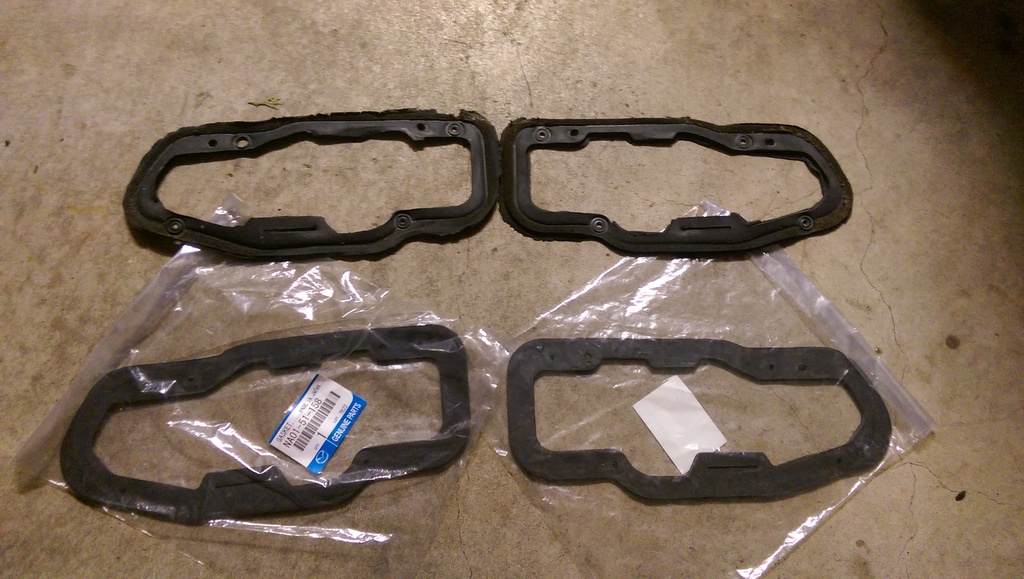
As you can see, the gasket is still in pretty good condition but it has started to become old and brittle on the left side of the gasket.
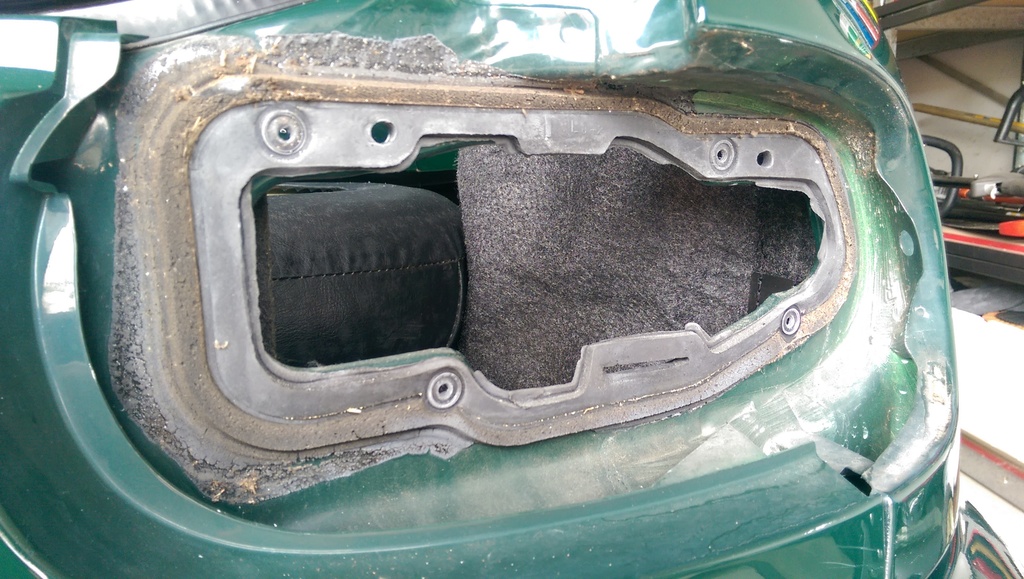
Old passenger side gasket.
Centre number plate garnish and tail lamps removed. Pretty filthy.

Some rags, warm soapy water, all purpose cleaner and degreaser and a plastic scraper was used to bring it back to factory fresh condition.
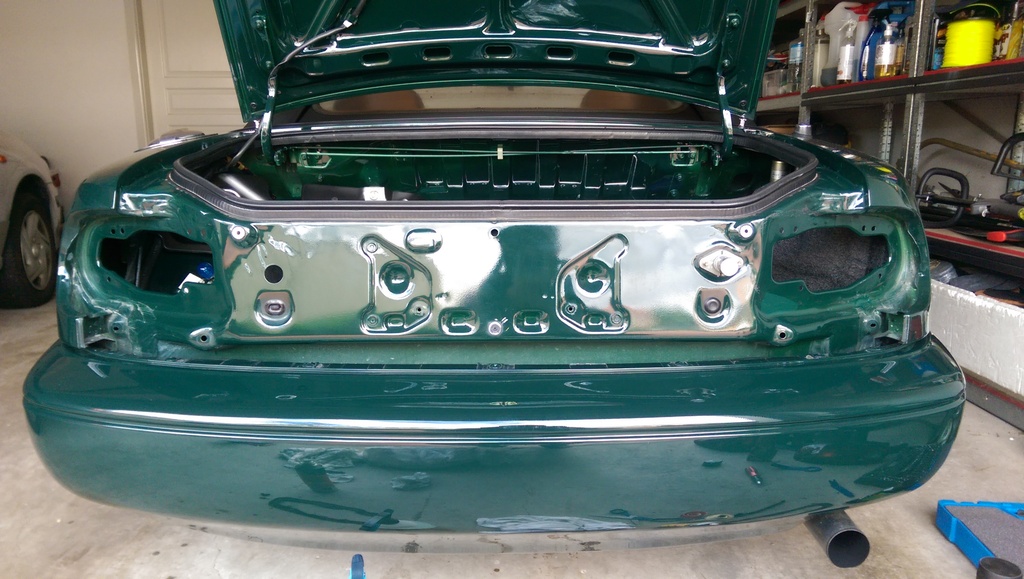
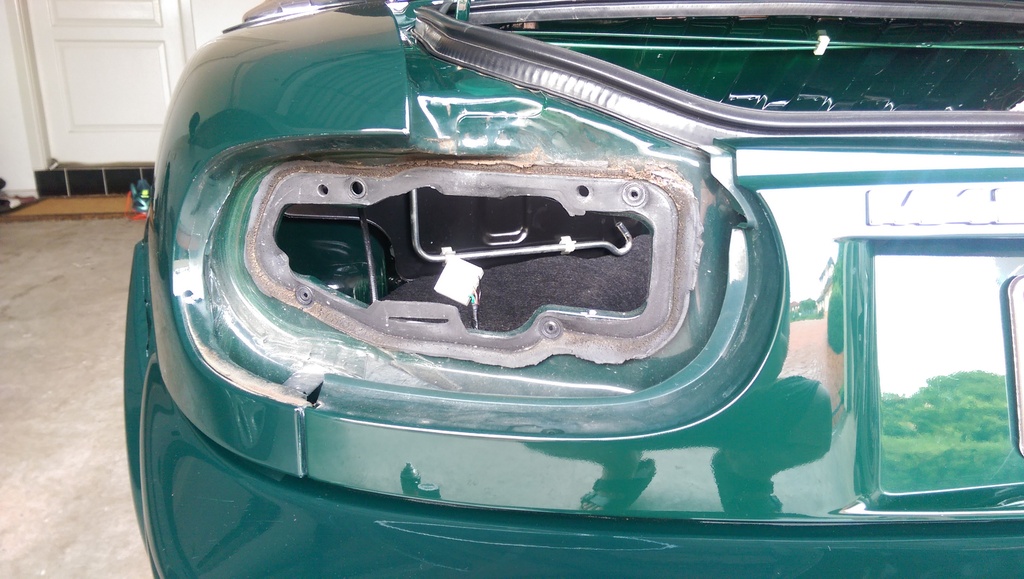
Fresh and clean, ready for the new gasket.

Tail lamps were also given a good clean.
 Last edited by stephen8512; 09-07-17, 01:26 AM.
Comment
-
Thanks Felix!Originally posted by felixR View Post
Went for a little drive today since it's been a while that I've had the car out and about due to all the rain we've had over the past month (constant rain/shit weather for the full month of March and the last 2 weeks of February).
Felt good to just get the car out and drive
 Last edited by stephen8512; 09-07-17, 01:27 AM.
Comment
-
-
-
28/05/2017
Minor Service + Engine Detox + Coolant Hose Replacements
Winter is coming...as is the new season of Game of Thrones. But I digress. Autumn will be officially over in a few days and we've been having some gorgeous weather lately, so why not do some DIY before it gets too cold for your hands to do any sort of work on the car?
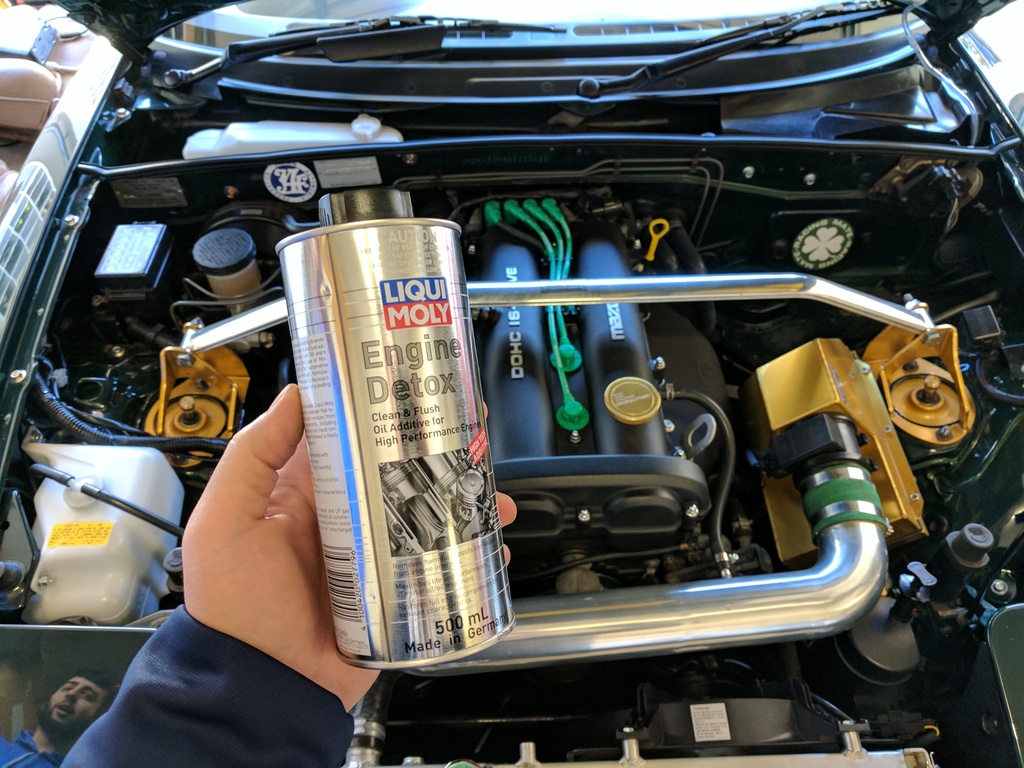
Last time I serviced the car was about seven months ago and although it had only done about 4,500kms since October last year, I decided to do a minor service by changing out the oil and oil filter as well install my Samco silicone coolant hoses. Before I did all this though, I decided to do an engine flush and clean so that it could get rid of any sludge and gunk that the internals may have housed for the past twenty one years. I used some Subaru upper engine cleaner, which contains a foaming agent similar to seafoam that cleans carbon deposits from the induction system and combustion chamber of the engine and I also used LiquiMoly Engine Detox, which is an oil additive that is meant to remove deposits and residues from all internal engine components including the piston rings whereby solid particles and liquid contaminants are isolated and allowed to freely drain with the old engine oil.
The upper engine cleaner was the first on the list. Spray half the can into the intake manifold of the car and let it sit for about five minutes or so before turning the car back on. I turned the engine on and sprayed the rest of the can into the manifold while the car was running. Gave it a few revs so that the car wouldn't stall and let it idle and smoke out before going for a short drive to clear out any of the remaining foam in the chamber until the exhaust stopped billowing the white smoke everywhere. It worked quite well I think. Apparently it's meant to give a smoother idle, better acceleration and better fuel economy. Time will tell if this is true or not.
Next was the LiquiMoly Engine Detox. This is added to the existing engine oil prior to the oil change. Mine was barely 5,000kms old but have seen oil which was 500kms old with this added and it came out nice and black. Instructions were simple enough again. Pour the whole content of the can in the oil filler hole, turn the car on and let it idle for 20 minutes. Then, drain the oil and replace the oil filter. The oil being drained was pretty black with the additive seemingly doing it's job.
I was also going to do a radiator flush but as the coolant was draining from the radiator, it didn't seem like it needed it. The radiator cap was still very clean and no evidence of any grime or sludge on it or the radiator so I decided to leave it for now and do it if and when I actually need to in future.
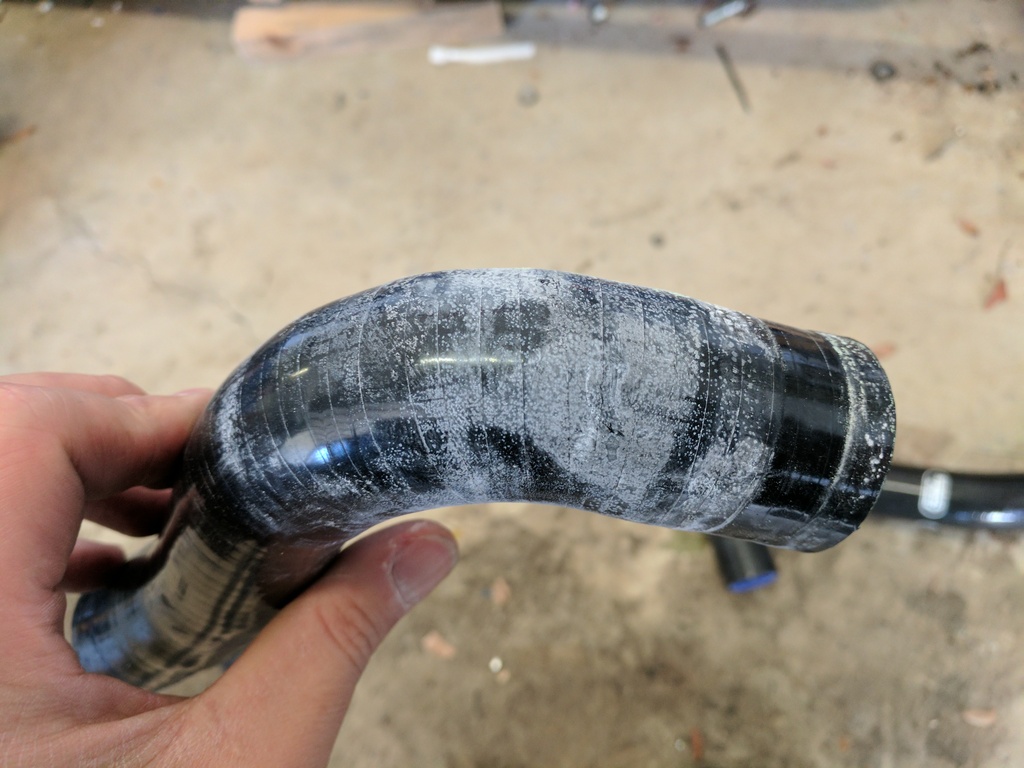
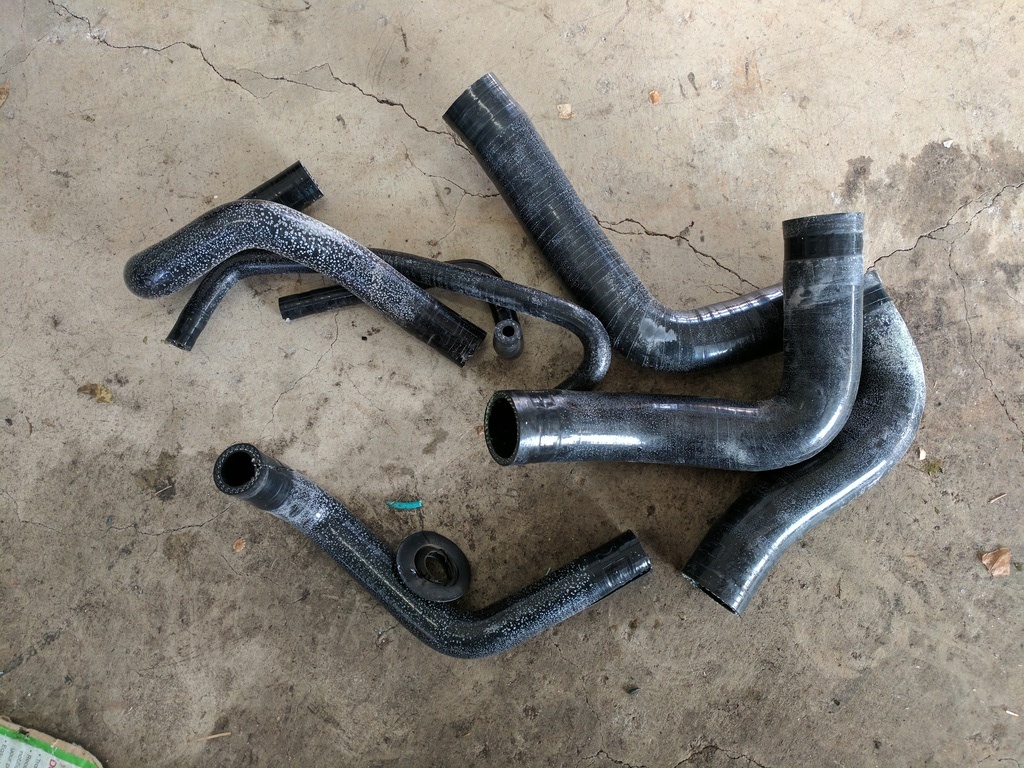
I needed to change my radiator hoses as well. When I first got the car back in late 2015, I decided to do a full major service and as a part of that, change all the old crusty rubber hoses to silicone. I should have went with my gut and bought some Samco silicone hoses but I decided to get a silicone hose kit by Carbon Miata. Big mistake. I always try and live by the mantra "do it once, do it right" and this usually means buying parts which may be considered expensive at the time of purchase but will save money later as what you bought would be a quality part and would very rarely fail and you wouldn't have to keep spending money on the same part by replacing it had you purchased an inferior or non quality part. The Carbon Miata hoses were basically Samco silicone hose copies and as such, they probably weren't produced with the same strict quality controls that I know the Samco ones are adhered to. This lack of QC showed because after running these hoses for just over a year (fourteen months to be exact), the coolant was already eating into the hoses and was failing. When I noticed this (which was about five months ago) I decided to just get some genuine Samco hoses and was ready to replace it all. The Carbon Miata silicone hose kit changes the three large coolant hoses, four smaller coolant auxiliary hoses and the two heater hoses. The three large hoses I changed to genuine Samco silicone hoses and I managed to change two of the four smaller auxiliary coolant hoses to OEM Mazda hoses. These were the throttle body to thermostat housing hose and the thermostat bypass hose. The other two hoses which is located on the intake side (i.e the back of engine to oil cooler hose and oil cooler to throttle body hose) are still the Carbon Miata items but I couldn't access them without taking off the intake manifold so I left it for now. I have the OEM Mazda hose replacement for these two ready to go but it will have to wait for another day.
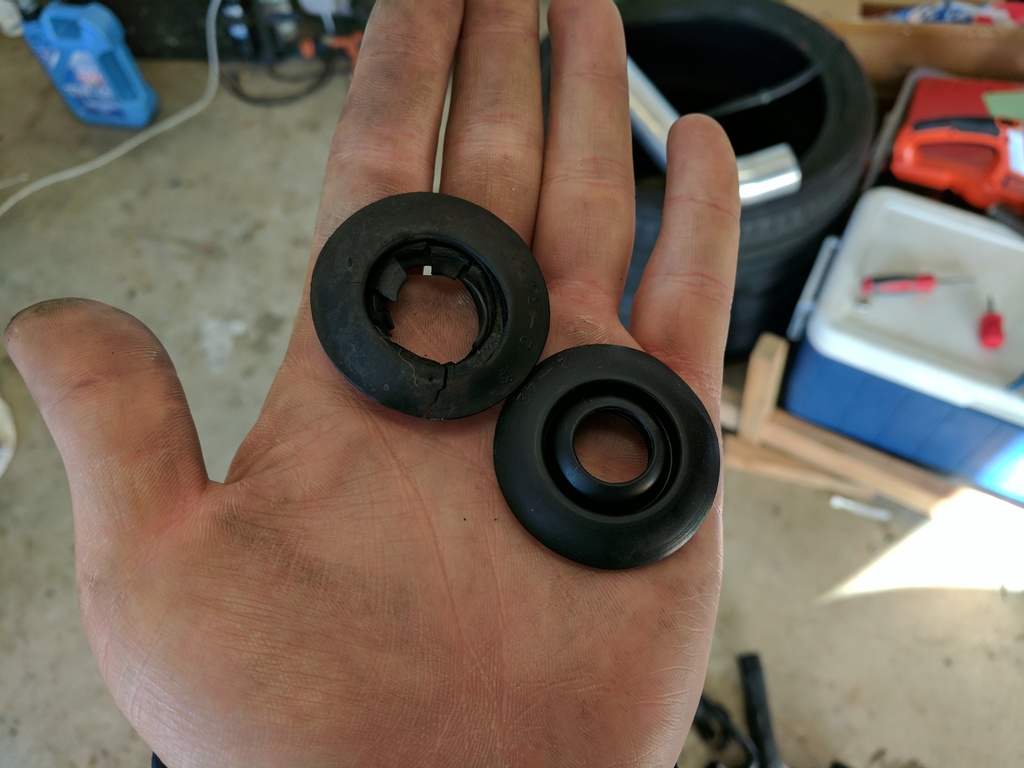
As part of the kit, the Carbon Miata silicone hoses also came with silicone heater hoses (which again, were failing). Like the auxiliary hoses, I decided to revert back to genuine OEM Mazda rubber heater hoses with brand new grommets. The grommets were not changed last time as I didn't have them with me and the ones on the car looked fine, i.e no cracks. This time around though I had new grommets so I decided to change them out. Once I started prying the old ones out, the rubber grommets basically disintegrated as they were quite brittle. I was so glad to be changing them to fresh new OEM parts.
Overall, it all went well and the car feels good as ever to drive. It needs a wash as it hasn't had one in about a month so there is a thin layer of dust on the paint. Plan to wash it some time this week before I take it out for a long overdue drive...
Subaru upper engine cleaner to clean out the carbon deposits from the induction system and combustion chamber.

LiquiMoly Engine Detox. Oil additive meant to remove deposits and residues from all internal engine components including the piston rings whereby solid particles and liquid contaminants are isolated and allowed to freely drain with the old engine oil.
4,500km old oil + engine detox solution. Result? Very black.

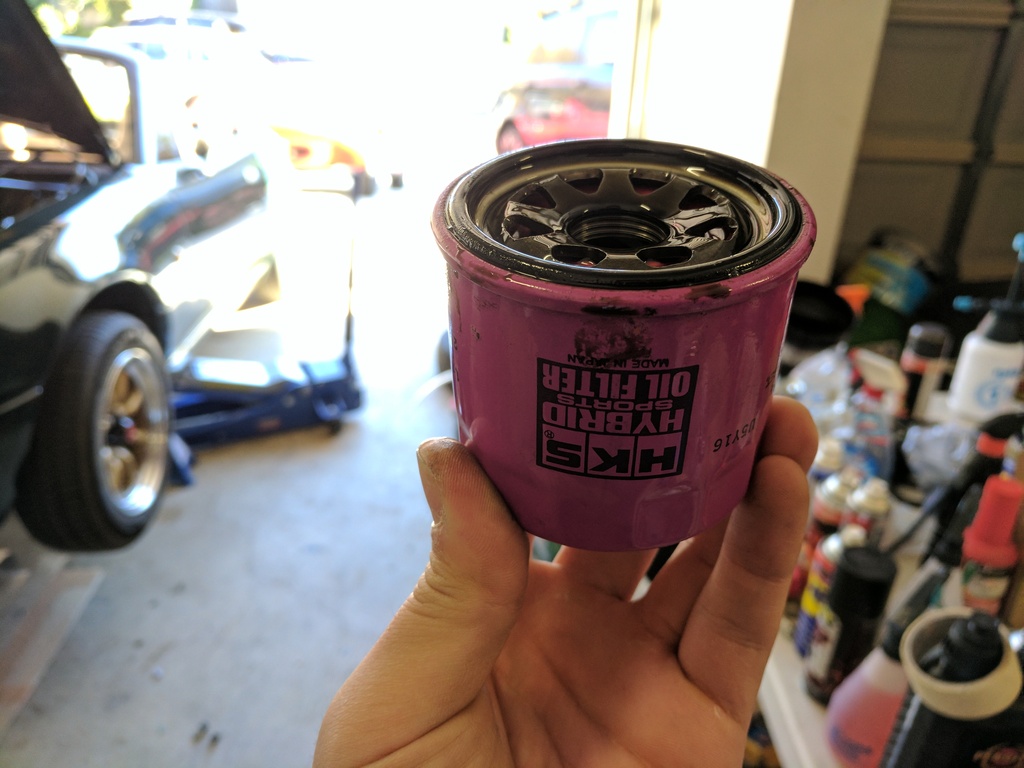
HKS Hybrid oil filter. Replaced this with a genuine OEM Mazda filter. Might go back to HKS in future but honestly, for a road car you won't notice the difference between this and OEM.
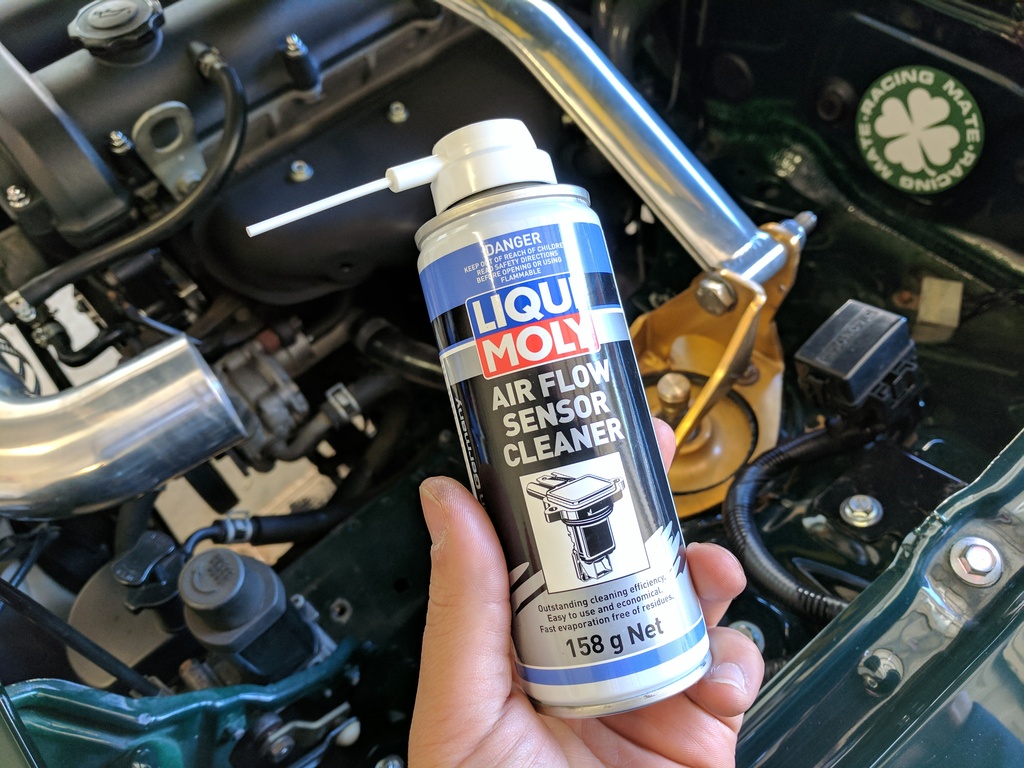
LiquiMoly Air Flow sensor cleaner. Did a bit of a clean on the MAF whilst the airbox was out.
Carbon Miata silicone hose. You can see that the hose started to fail as the coolant was eating into the hose. Who knows how much longer it would have stood up until it split or leaked?
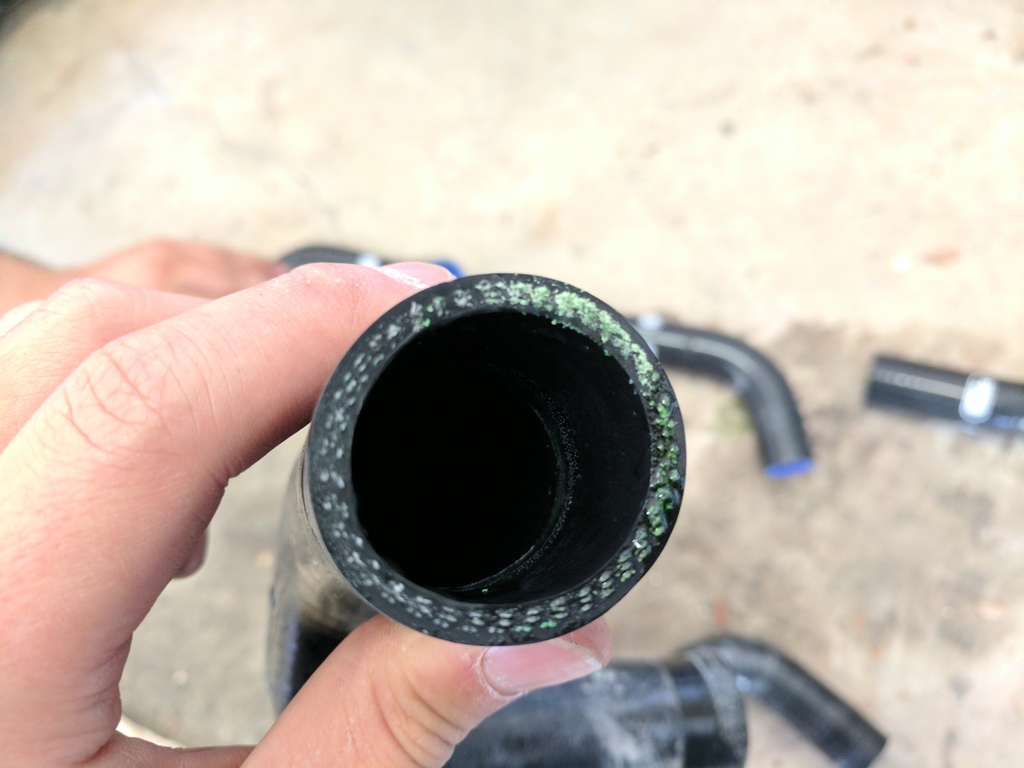
Another angle. Should have gone with Samco from the beginning...
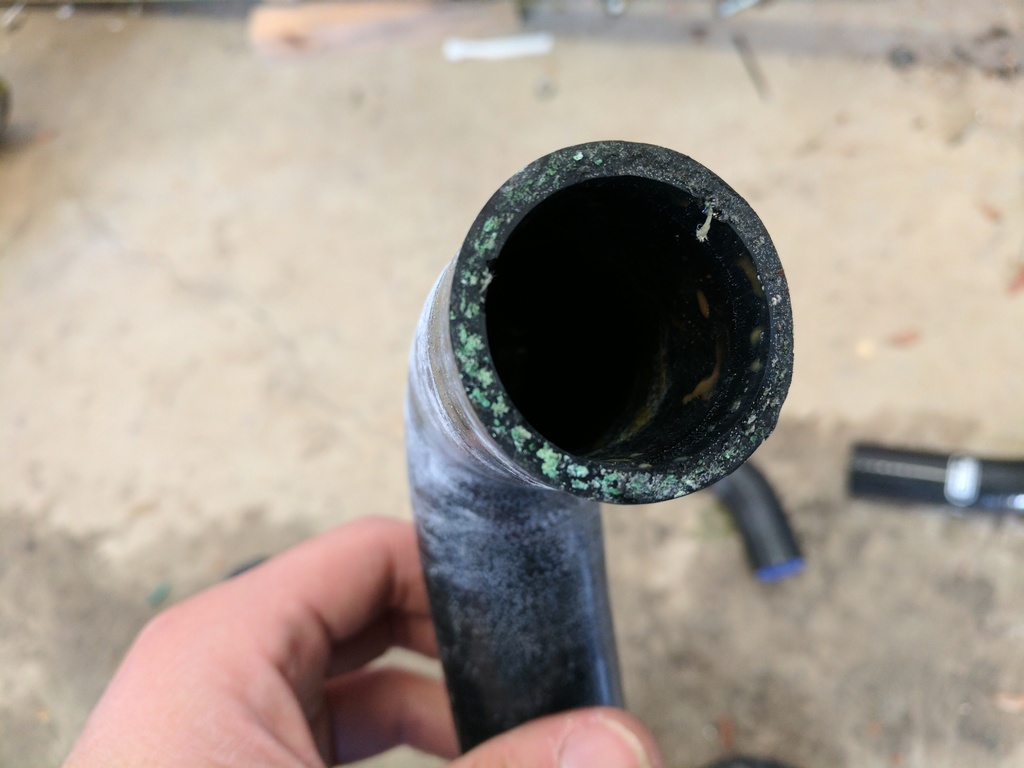
Glad to be rid of this.
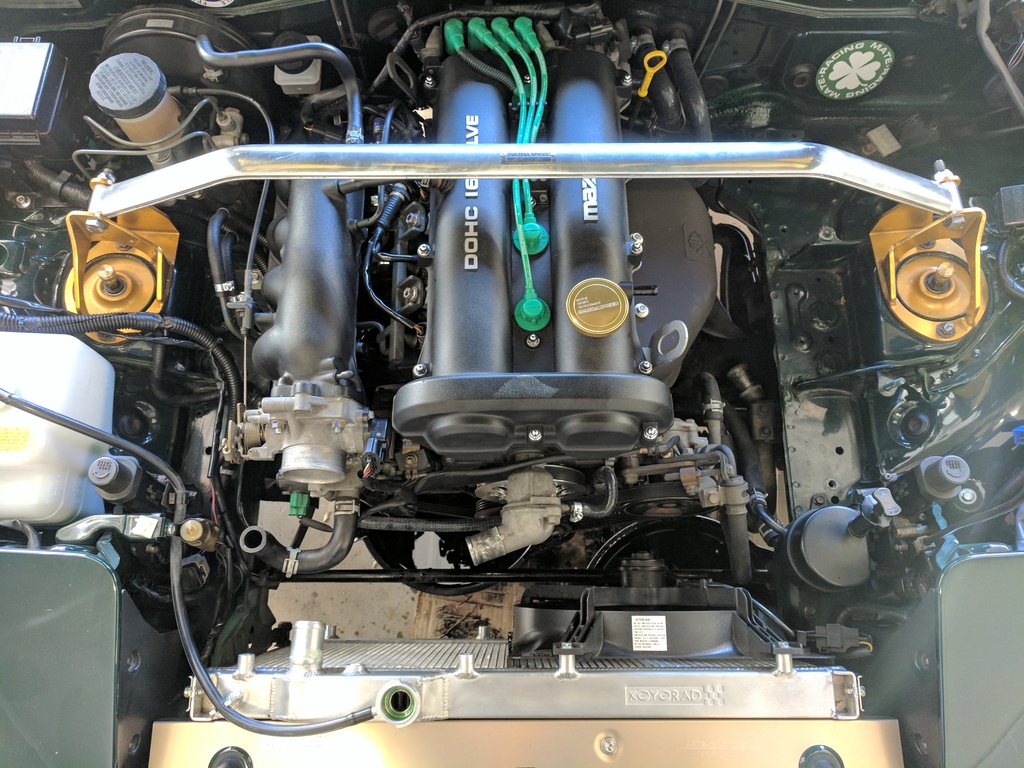
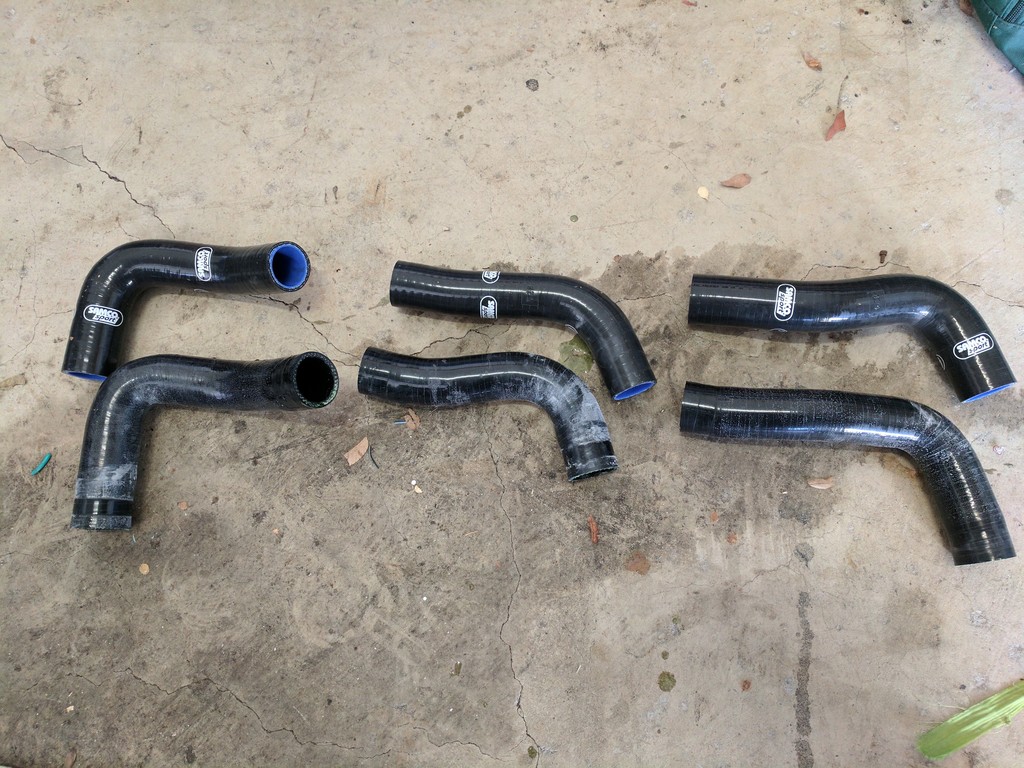
Everything off, ready for some OEM Mazda and Samco goodies.
Genuine Samco silicone hoses VS Carbon Miata knock off copies.
OEM Mazda coolant auxiliary hoses.
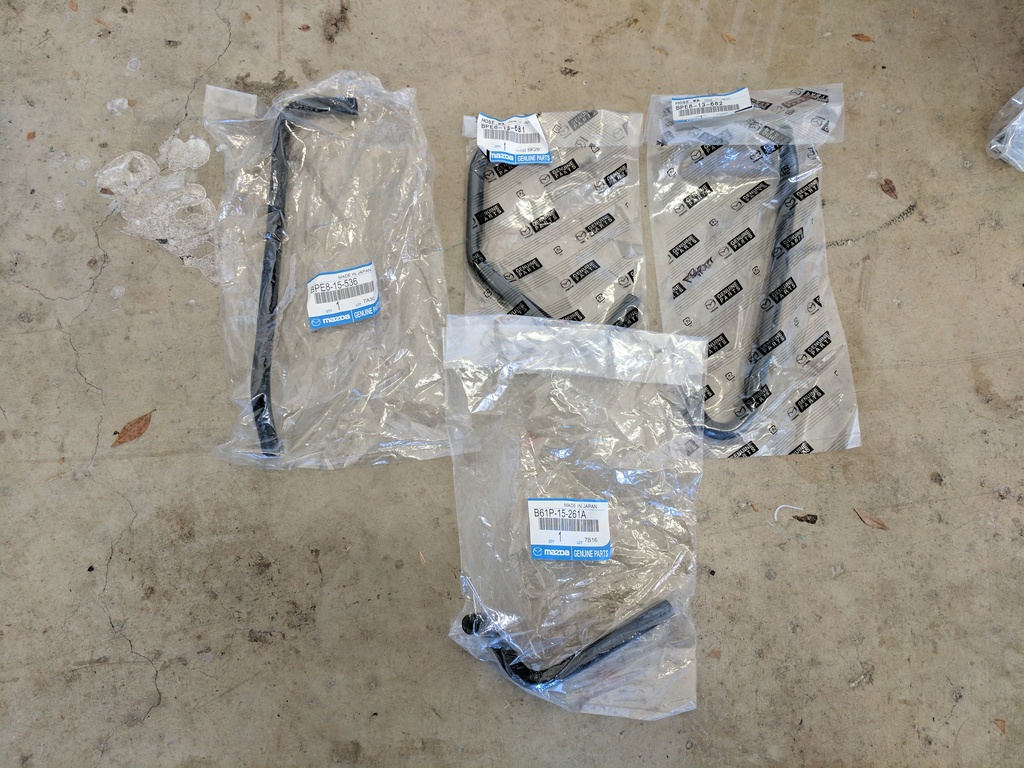
OEM Mazda heater hoses with grommets.
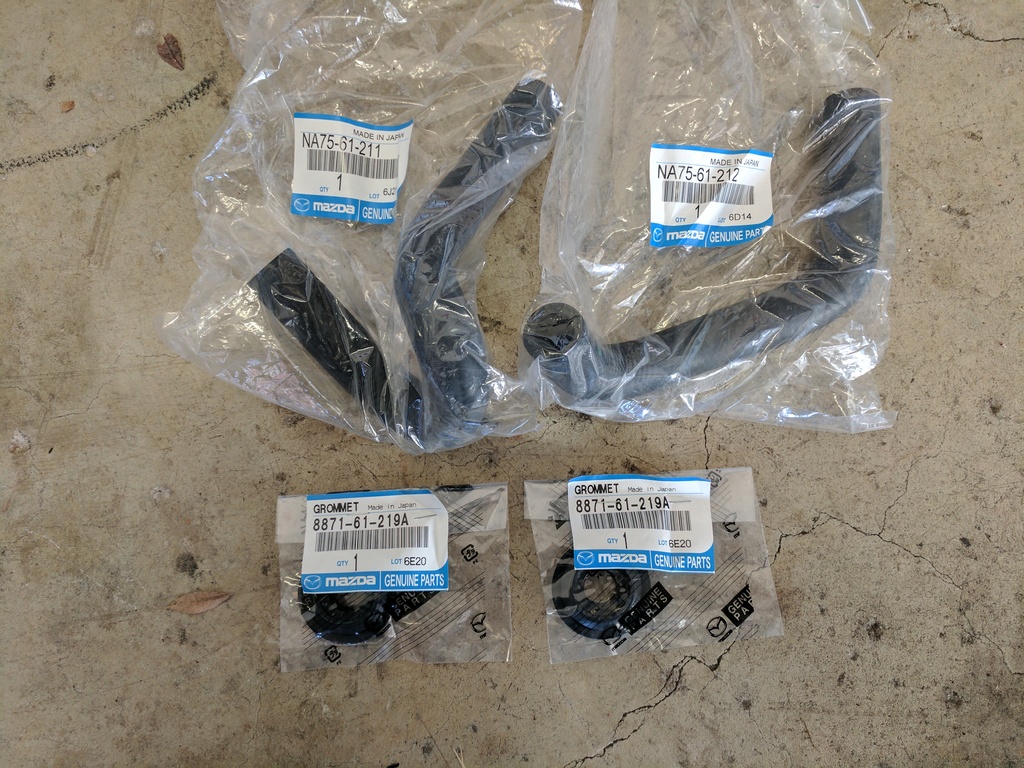
In the bin you go!
Old heater hose grommet VS new heater hose grommet.
 Last edited by stephen8512; 09-07-17, 01:27 AM.
Comment


Comment