Hi all, I am pretty bored and there is has been some interest in DC5 tie rods on the forums lately so I thought i would share my experience with the install and the product.
I obtained some coilovers recently and realised that to run my desired alignment settings I would need shorter tie rods. Due to the significant camber I had at the front of my car I was running out of thread on the stock tie rods before I could even get close to zero toe. This led me to order some J's Racing reinforced tie rods (thanks yonas at JDMyard). Special thanks to Mugsee for all the photos in this post.
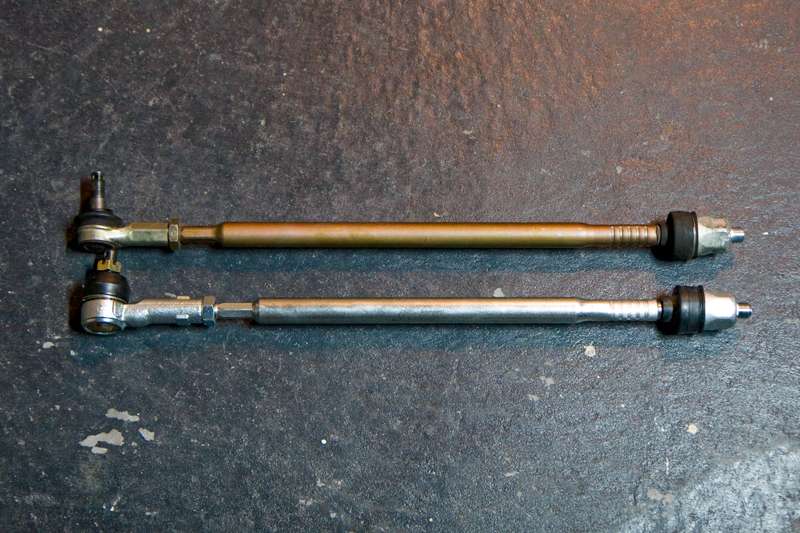
The new shorter tie rods side by side with the stock tie rod:
Install
This is my experience with the install and I ccan take no responsibility for any mischief that anyone gets into attempting it .
.
Stuff I used for the install:
Two different adjustable spanners (10in and 12in)
Two pairs of vice grips ( big and small)
A 1/2 inch drive torque wrench
A tie rod end puller (I bought mine from Burson or something)
A 1/2" drive socket set (only 12 14 and 19mm are used for this install I think)
A Hammer
The install was relatively easy. The general steps are as follows (Sorry I don't have more pics I was trying to get my car back together as quickly as possible):
1. After slightly loosening the front wheel nuts and removing my bulky front strut bar I jacked up the front of the car and placed it on jack stands. I then removed the front wheels. To make access to the tie rods easier I also removed the stock mid brace that runs along the back of the engine bay just below the steering rack and also removed the heat shield that attaches to this brace.
2. I then removed the cotter pins from the tie rod ends and undid and removed the nuts (19mm) from the ends. I then used a tie rod puller to pop the tapered section of the tie rods out of the steering arm.
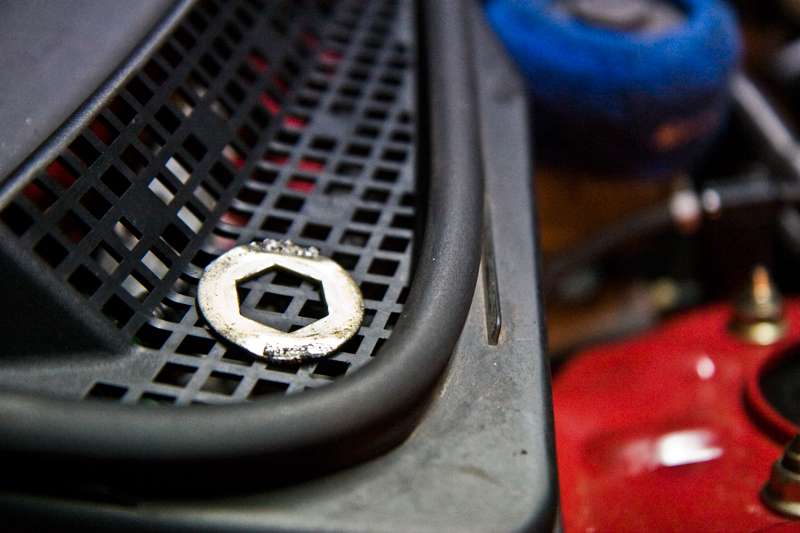
3. The next step I did was to bend back the stock lock washers that are on the steering rack ends of the tie rods. For this task I used a hammer and a screwdriver and some pliers and vice grips and just kept unleashing the fury on them until they were relatively flat. The picture below shows what they look like after they are removed .
.
4. Once the washers are bent back the tie rods can be undone from the steering rack. For this I used a 12" adjustable spanner whilst holding the steering bracket in place with a pair of vice grips. The steering bracket with the tie rods removed is shown below:

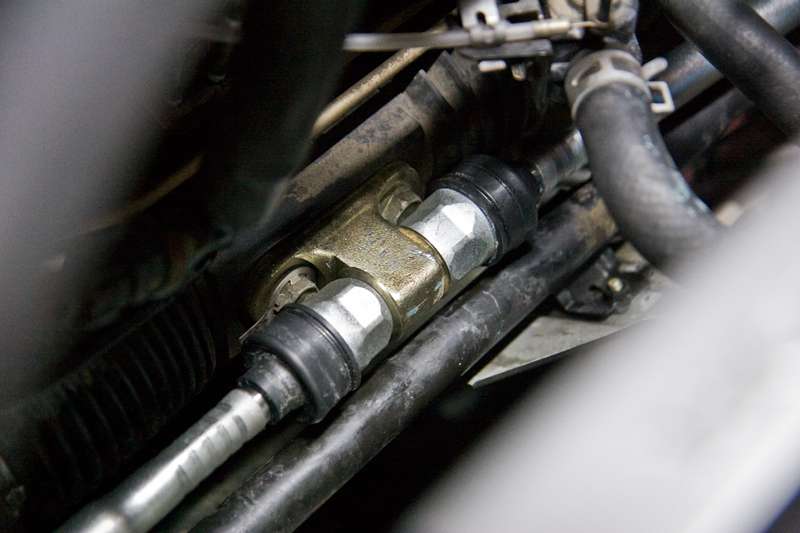
5. Once the stock tie rods were removed install of the j's was reverse of the removal. Be sure to torque the tie rods to the correct 54Nm and install new cotter pins. Also remember to replace the lock washers on the steering bracket end of the tie rod and bend them over fully, I used my jack handle and a hammer. The new tie rods installed but without the tabs on the lock washers bent are pictured below:
6. Once you are finished the it should look something like this, but your tie rod ends may or may not be inverted.

Impressions
Overall I am pretty happy with the tie rods. They were well made, came with all the required hardware and solved my problem. I would recommend them to anyone with a dc5 who wants to run a good amount of camber for track use. I investigated other tie rod ends that were shorter but all of the ones available are designed to be used inverted, which would be no use to me since my suspension forces me to run the tie rods inverted.
Here is what my alignment looked like before it was corrected:

And this is how ghetto your car can look if you choose to be as silly as me:

I obtained some coilovers recently and realised that to run my desired alignment settings I would need shorter tie rods. Due to the significant camber I had at the front of my car I was running out of thread on the stock tie rods before I could even get close to zero toe. This led me to order some J's Racing reinforced tie rods (thanks yonas at JDMyard). Special thanks to Mugsee for all the photos in this post.
The new shorter tie rods side by side with the stock tie rod:
Install
This is my experience with the install and I ccan take no responsibility for any mischief that anyone gets into attempting it
.Stuff I used for the install:
Two different adjustable spanners (10in and 12in)
Two pairs of vice grips ( big and small)
A 1/2 inch drive torque wrench
A tie rod end puller (I bought mine from Burson or something)
A 1/2" drive socket set (only 12 14 and 19mm are used for this install I think)
A Hammer
The install was relatively easy. The general steps are as follows (Sorry I don't have more pics I was trying to get my car back together as quickly as possible):
1. After slightly loosening the front wheel nuts and removing my bulky front strut bar I jacked up the front of the car and placed it on jack stands. I then removed the front wheels. To make access to the tie rods easier I also removed the stock mid brace that runs along the back of the engine bay just below the steering rack and also removed the heat shield that attaches to this brace.
2. I then removed the cotter pins from the tie rod ends and undid and removed the nuts (19mm) from the ends. I then used a tie rod puller to pop the tapered section of the tie rods out of the steering arm.
3. The next step I did was to bend back the stock lock washers that are on the steering rack ends of the tie rods. For this task I used a hammer and a screwdriver and some pliers and vice grips and just kept unleashing the fury on them until they were relatively flat. The picture below shows what they look like after they are removed
.4. Once the washers are bent back the tie rods can be undone from the steering rack. For this I used a 12" adjustable spanner whilst holding the steering bracket in place with a pair of vice grips. The steering bracket with the tie rods removed is shown below:
5. Once the stock tie rods were removed install of the j's was reverse of the removal. Be sure to torque the tie rods to the correct 54Nm and install new cotter pins. Also remember to replace the lock washers on the steering bracket end of the tie rod and bend them over fully, I used my jack handle and a hammer
. The new tie rods installed but without the tabs on the lock washers bent are pictured below:6. Once you are finished the it should look something like this, but your tie rod ends may or may not be inverted.
Impressions
Overall I am pretty happy with the tie rods. They were well made, came with all the required hardware and solved my problem. I would recommend them to anyone with a dc5 who wants to run a good amount of camber for track use. I investigated other tie rod ends that were shorter but all of the ones available are designed to be used inverted, which would be no use to me since my suspension forces me to run the tie rods inverted.
Here is what my alignment looked like before it was corrected:
And this is how ghetto your car can look if you choose to be as silly as me:
 . At least the DIY is the same
  .
.


 ヒール&トウのやりかた
 Mugsee is kidding about accidents causing my camber :P. My camber has always been slightly uneven across the car even before some crazy lady ran a red and ploughed into the front left of my car.
Comment